

A few weeks ago, as the work week wound down, I realized that it had been a while since I had 3D-printed anything and even longer since I had designed anything. Immediately, I let my intrusive thoughts win, setting aside whatever I was planning to work on, and I started looking around my office for a problem to solve with my 3D-printer.
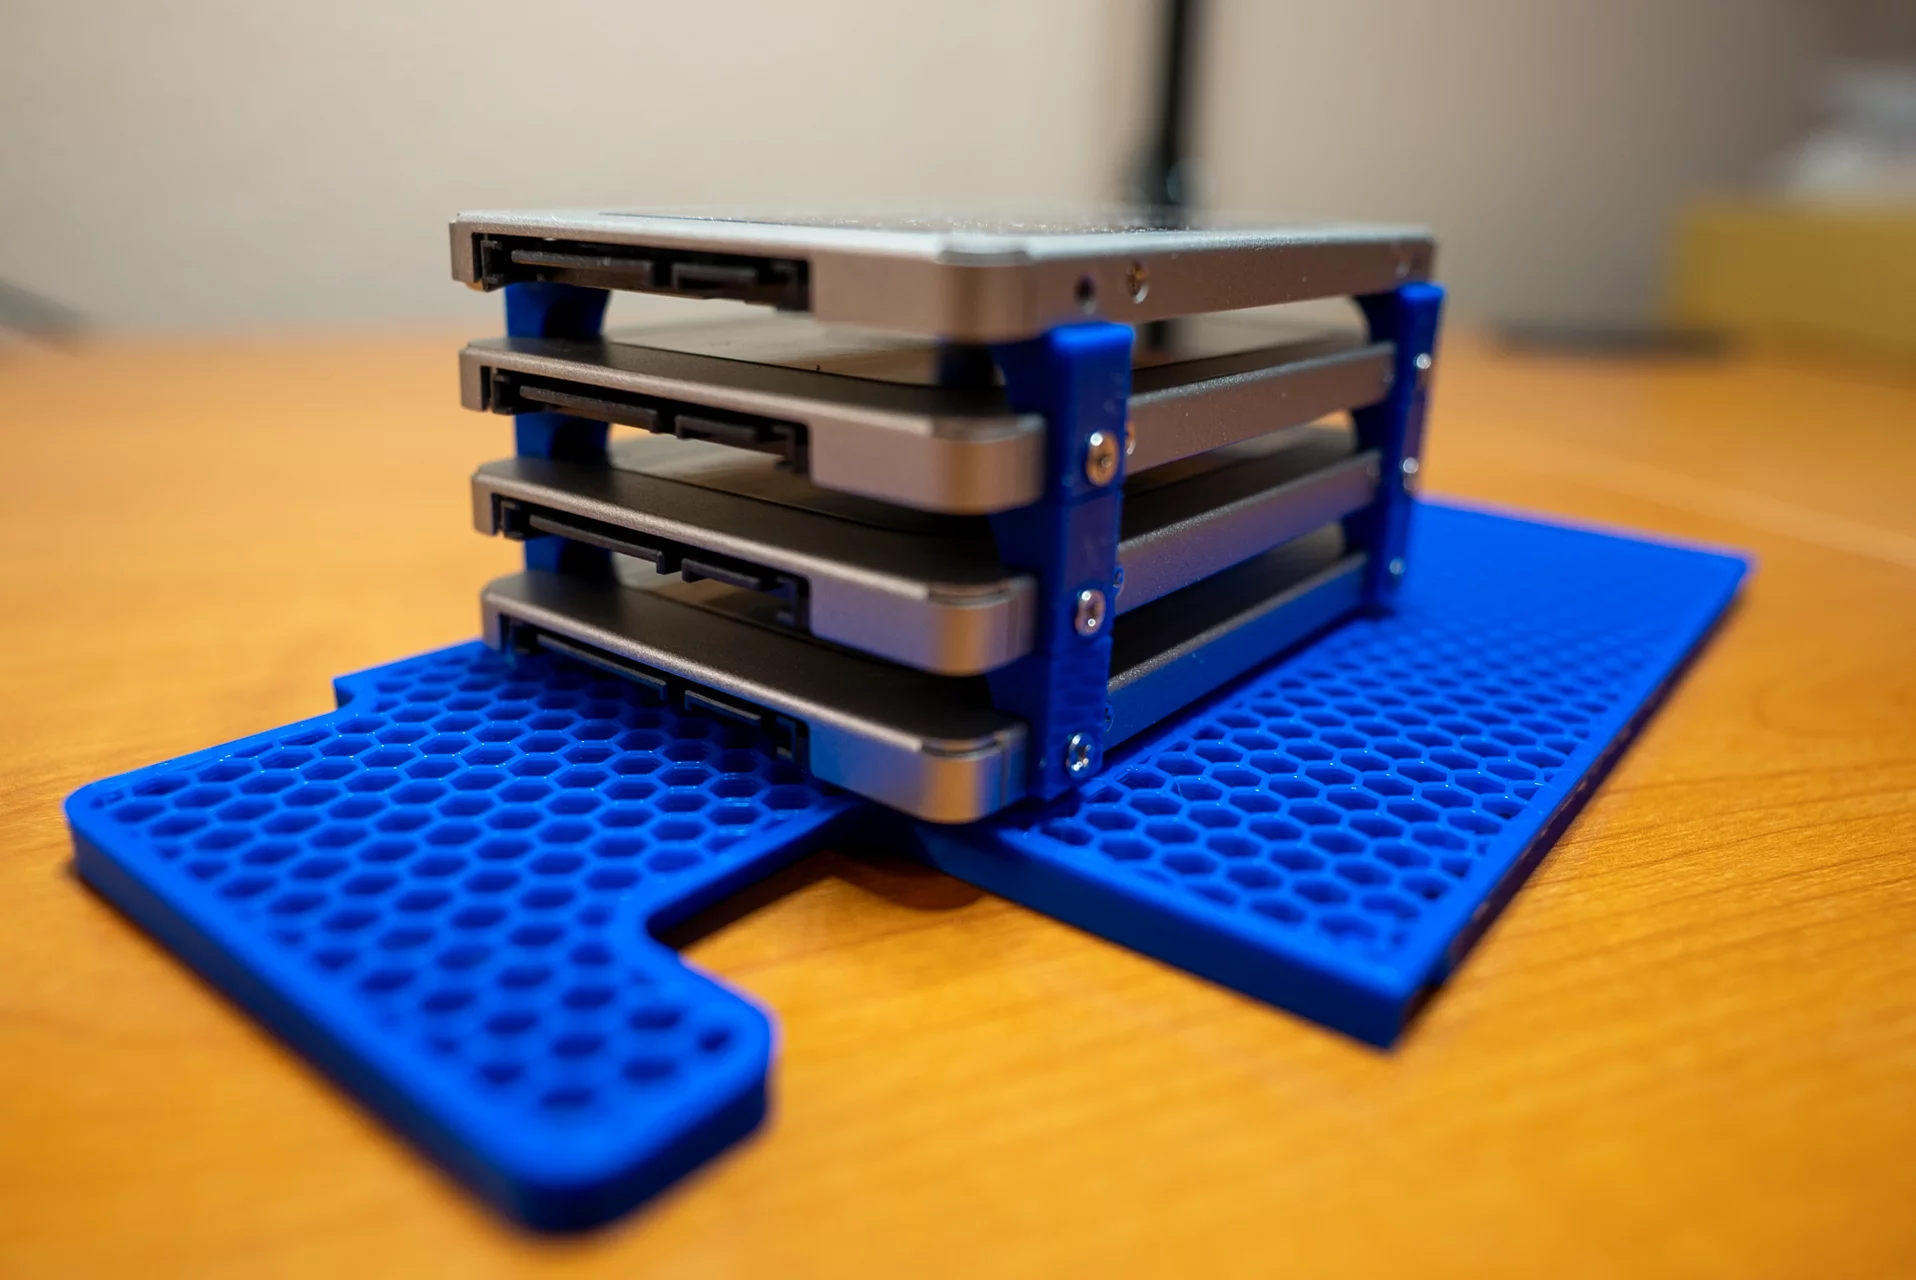
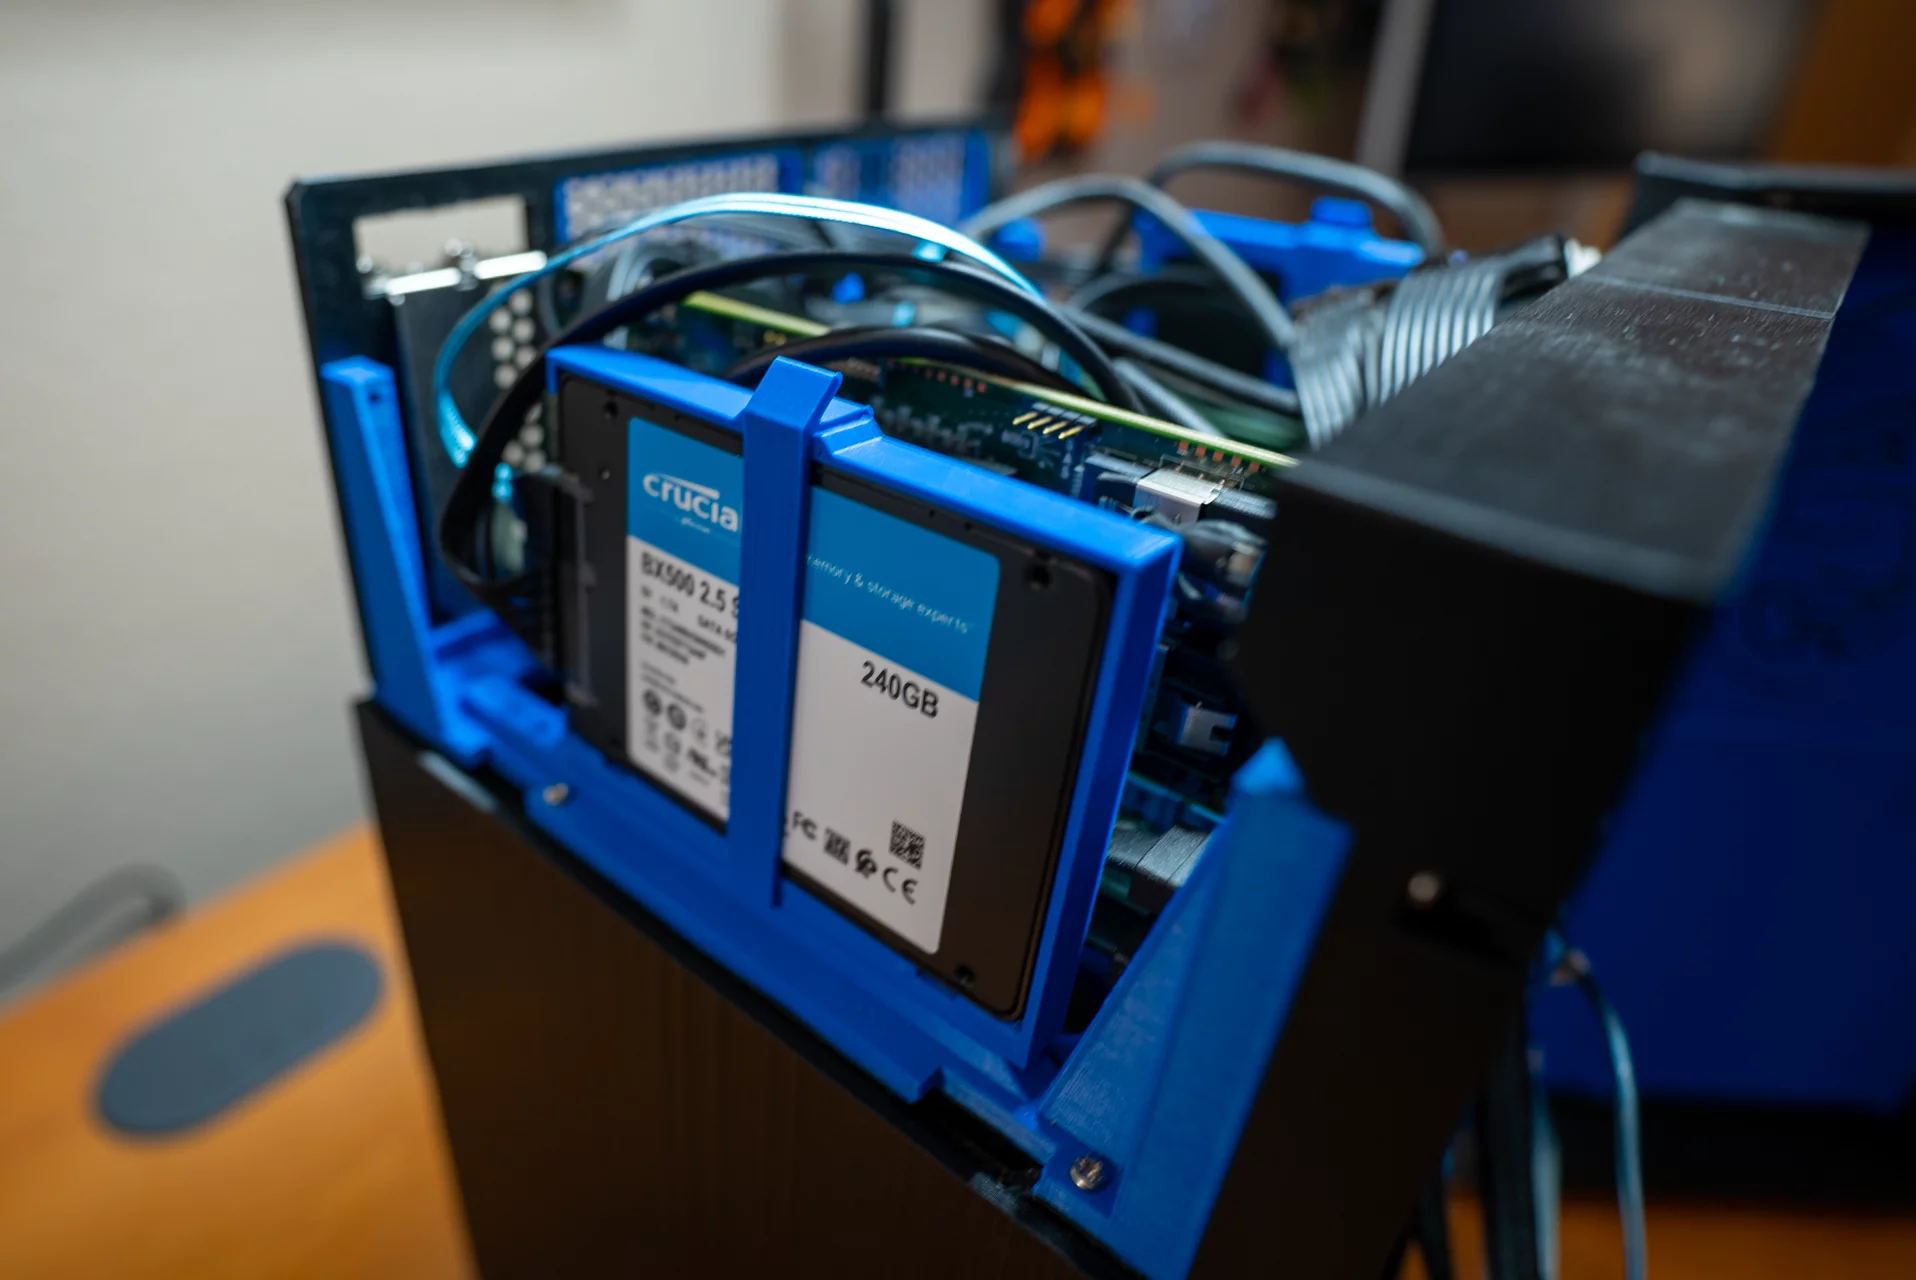
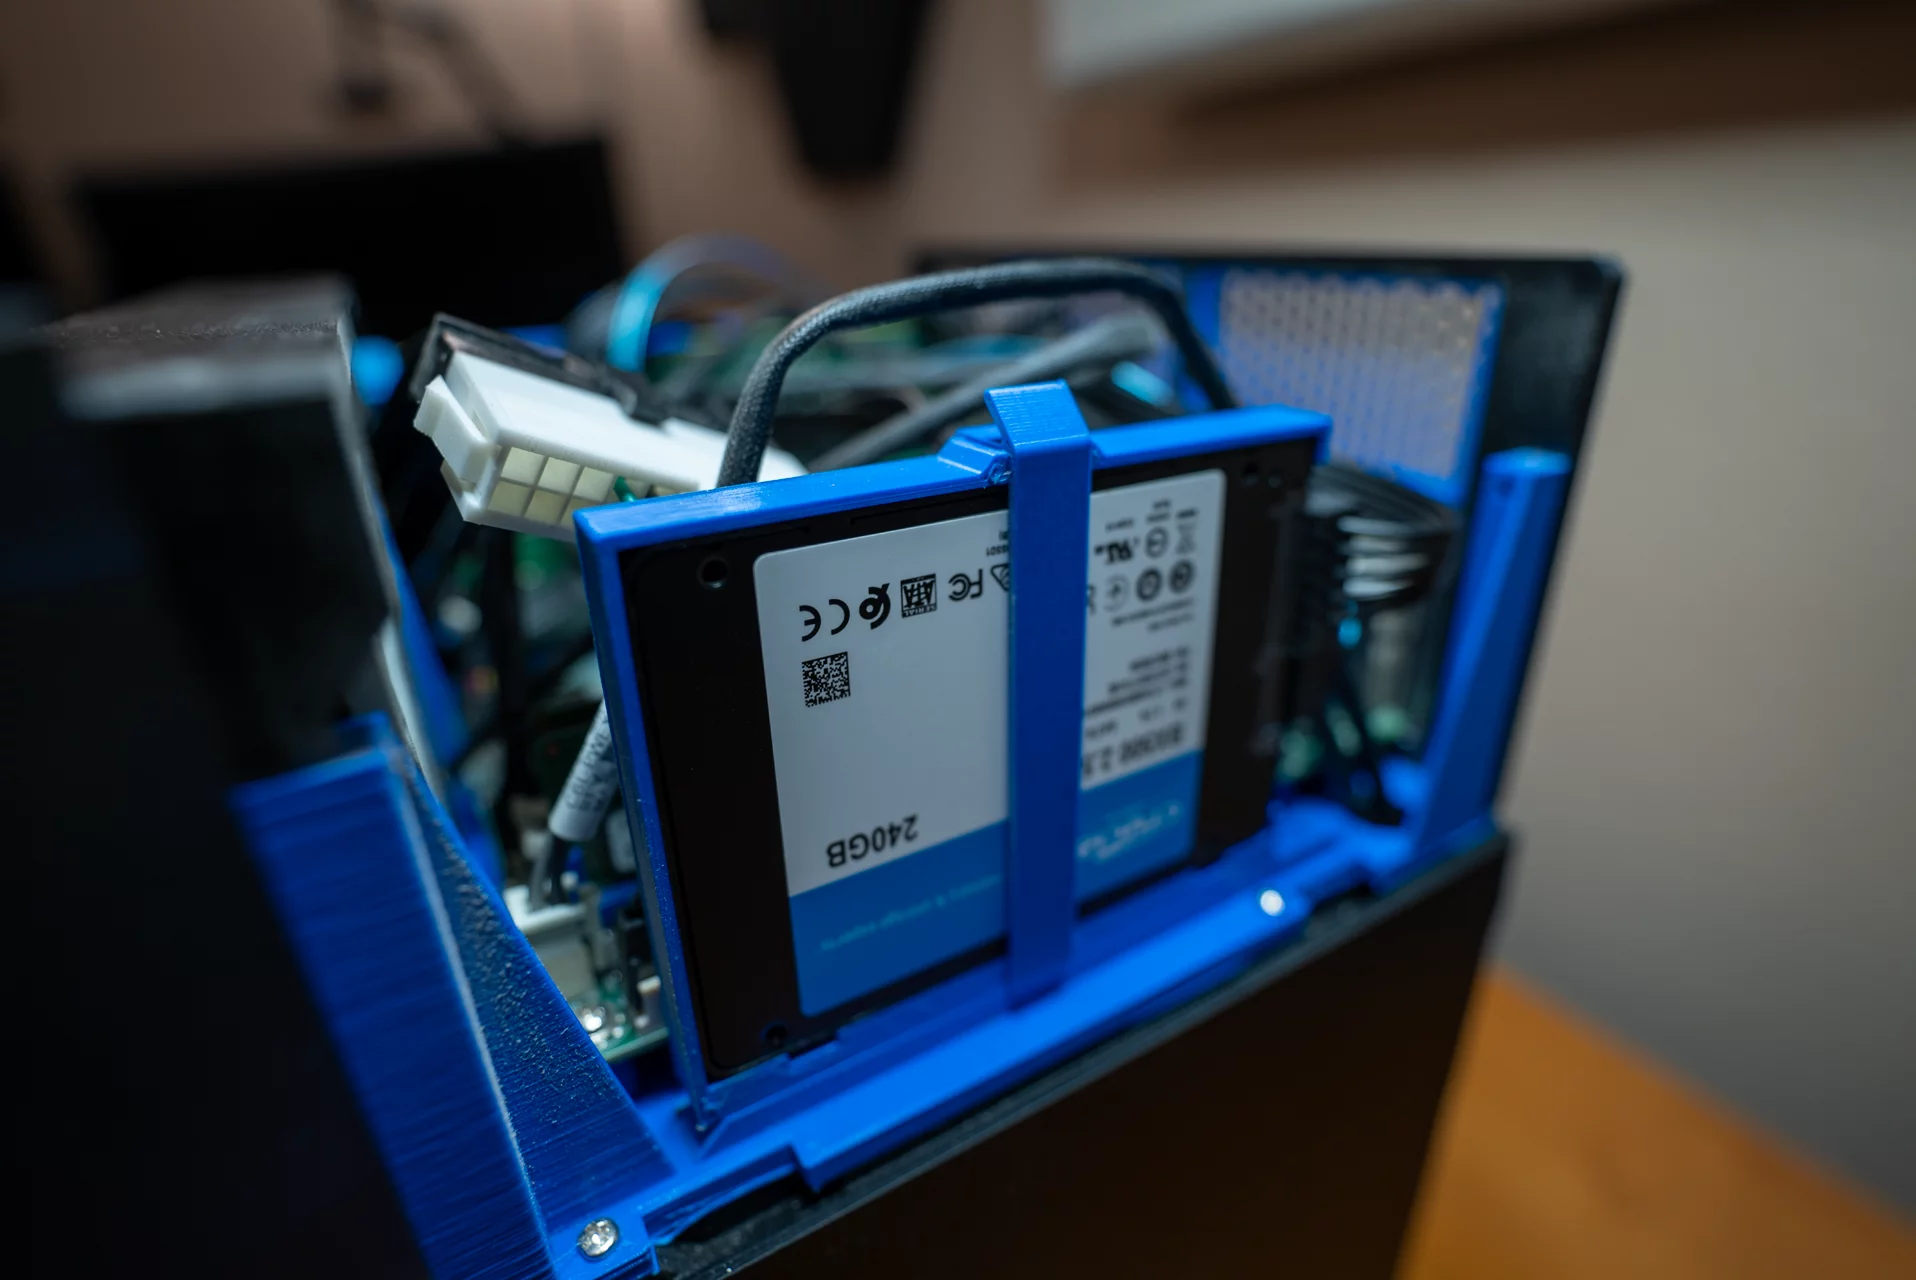
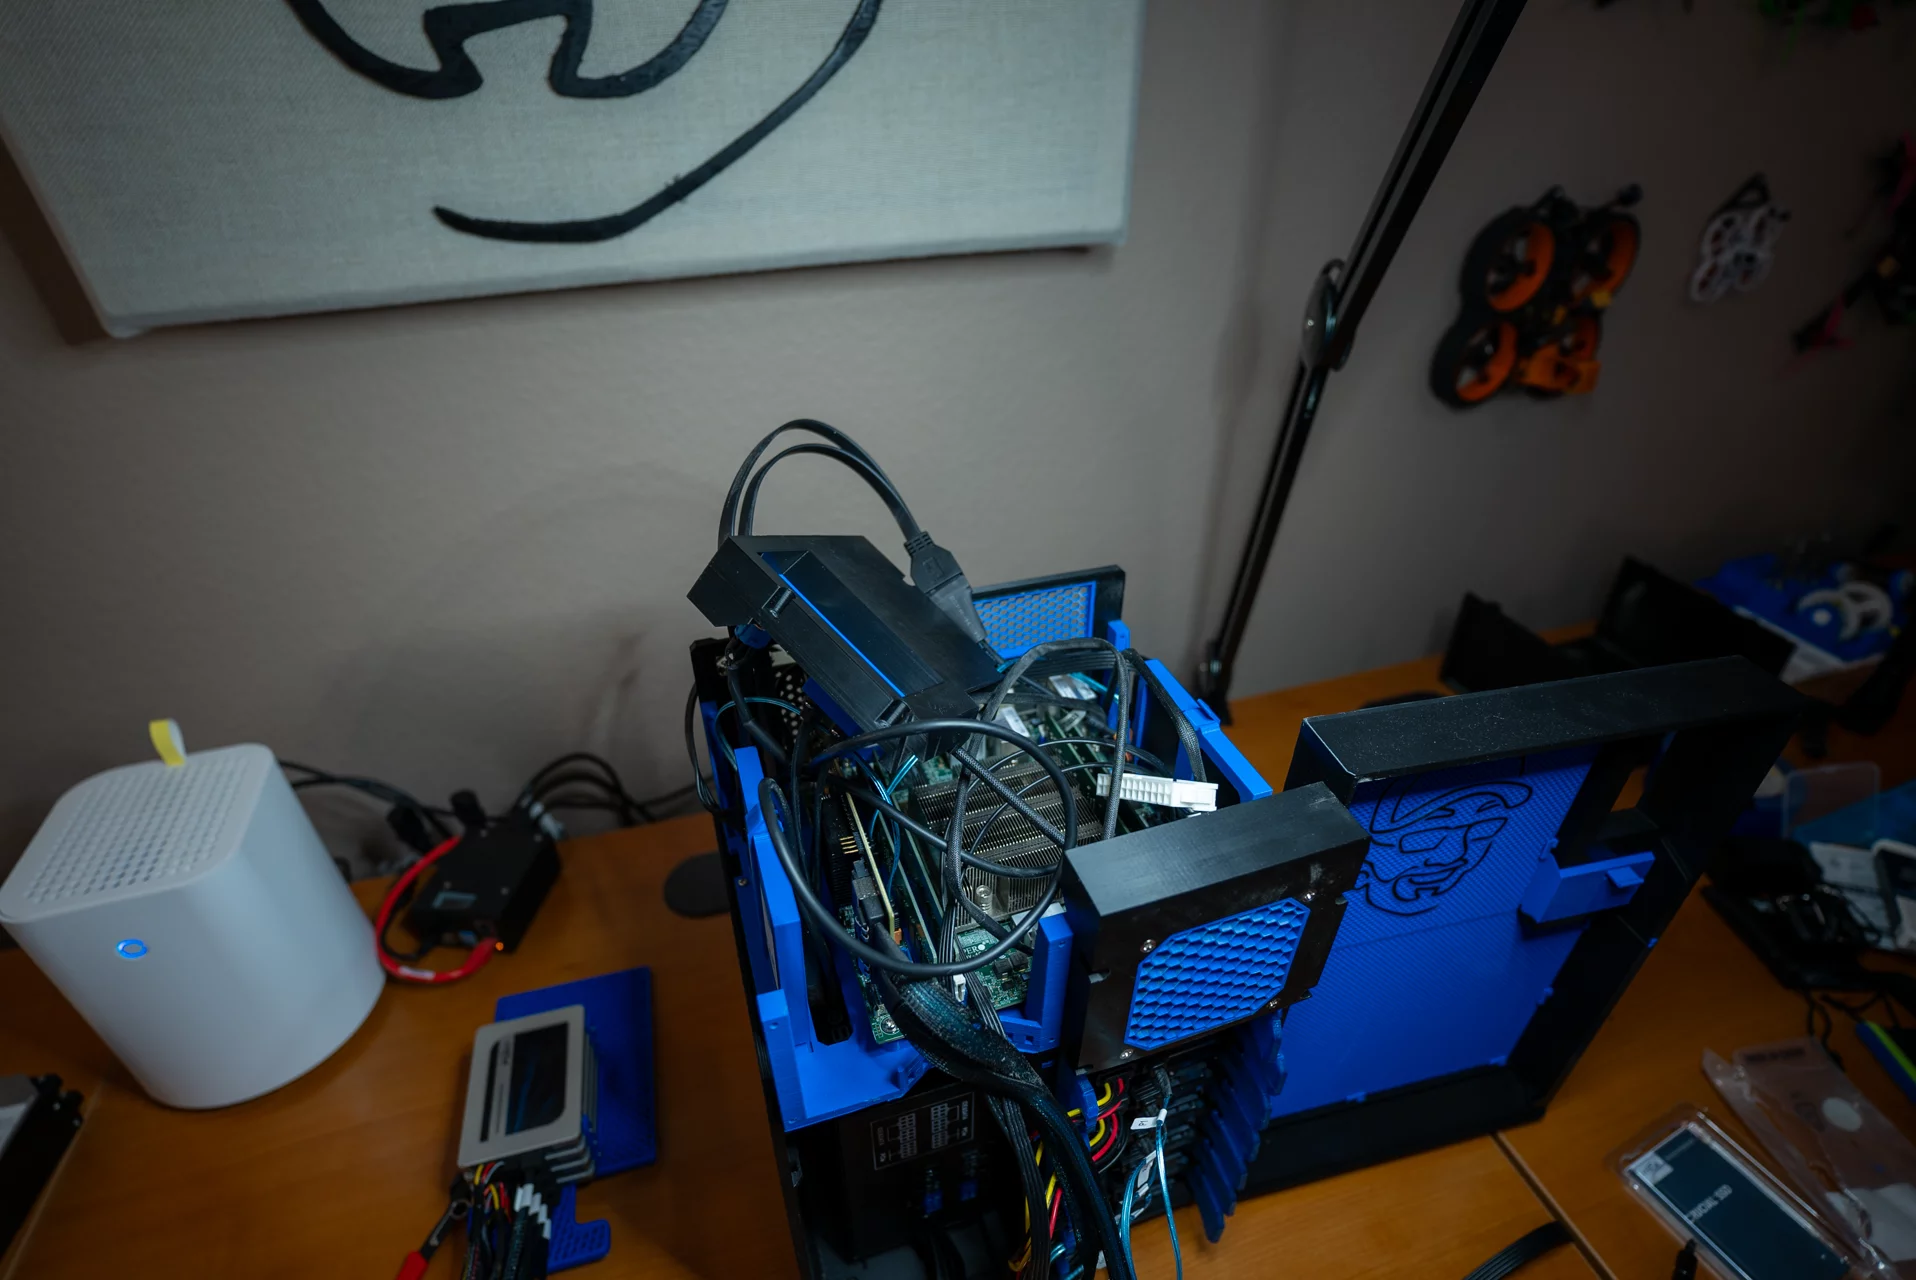
Behind me, the door was open on my 3D-printed do-it-yourself NAS server, and it captured my attention. Above the power supply of the 3D-printed NAS case, the MK735, is a small cavity with a shelf on it. Over the years, that shelf has gone largely unused. Finding a way to stash some more storage in there seemed like an excellent opportunity.
I mused out loud, “I wonder how many 2.5” SATA SSDs I could squeeze on that shelf?” I grabbed my calipers, opened up OpenSCAD, and deduced that I could squeeze up to four more SATA SSDs in that empty space. With at least 6–7 unused SATA ports in my NAS, it sure seemed like I should be able to put this space to good use!

But why would I want to squeeze 4 more SATA SSDs into my NAS? My primary pool is at about 50% capacity, and in recent years, I have not been accumulating data at a rate which would suggest that I needed more capacity any time soon.
- Ending an unsupported TrueNAS SCALE configuration. When I first set this machine up, I partitioned two 1TB SSDs, slicing off a tiny partition for the boot pool. The remaining space was partitioned and then used as storage for my apps and virtual machines. I’ve been using TrueNAS SCALE since its first beta, and I’ve never had an issue with this arrangement. But this configuration has me worried each time I perform an upgrade of TrueNAS SCALE.
- Flash storage had been getting to a tempting price point. The first hard drives I bought for my DIY NAS were 2TB, and I’ve been noticing that 2–4TB SATA SSDs are selling for less than I spent on 2–4TB HDDs about ten years ago.
- Because I could and it seemed like a fun project! Finding a way to squeeze 4 more drives (a total of 13!) into my DIY NAS seemed like a perfect little project to do and write a blog about, even if it wasn’t especially practical.
Turning the MK735’s empty shelf into a drive caddy
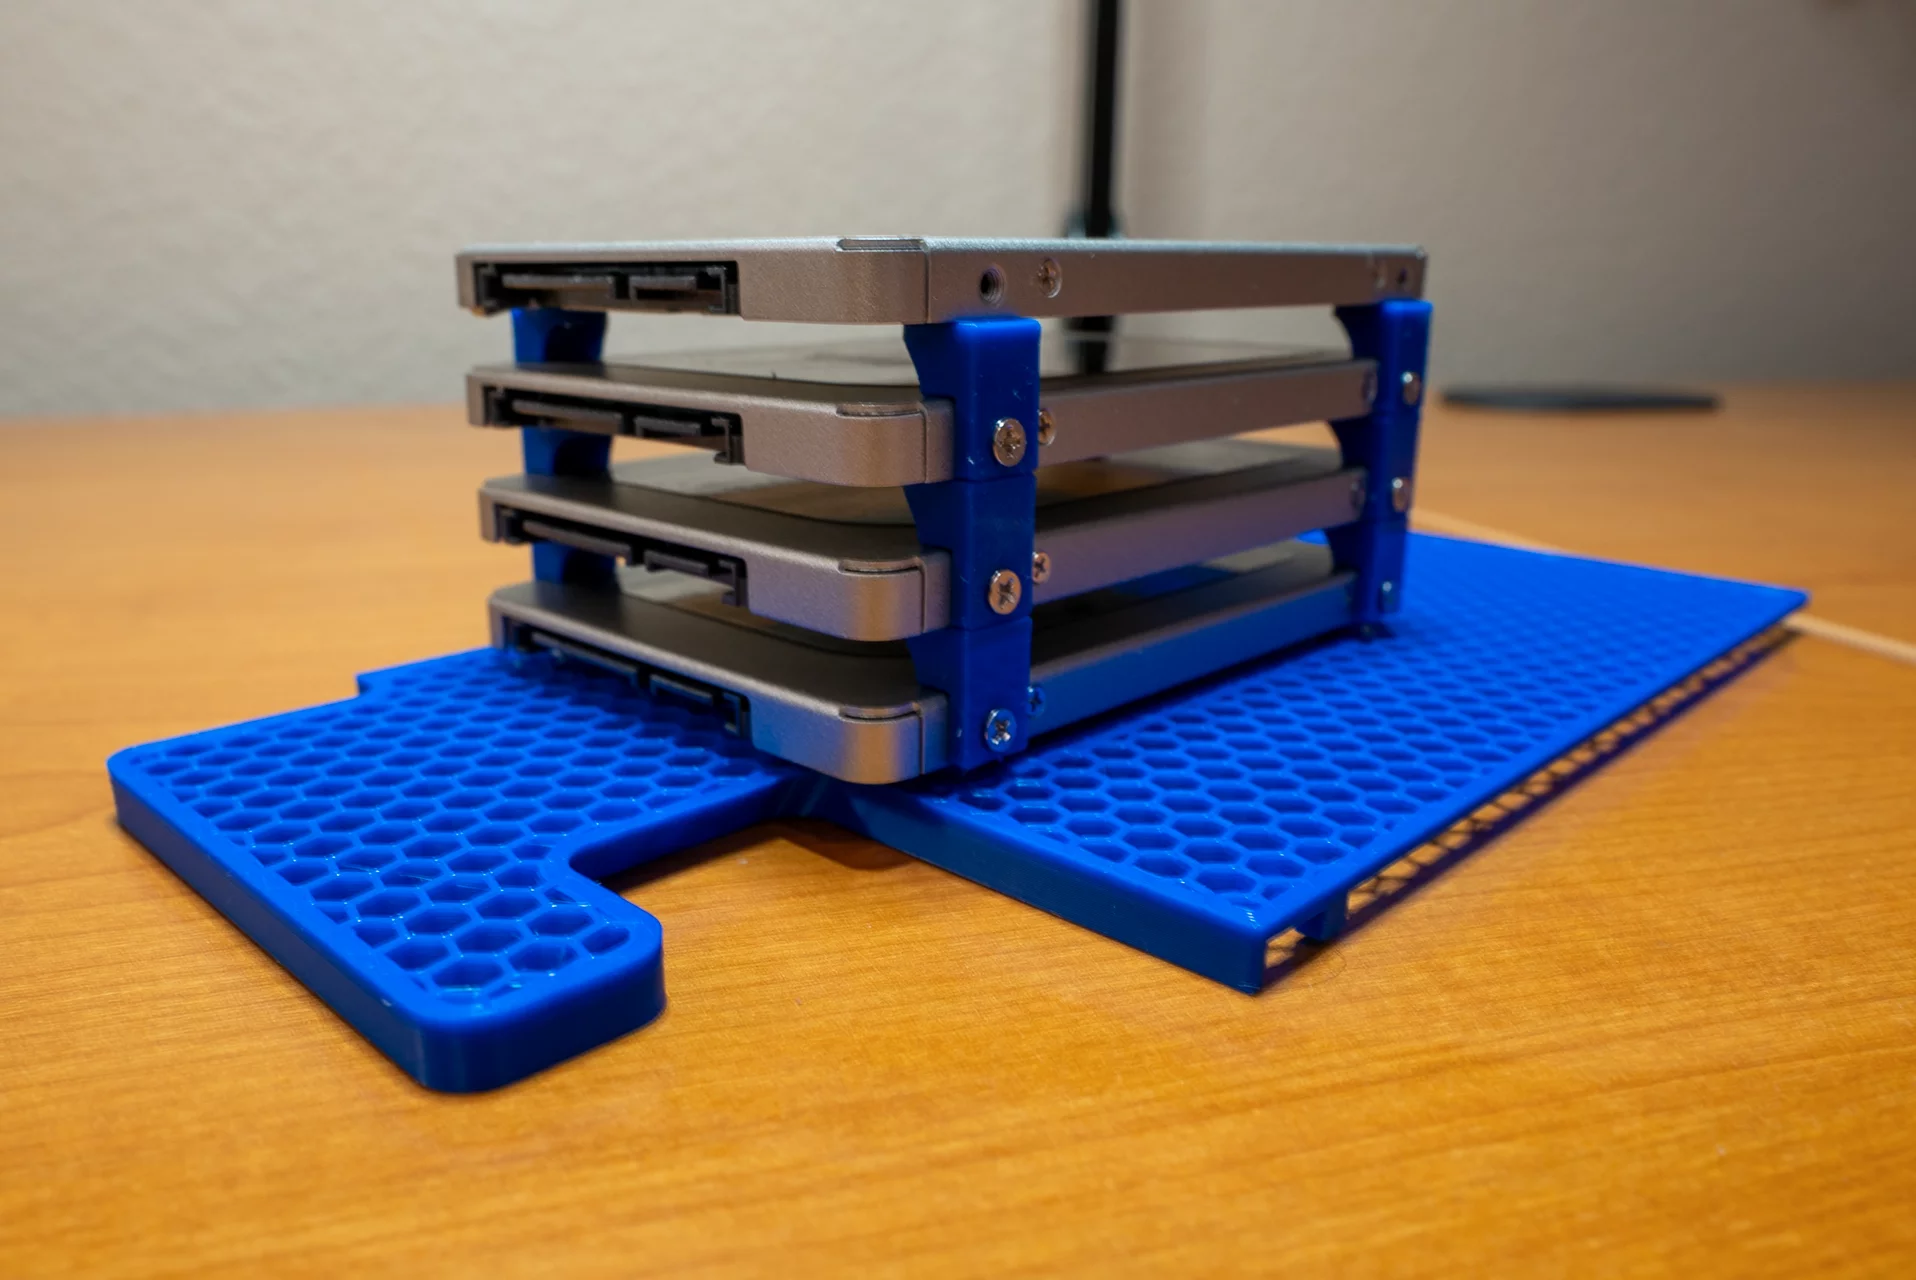
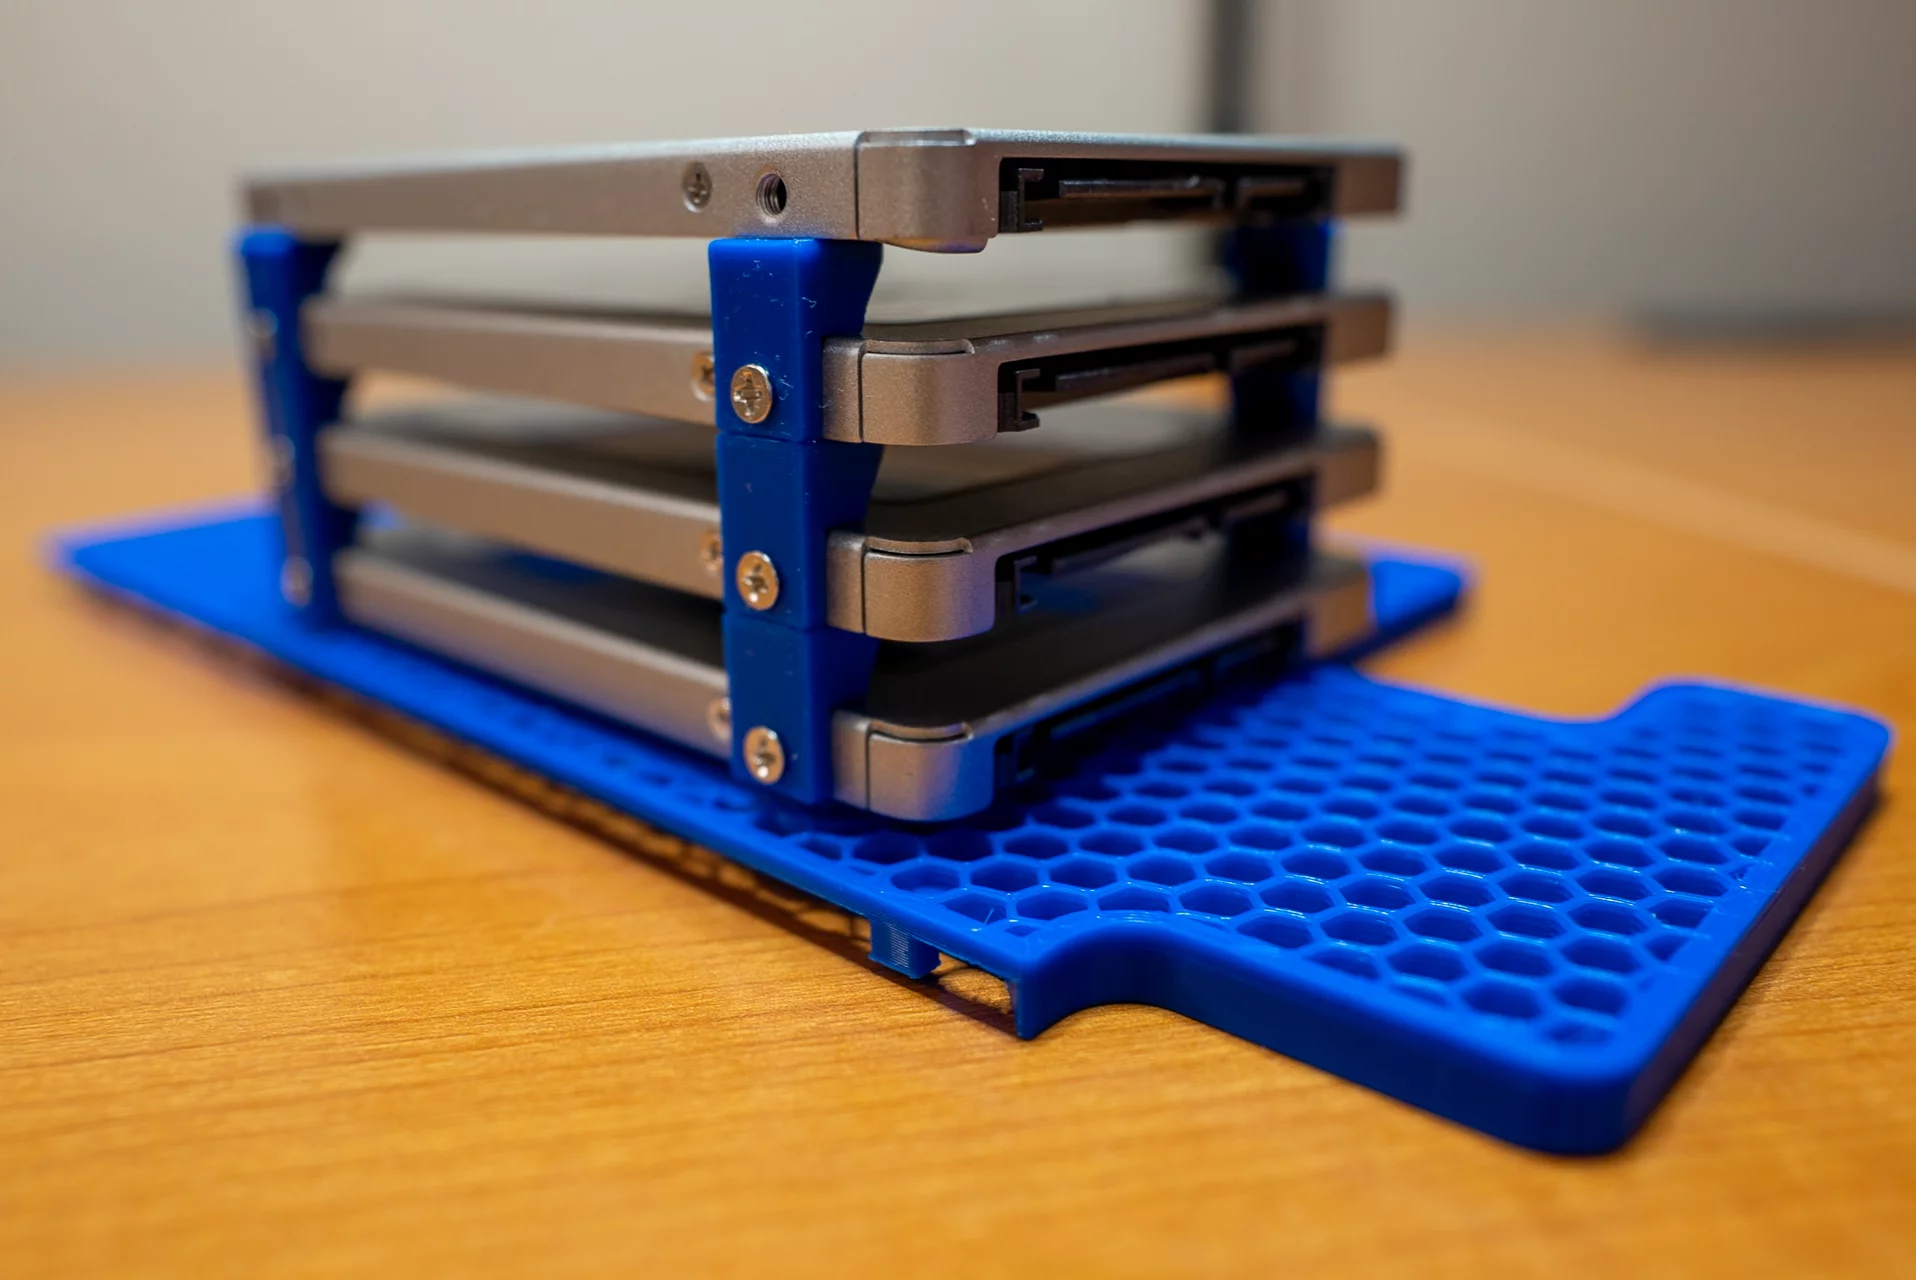
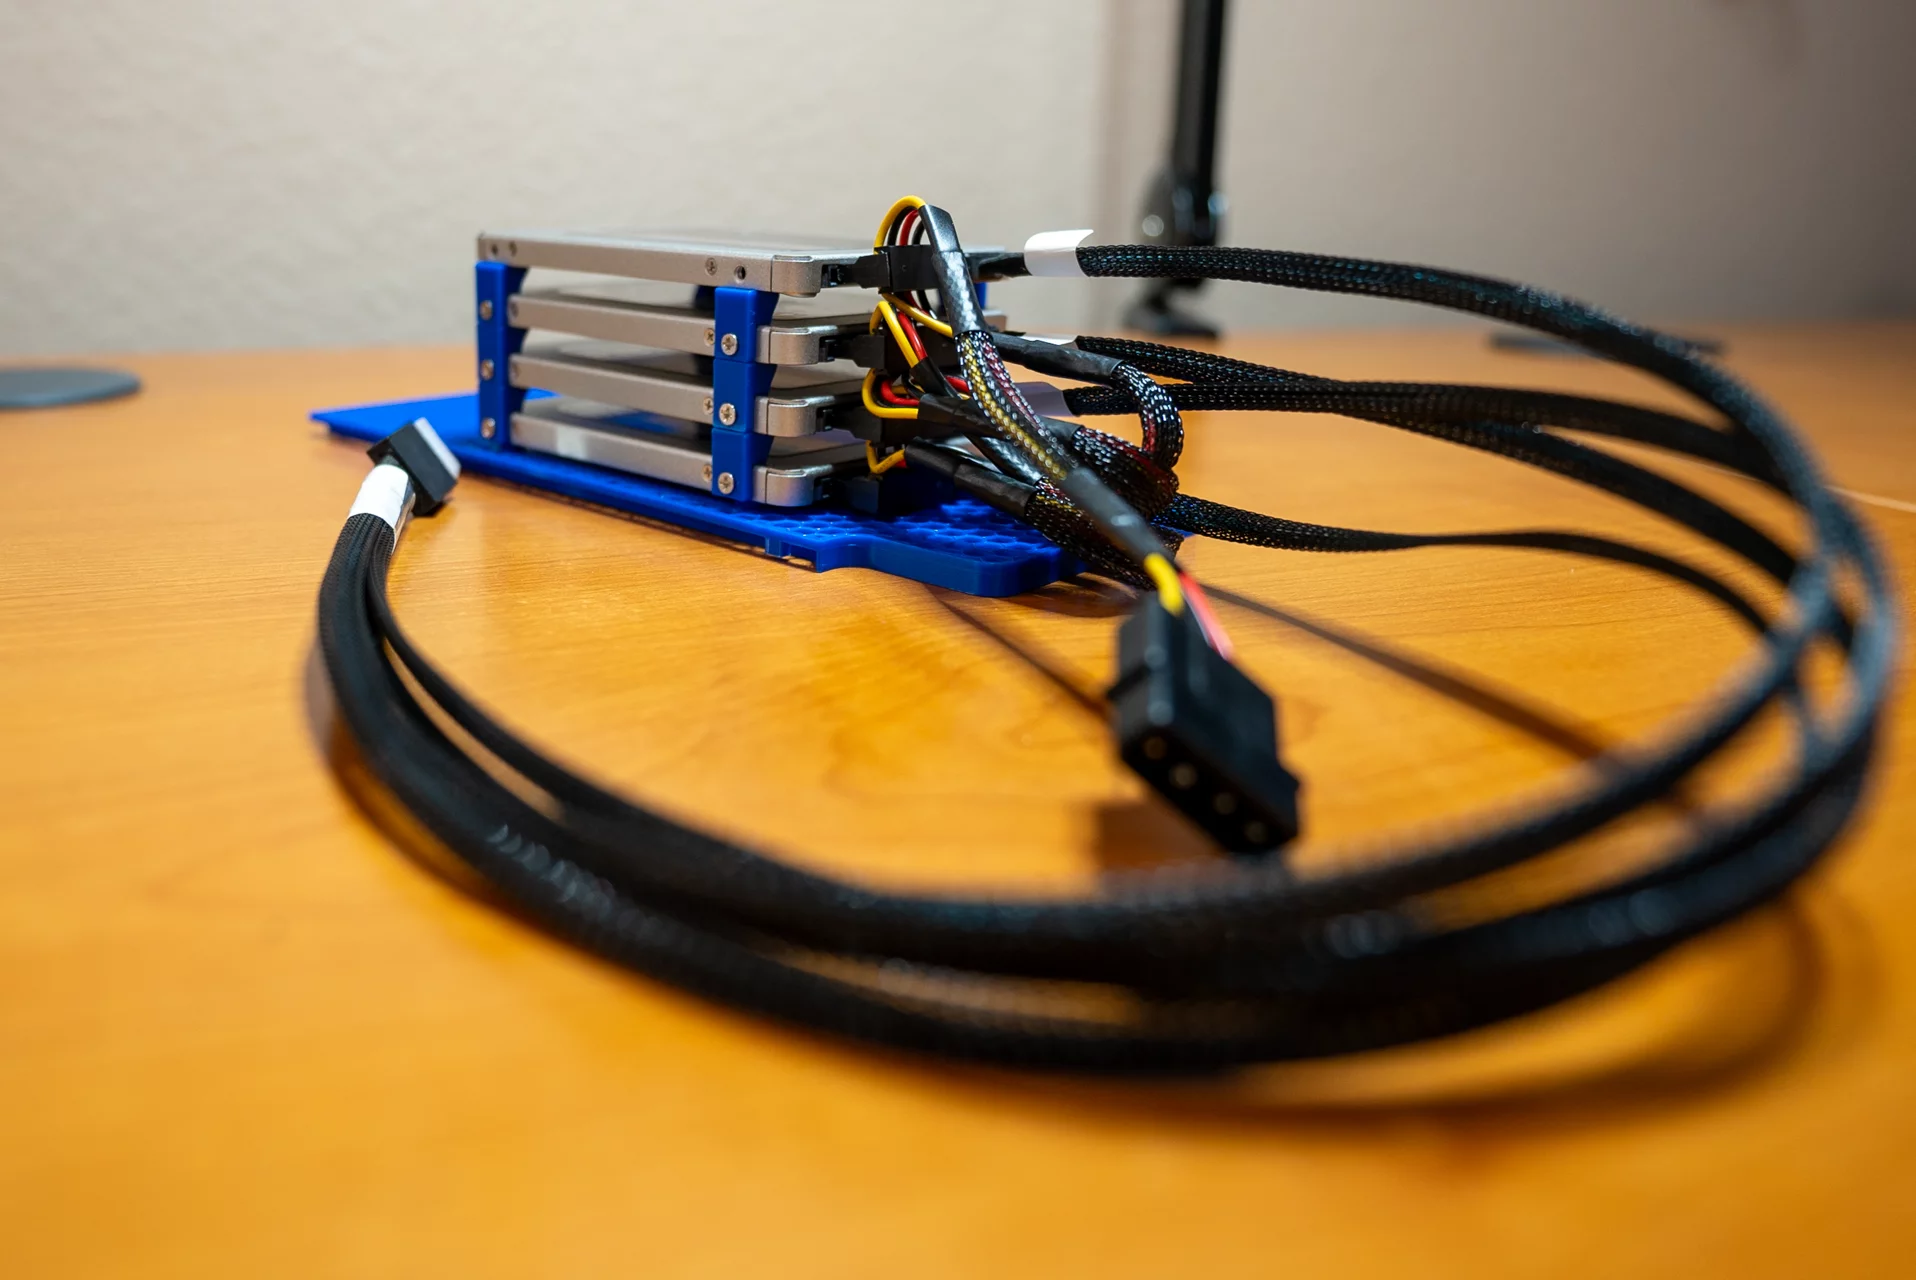
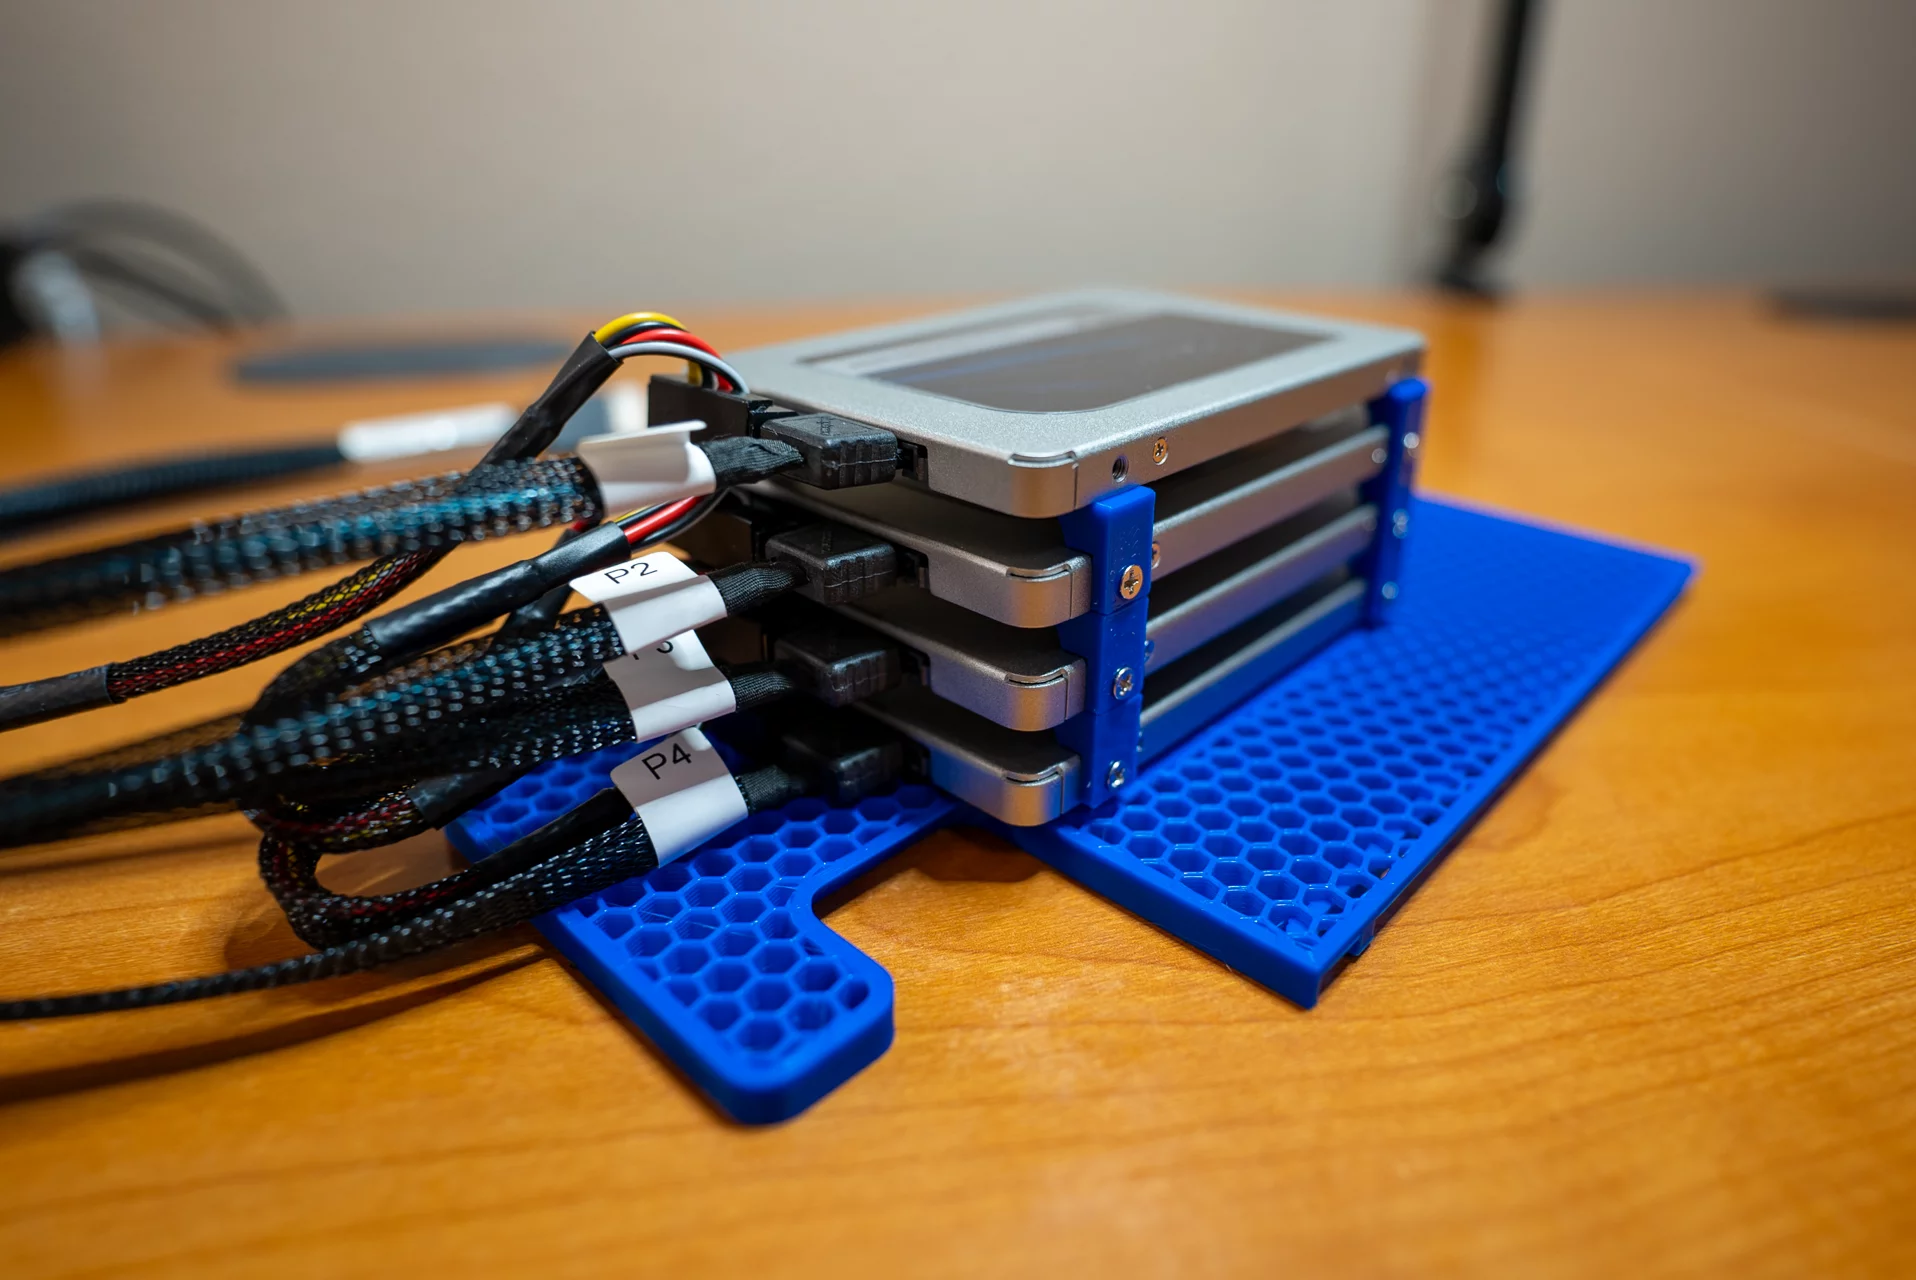
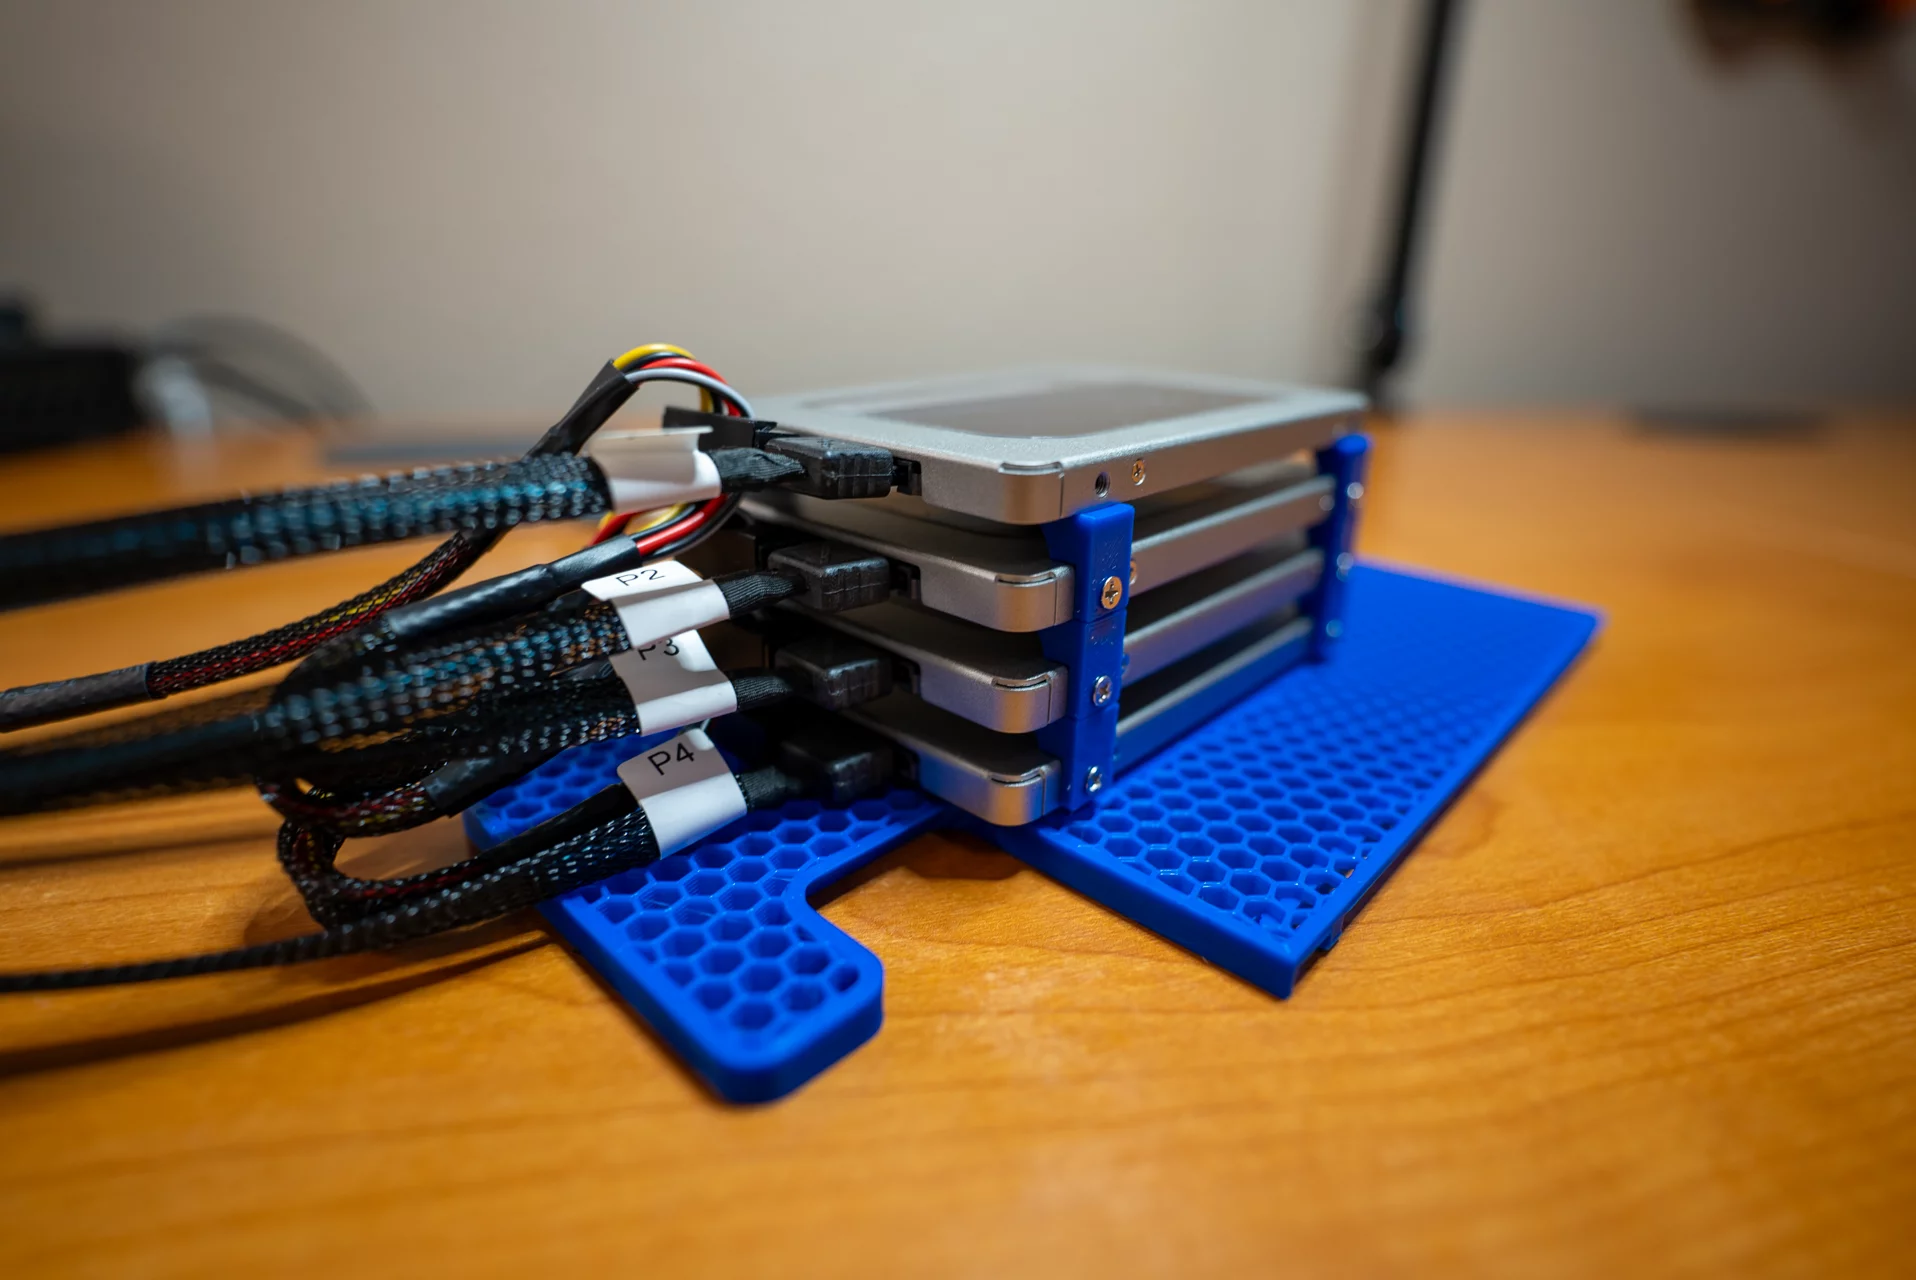
Instead of diving headfirst into obsessively 3D-designing a modified version of the MK735’s power supply shelf, I first started searching around for models which attempted to solve this same problem. These models would either serve as inspiration or maybe even get repurposed in my own design! After about half a dozen different searches, I found these SSD Stackers on Printables.com and immediately knew they were perfect! With enough 2.5” drive screws, you can create a custom-sized stack of 2.5” drives. These SSD stackers are fantastic!
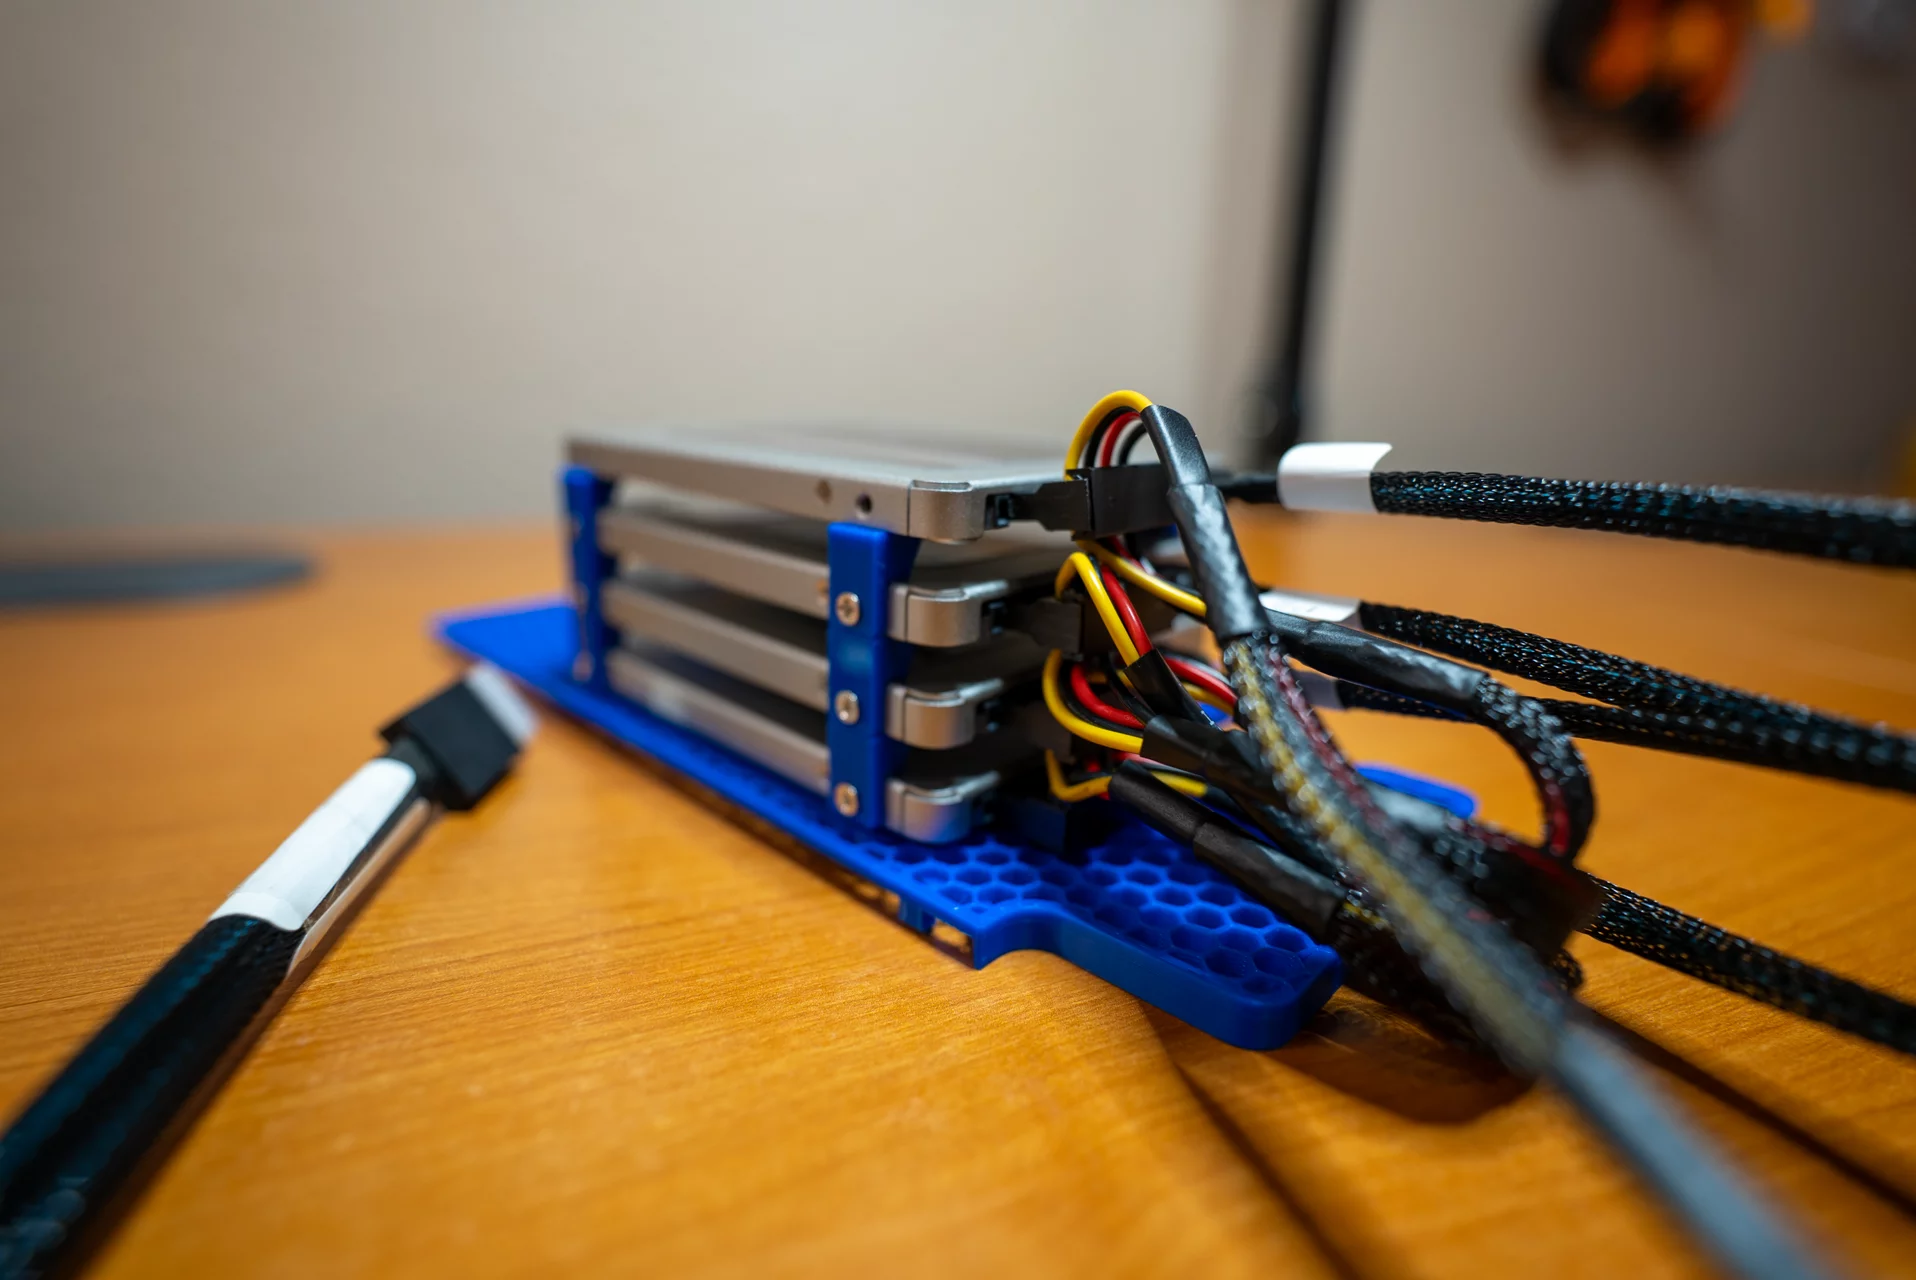
I decided that I would use the SSD stackers to attach all four of the SATA SSDs to each other and then I’d put some screw holes in the shelf to screw up into the drive on the bottom of that stack. The biggest challenge in this was that the honeycomb design of the shelf is achieved by telling your slicer to put no layers on the top or bottom of the object. I needed those solid layers in order to put some recessed screw holes into the shelf itself. I wound up designing a second model that sat atop the shelf to give the screw holes some reinforcement and to raise the bottom drive up off the shelf a bit.

Altogether, it took two iterations to get this into a usable state. On the first iteration, I had some issues getting the shelf placed inside the case, and I felt like all of the drive cables were too far forward and contributing to the cable mess inside my DIY NAS.

Hardware should’ve been the easy part–but it wasn’t!
My motherboard, a Supermicro X11SDV-4C-TLN2F-O, has a total of 8 SATA ports: 4 by the way of the onboard SATA ports and an additional 4 via its OCuLink port. Two of the SATA ports were empty, and I had never used the OCuLink port for anything, but had an OCuLink to 4x SATA cable from when I originally bought all the parts for my NAS. So quite confidently, I ordered the only hardware that I thought I’d need:
- A bunch of 2.5-inch hard drive screws for the 3D-printed SSD stackers
- 2x Crucial BX500 240GB SATA SSDs for the TrueNAS SCALE boot mirror.
- 2x Crucial MX500 1TB SATA SSDs to go along with the pre-existing 1TB SATA SSDs for a raidz1 pool of user storage.
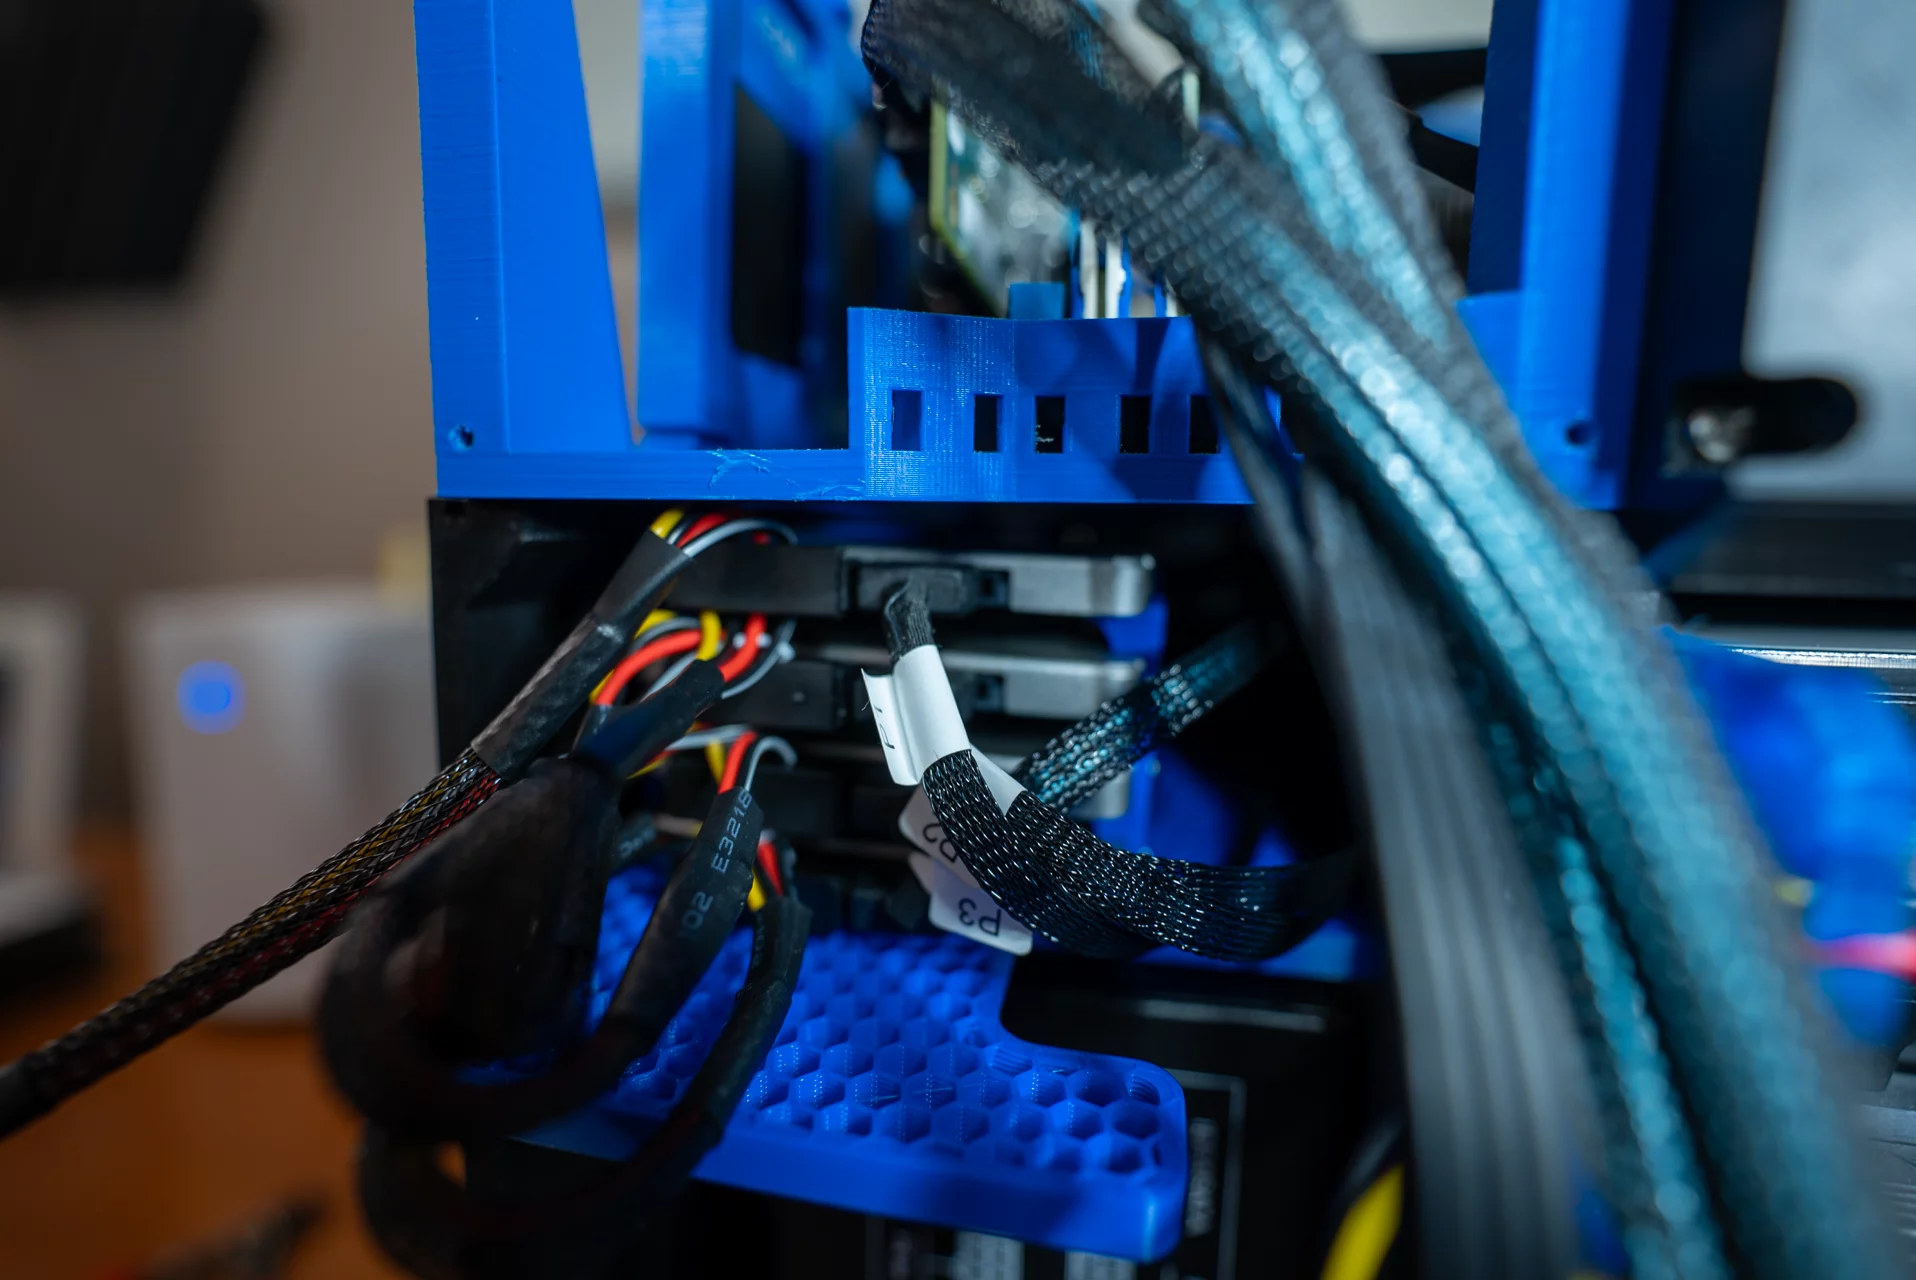
Then I ran into the first problem! I set the jumper on the motherboard to switch the OCuLink port to SATA and plugged all of the 1TB SATA SSDs into the motherboard’s OCuLink port via an OCuLink to 4x SATA cable. But for some reason, it wasn’t detecting any drives. Out of curiosity, I removed my 8-port HBA and even bought an Icy Dock M.2 NVMe SSD to U.2 2.5” SSD adapter, used it with an NVMe SSD, and a OCuLink to U.2 cable but with the same exact result. For some reason, my motherboard’s OCuLink port simply wouldn’t detect any kind of drive I plugged in to.
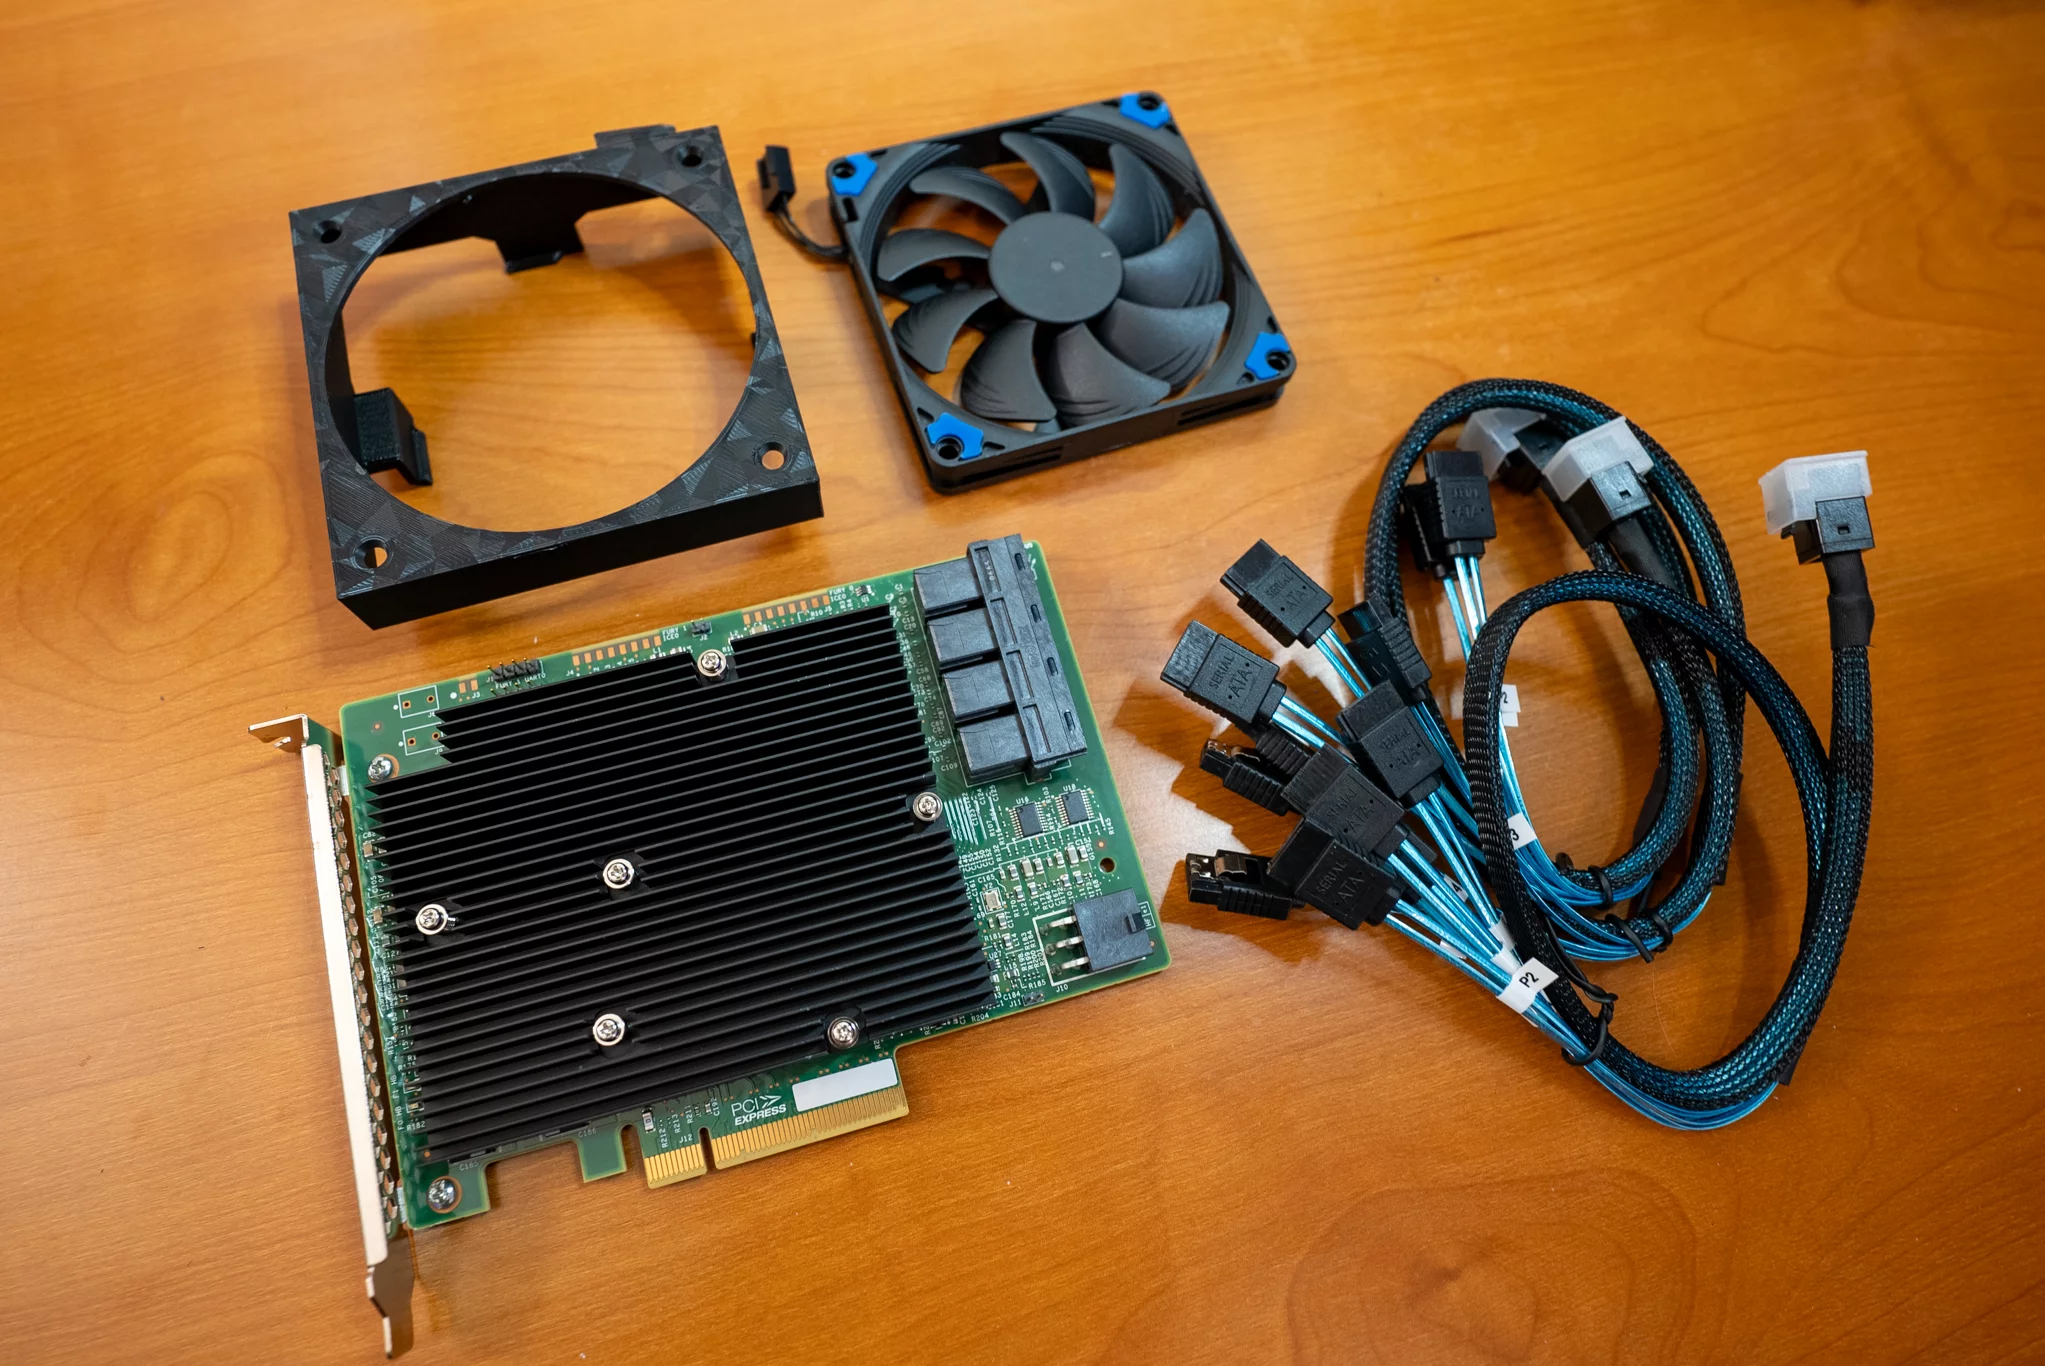
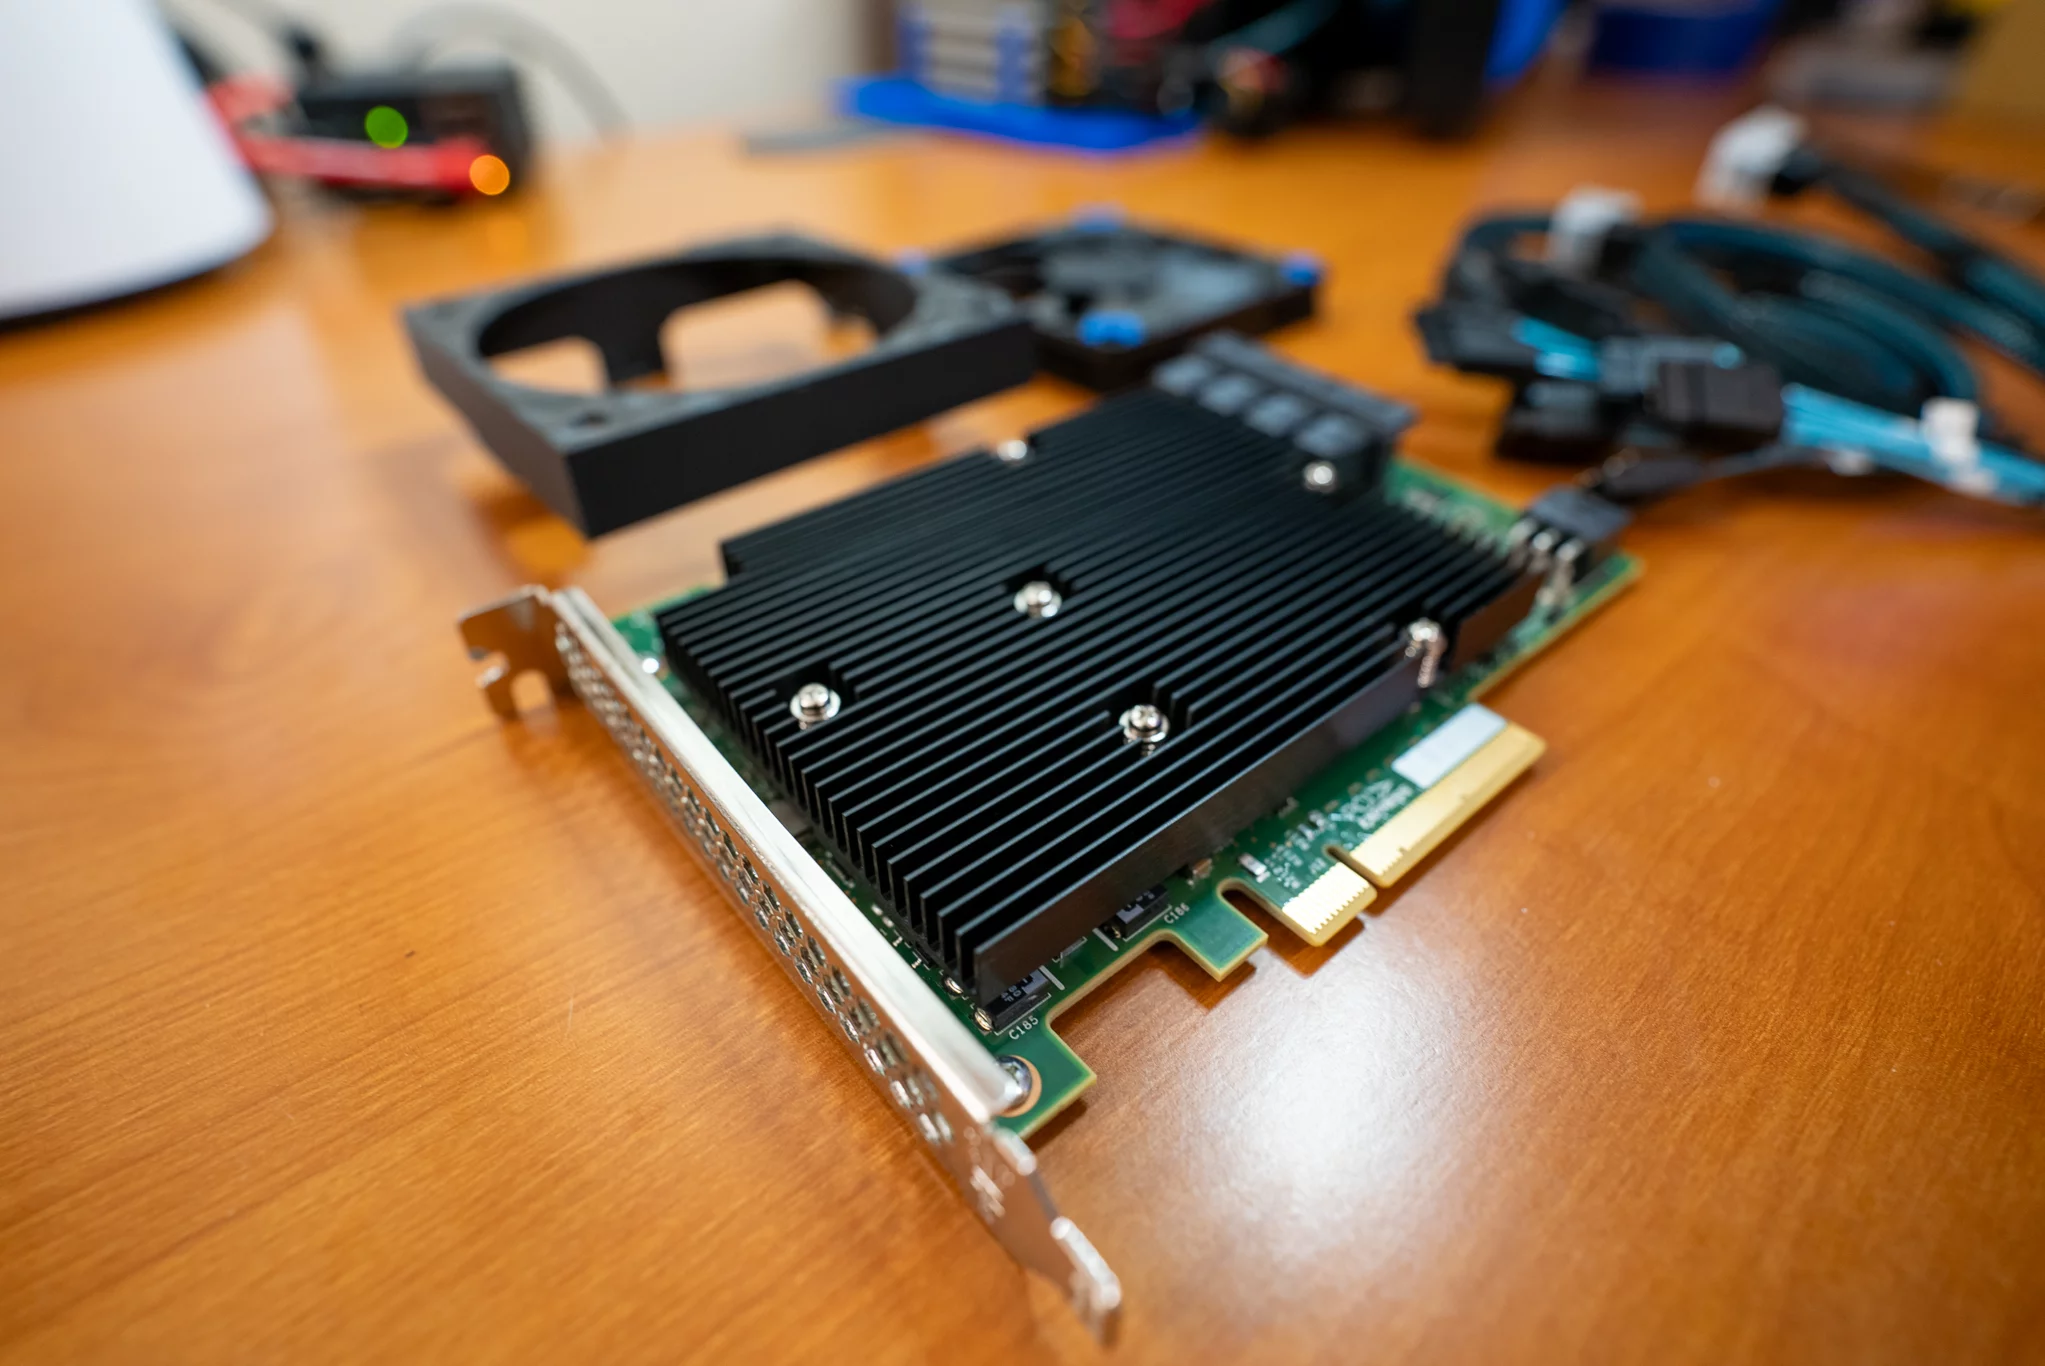
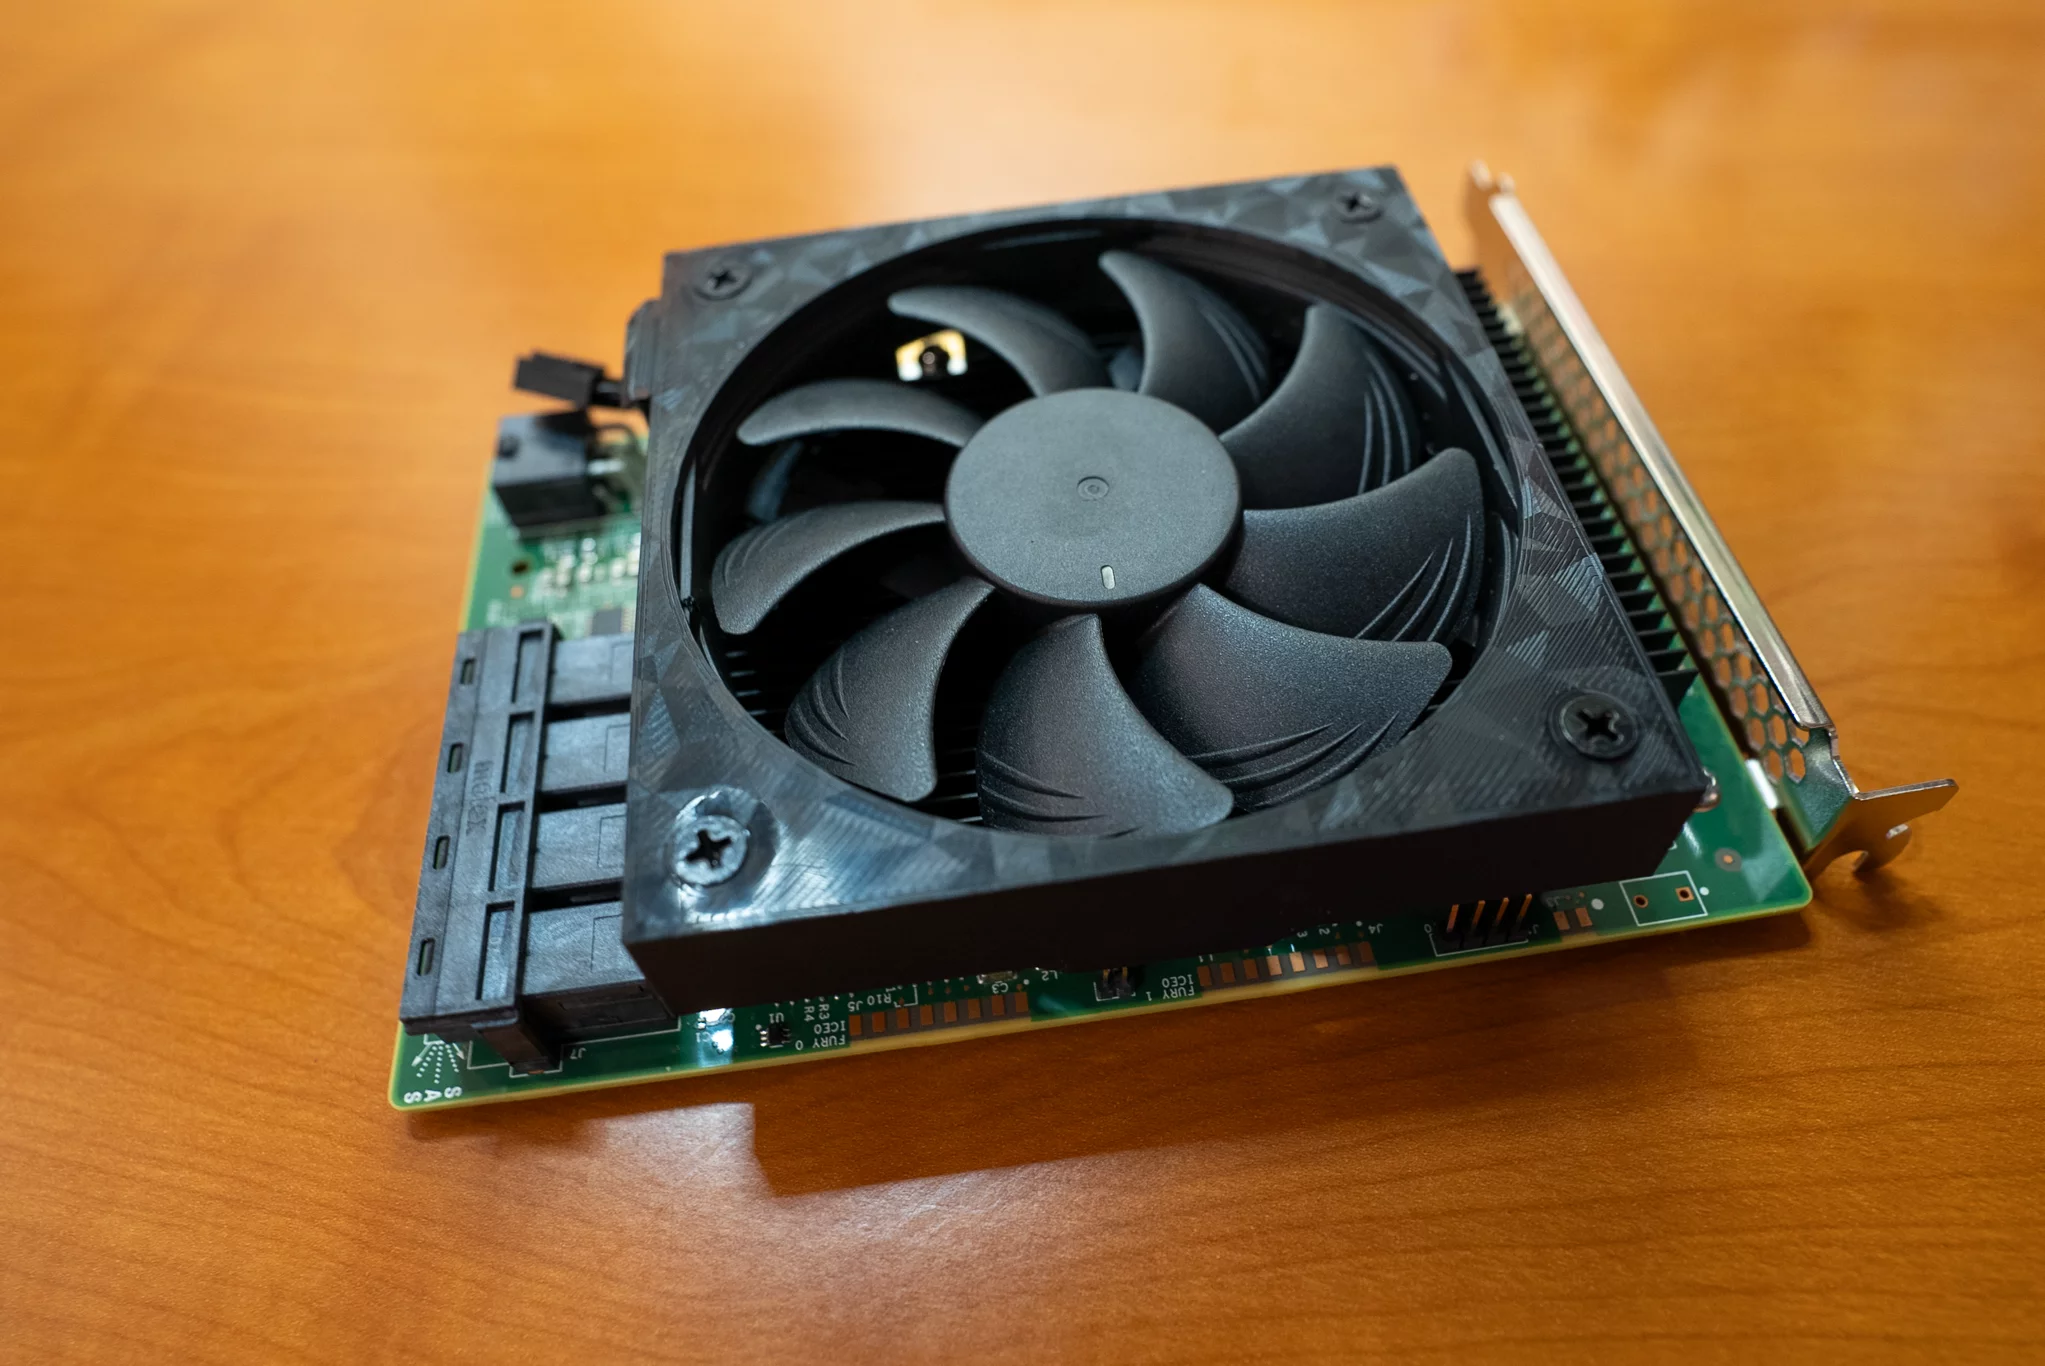
Undeterred, I immediately went out and purchased a new 16-port HBA. All too quickly, I had purchased an LSI 9300-16i to replace the 9220-8i that I had been using. Assuming that there wouldn’t be enough airflow in my MK735 to cool the LSI 9300-16i, I printed this neat LSI 9300-16i Noctua NF-A9x14 Fan Shroud on printables.com, ordered a Noctua NF-A9x14 fan, and assembled all the parts when they showed up. I also picked up four SFF-8643 to 4x SATA cables to populate the HBA.
In my haste, I overlooked a really important and painfully obvious detail: the MK735 case is not tall enough to accept full-height PCIe cards, and the LSI 9300-16i was not going to fit!

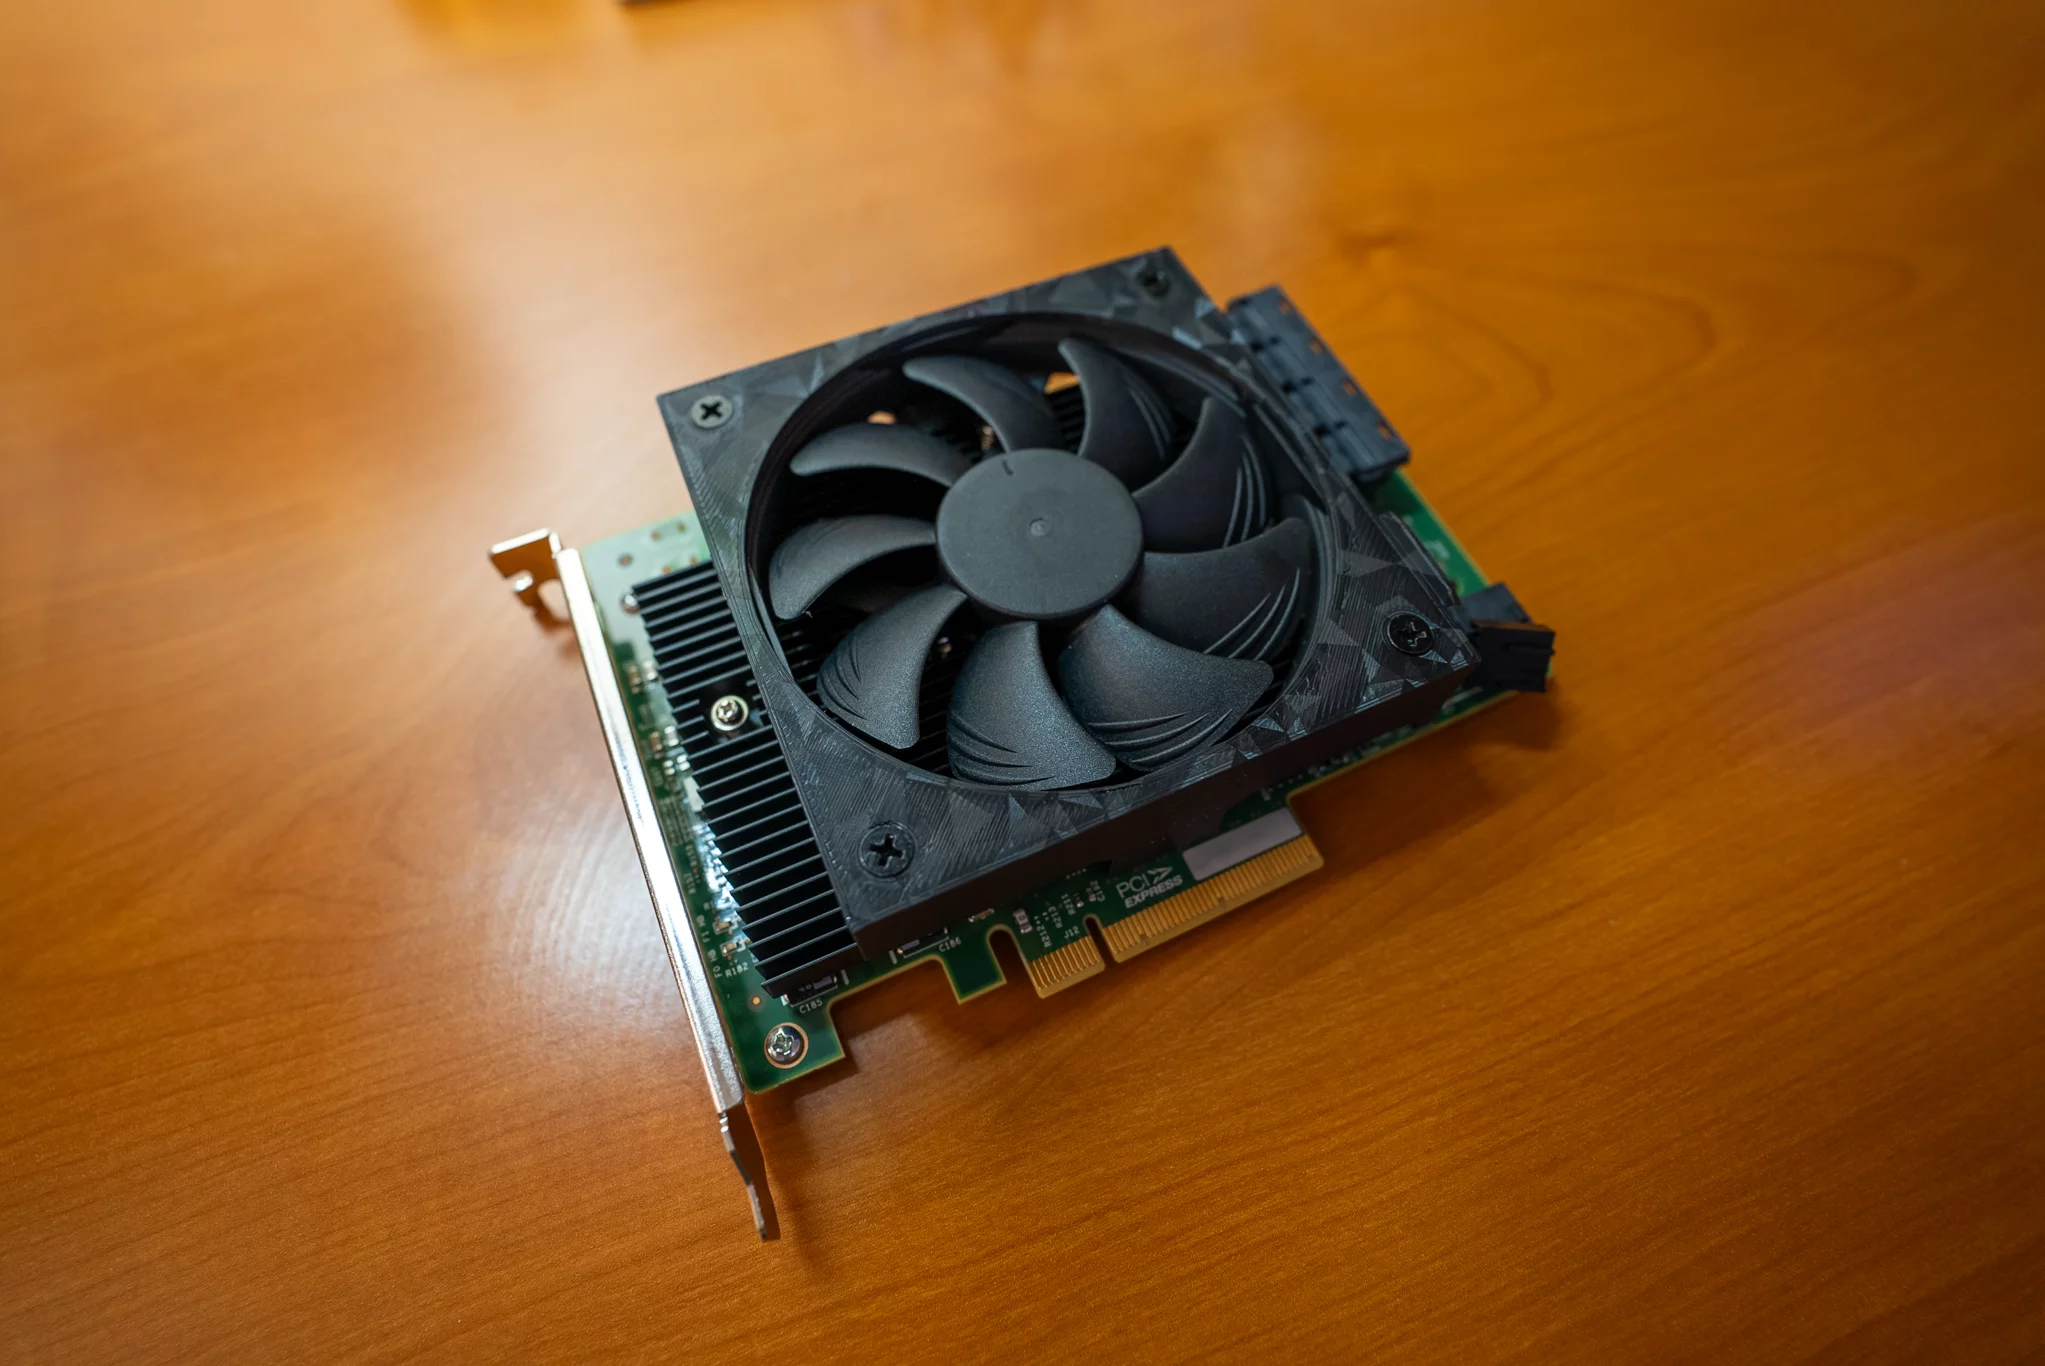
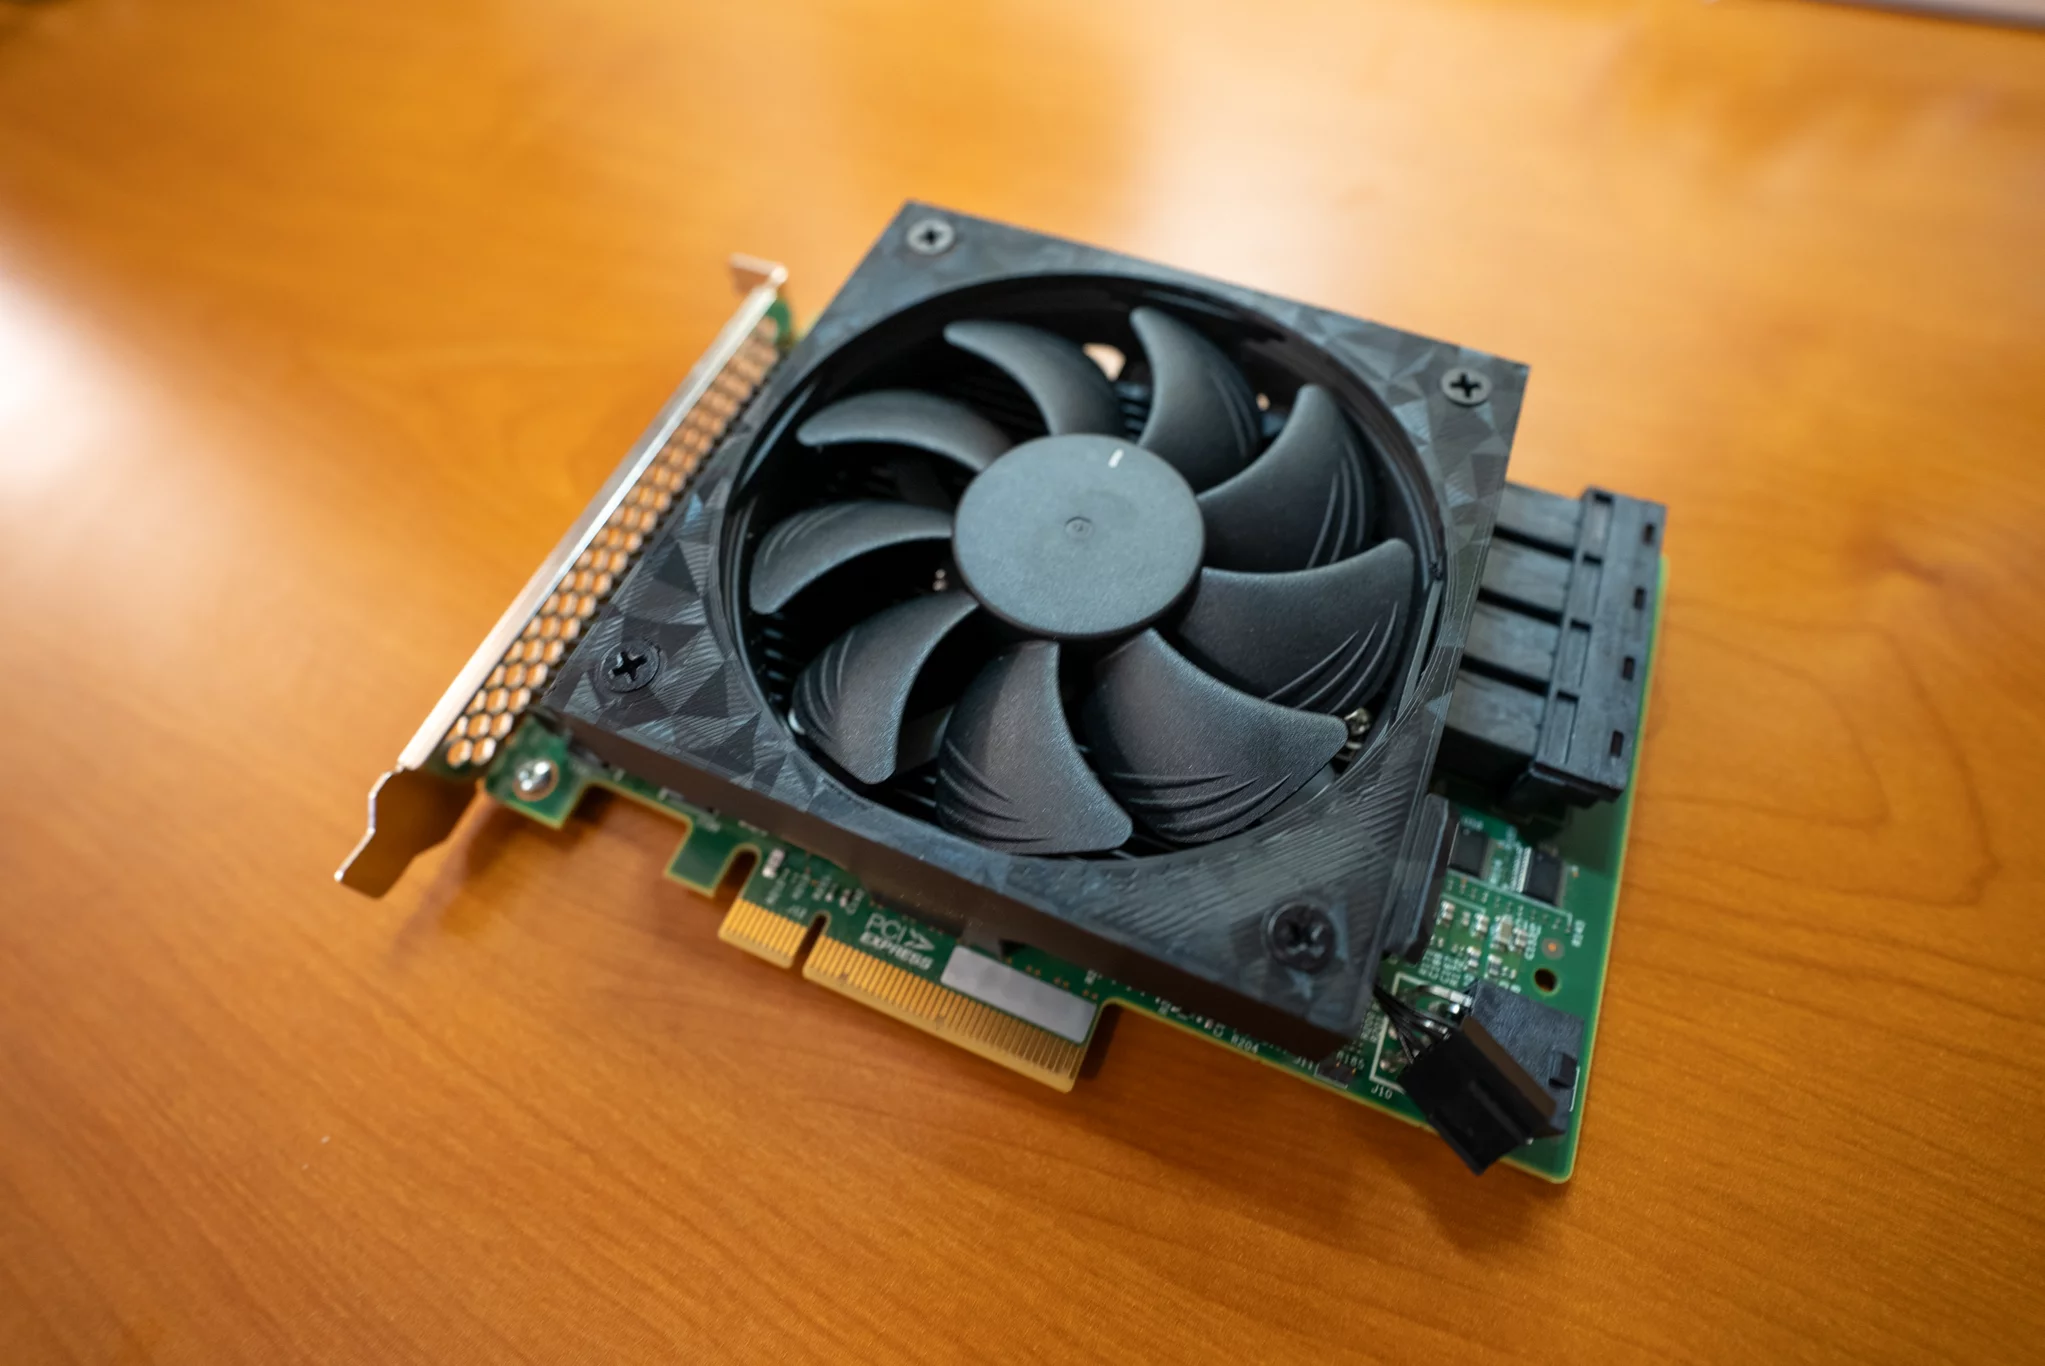
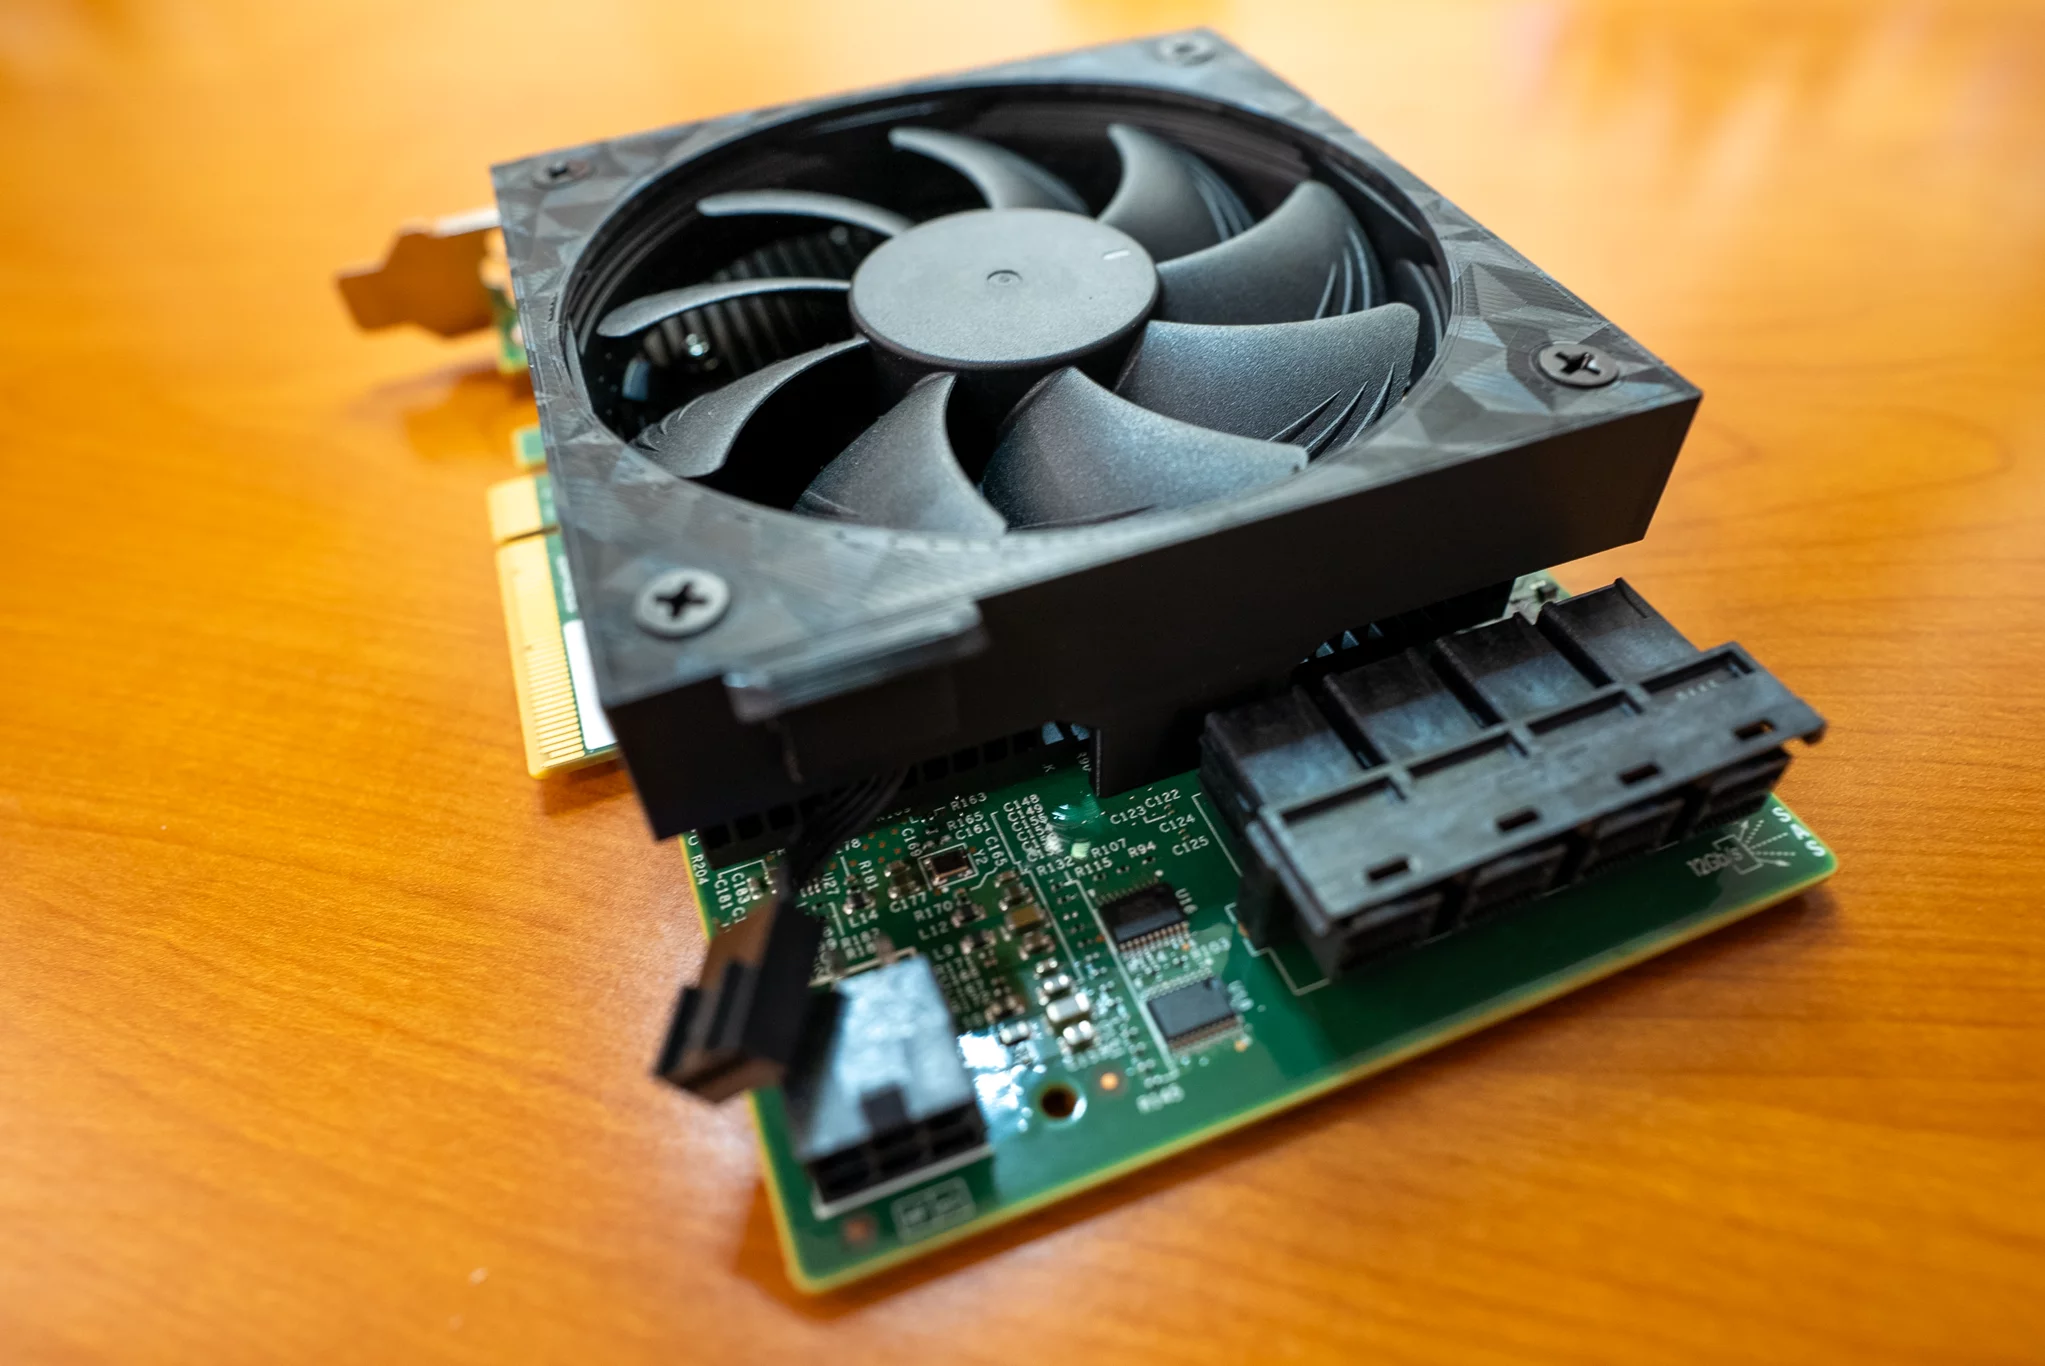
Ultimately, I wound up buying an LSI 9305-16i (I even briefly considered an LSI 9305-24i, too!). The low profile LSI 9305-16i fit fine in my MK735, and I was pleased to learn it was less likely to need the additional cooling that was strongly recommended for the 9300-16i.
Shuffling Data and Drives
I decided early on that I wanted to switch from a mirrored pair of SATA SSDs to a raidz1 pool of SATA SSDs. Unfortunately, that meant I would need to create a pool from scratch. Thankfully, I had a backup, enough hardware redundancy, and enough risk tolerance that I would be able to build the new pool and copy my data over from the old pool, but only if both the source and destination pools were in a degraded state.
I expected that this would be the most difficult part of my upgrade, but it wound up being easier than I expected! Shuffling my drives and data between pools seemed like the DIY NAS version of three-card monte. Once I had all the new disks plugged in and detected by my DIY NAS, I did the following:
- I replicated the contents of my
fastpool to my off-site NAS. - I added each of the BX500 240GB SSDs to my boot pool, waited for it to resilver, and then removed the partitions I created for the OS off my legacy 1TB SATA SSDs.
- I added one of the new MX500 1TB SSDs to the mirror vdev in the
fastpool and waited for the resilver to convert it to a 3-way mirror. - I deleted the two legacy 1TB SSDs from mirror vdev in the
fastpool. - Then I created a degraded raidz1 pool that I called
fasterout of the three unused 1TB SSDs and a sparse file. - I shut down all my virtual machines, all of my apps, and unset the app pool.
- I used
zfs sendandzfs receiveto copy my data from thefastpool to thefasterpool. - Through the TrueNAS UI, I exported the
fastpool and removed its related TrueNAS configuration. - I replaced the sparse file in the raidz1 vdev in the
fasterpool with the unused 1TB SSD. - From the CLI, I renamed the
fasterpool tofastby exporting thefasterpool, imported that pool asfast, and then exported thefastpool. - I reimported the recently renamed
fastpool from the TrueNAS UI. - I recreated the TrueNAS configuration that was deleted when the legacy
fastpool was exported.- I set my applications pool to the
fastpool. - I moved the system dataset to the
fastpool. - I made sure my VMs’ virtual drives were pointed at the correct path for their zvols.
- I recreated a replication task to replicate the
fastpool to my off-site NAS.
- I set my applications pool to the
I was pretty impressed at how well all of this wound up working. Especially when I considered that I had never attempted many of these tasks before. Thankfully, everything went really smoothly. The riskiest parts (when I had no hardware redundancy in either the fast or faster pools) didn’t have hiccups. And thanks to the speedy SSDs and mostly-empty pools, the entire process of moving data around and resilvering pools finished in mere moments.
Was this the most expensive 2TB upgrade ever?
In the end, I accomplished everything that I set out to do. I was able to retire my unsupported TrueNAS boot pool partitions and I wound up growing my fast pool by 2TB. But in that process, I managed to spend over $700! A good chunk of that $700 was spent on hardware that never was installed in my NAS or didn’t wind up staying in my NAS for very long.
I imagine that I can turn around and either return the hardware that I don’t need any longer (the 9300-16i, the Noctua fan, the M.2 to U.2 drive adapter, etc.) or sell it on eBay (my old 9220-8i and its cables) to lessen this upgrade’s financial impact. But even then, the cost of adding that 2TB of space wound up being wildly expensive.
What do you think? Have you ever spent around $350 (or more!) per terabyte to upgrade your own NAS? Tell me about it in the comments!

Help me offset some of my costs!
My loss might be your gain! Rather than return some of the stuff that I bought, I’ve decided to list them on my eBay store as well as some other parts that were made redundant by my upgrade!
- LSI 9300-16i 16-port HBA IT Mode ZFS TrueNAS UNRAID with Noctua NF-A9x14
- IBM M1015 PCIe 8-port HBA IT w/ 2x SFF-8087 to 4x SATA TrueNAS ZFS UNRAID
It might have been expensive, but I think it was still worth it!
There’s no disputing that I spent quite a bit of money and didn’t seem to get very much in return for what I spent. Regardless, I still enjoyed doing it. In addition to gaining those 2TB of usable storage, I also managed to add room for four more 2.5” drives in my DIY NAS, andcreate the possibility of an additional 4 more SATA drives via the HBA upgrade.
Part of my rationale in spending this money was anticipating what my NAS will look like in 2 or 3 more years. At some point in the future, I fully expect that I will be ditching hard drives in favor of SSDs. To accomplish that, I was going to need to be able to increase the total number of drives allowed by my NAS.
Once I can regularly buy quality 4TB SATA SSDs for $150–200, I will start slowly buying them. I’ll grow my SATA pool by swapping the 4TB SSDs in for my 1TB SSDs. By the time I’ve collected enough 4TB SSDs, I expect that RAIDZ expansion will have been released by OpenZFS and adopted by TrueNAS SCALE. This will allow me to grow my SSD pool to exceed my data storage needs and begin my move over to an all-flash DIY NAS!
Today, I might have a tinge of regret about spending $700 and only managing to add 2TB of usable storage. But down the road, I am confident that I’ll be glad that I spent it!