
When I built my inexpensive off-site backup NAS I really wanted to find a MiniPC that had room for one or two 3.5” hard disk drives. I looked at MiniPCs, small form factor PCs, and even scoured my favorite websites for a do-it-yourself solution. What little I found was too big, too expensive, and most were both! Understandably, no company is brave enough to put any 3.5” hard drives in products which have the word miniature in its description.
Not too long after buying the hardware for my off-site backup NAS, I learned of the Topton N1 NAS. I immediately bought one and wrote a review of this toaster-shaped NAS over on Butter, What?!. I liked everything about the Toaster NAS. I liked it enough that I really wanted to try and sell it on my eBay store. Except the window on that particular product was closing, and I missed out on an opportunity to resell them.
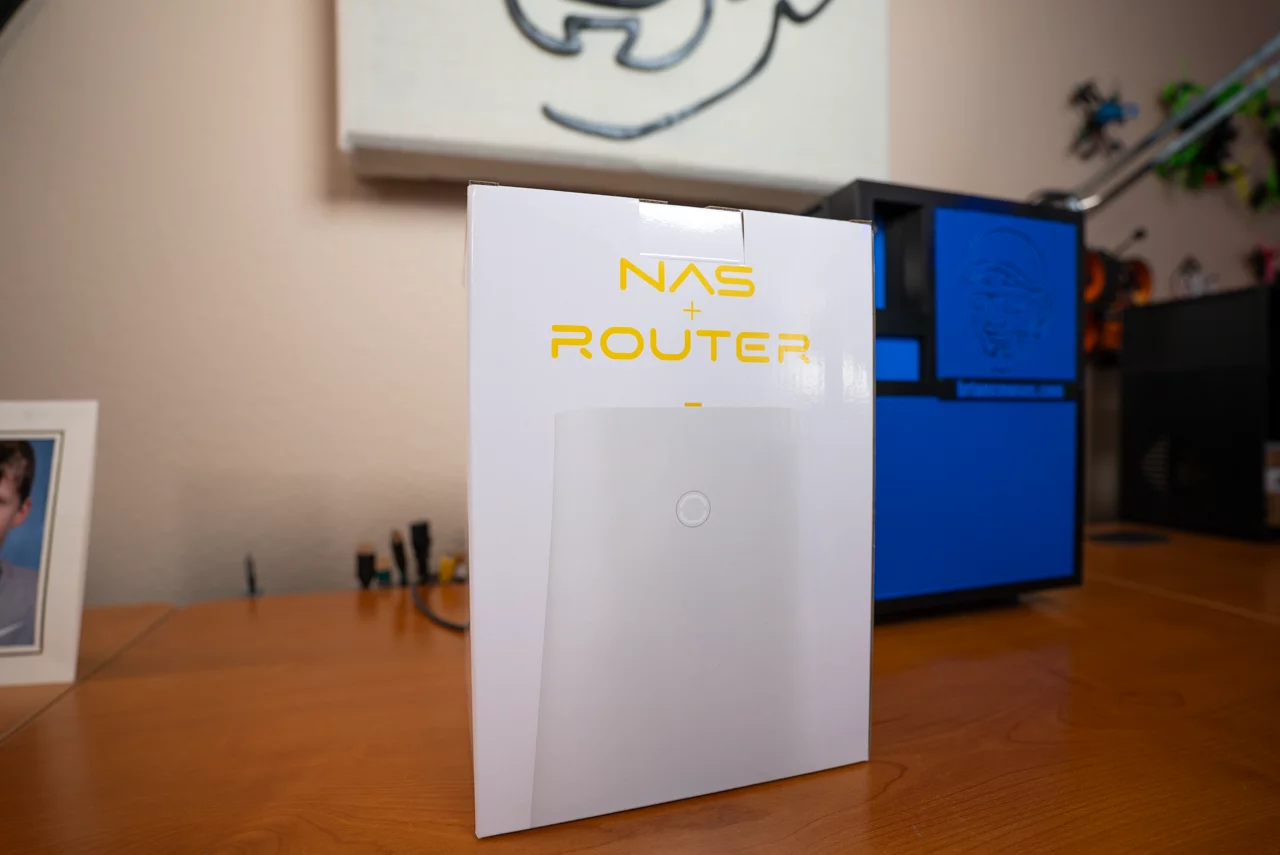
- Topton R1 Pro NAS barebones kit for $275
- Topton R1 Pro NAS with 16GB DDR4 RAM, Intel Optane 16GB NVMe, and TrueNAS SCALE for $375
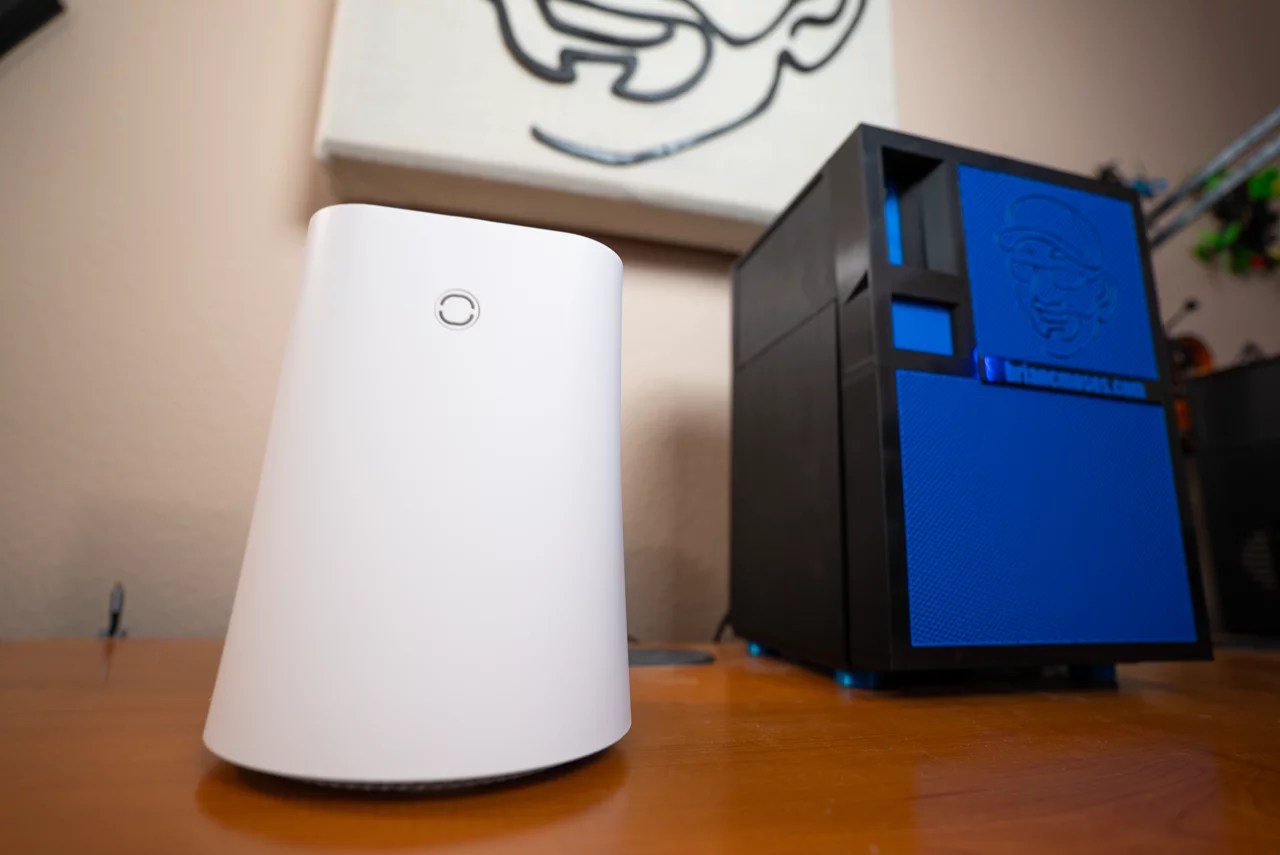
A new and improved Toaster NAS
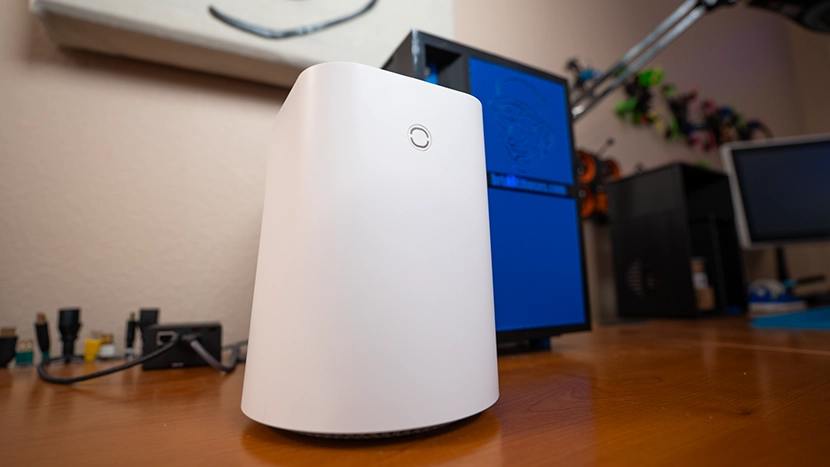
 Last time I placed an order to restock my eBay store’s inventory of motherboards, Topton asked me if I’d be interested in a product similar to the N1 NAS called the Topton 2-bay R1 Pro NAS.
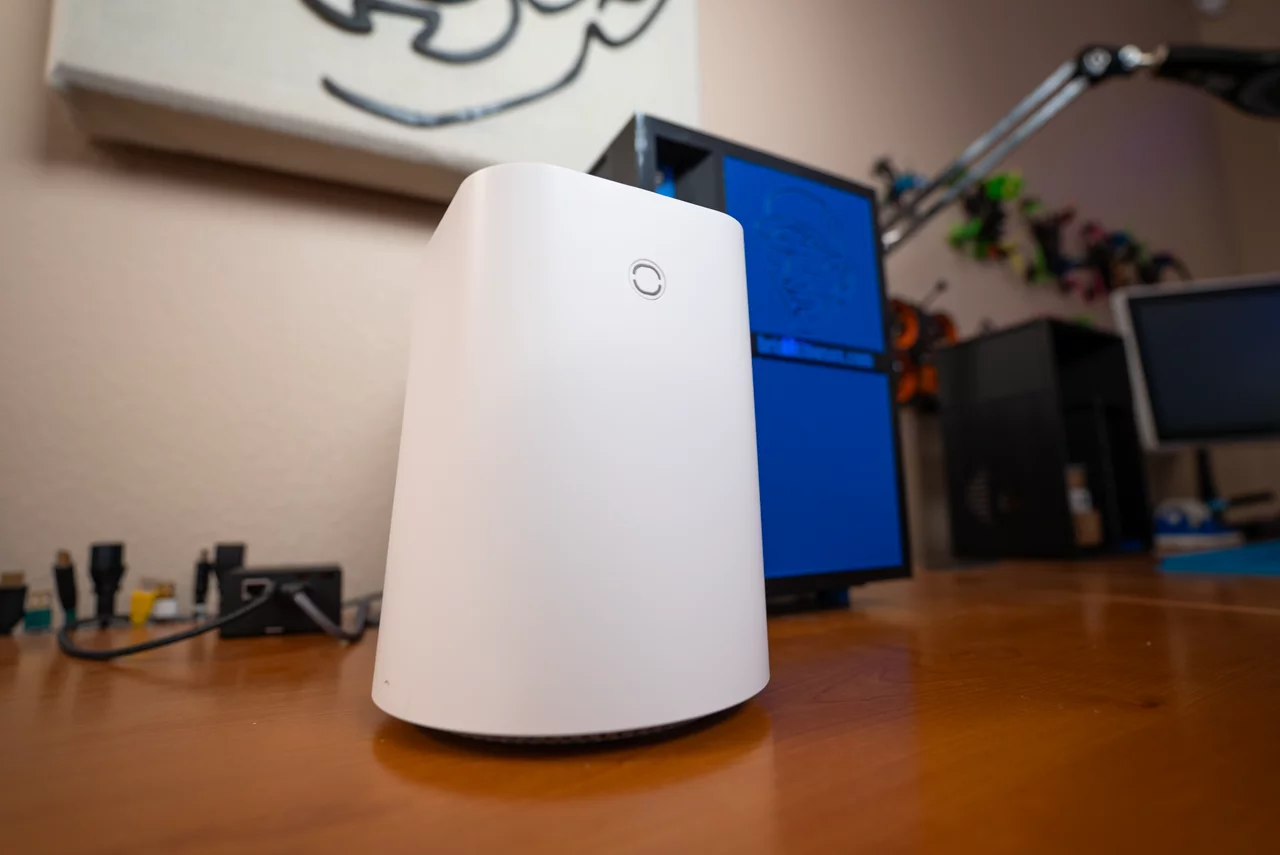
From the information they sent me, it looked like exactly the same enclosure with an upgraded motherboard. Encouraged by my experience with the Topton N1 NAS, I bought a handful of the R1 Pro NAS and began to think of ideas for them.
Topton R1 Pro NAS Specifications
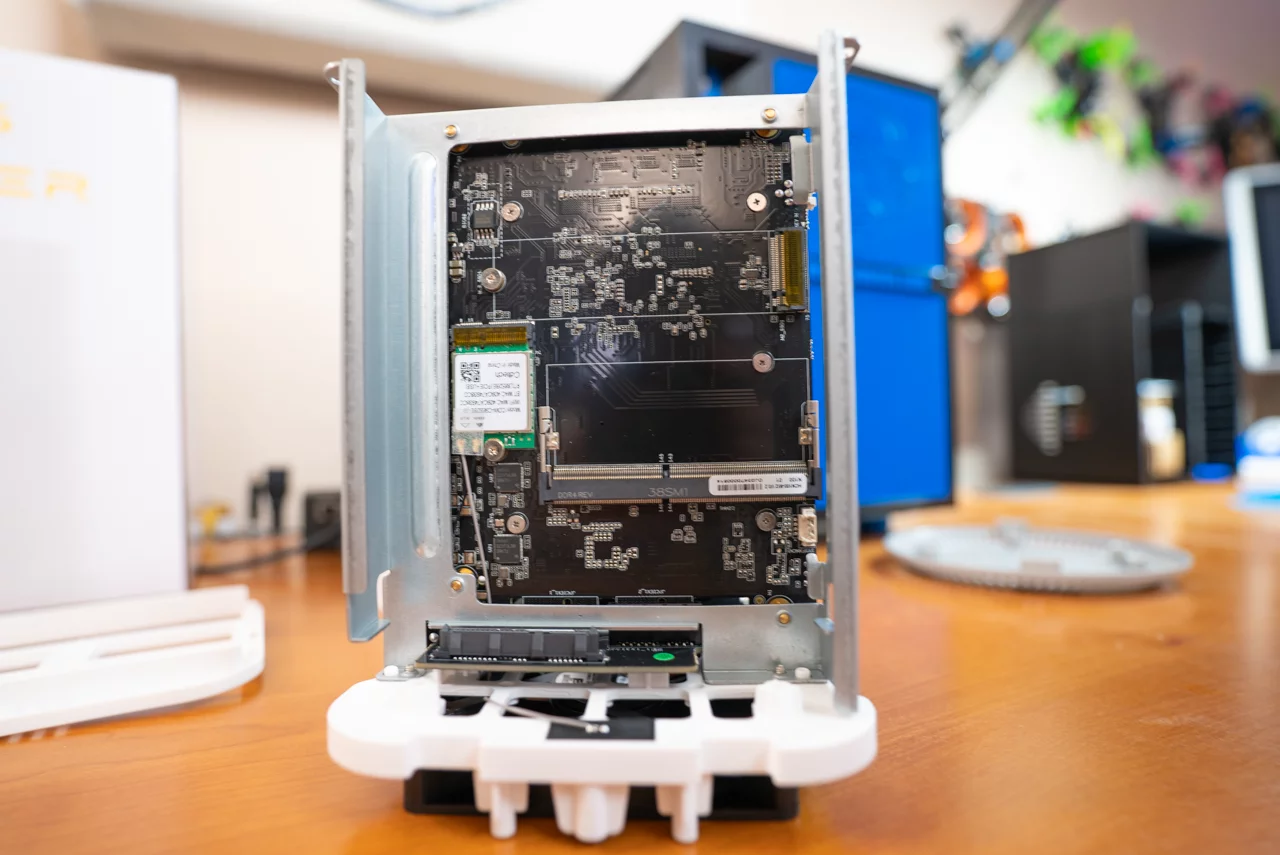
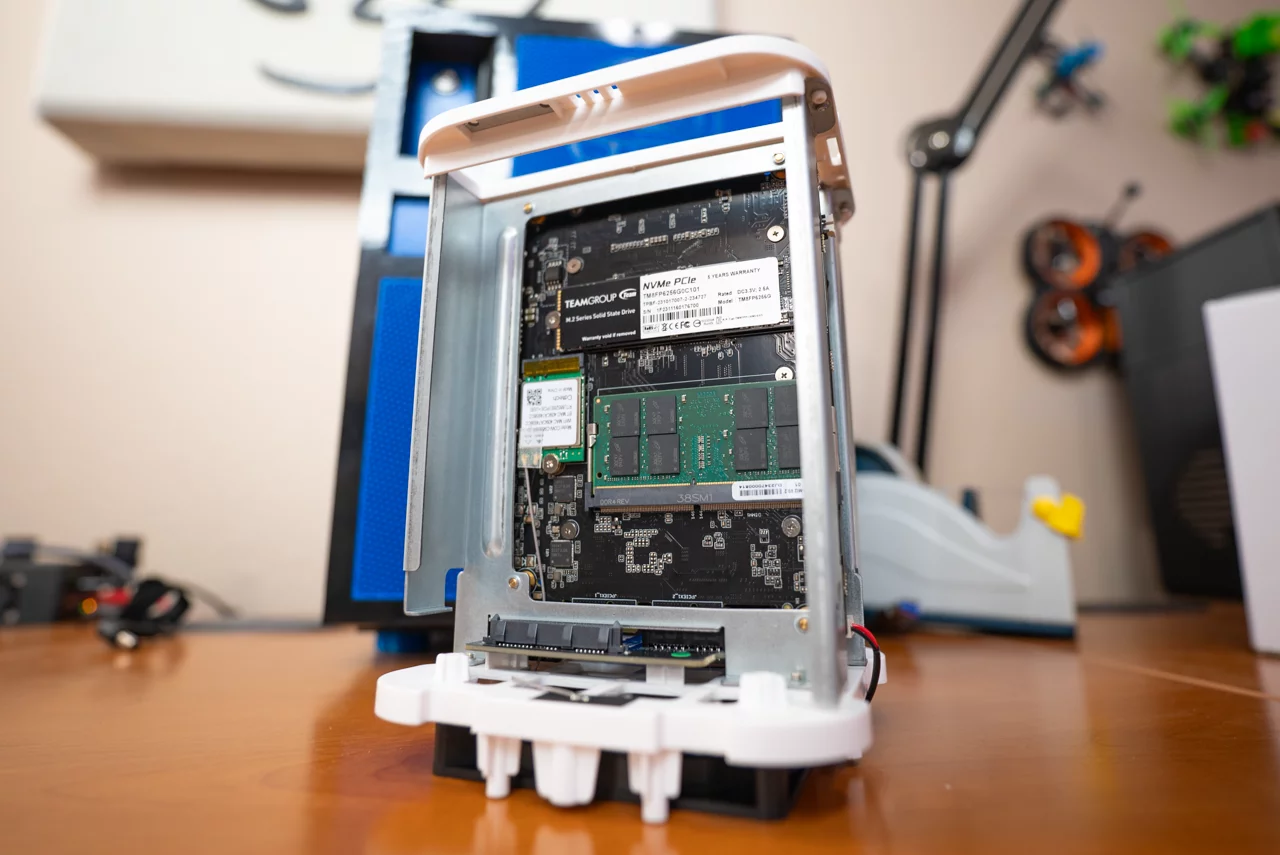
From the beginning, the specifications of the R1 Pro NAS had me quite intrigued. I think the specifications were really ideal for what I’d consider an amazing “small” NAS or even an entry-level NAS for the budding data hoarder. The R1 Pro NAS, some quality RAM, an inexpensive NVMe SSD, a pair of hard disk drives, TrueNAS SCALE, and a little bit of assembly are all the necessary ingredients to build a very capable DIY NAS!
- CPU: Intel N100 (4 cores, 4 threads, Max Turbo 3.4Ghz, 6W TDP)
- RAM: 1 x DDR4-3200 SODIMM slot up to 32GB
- Storage
- 1 x M.2 2280 NVME slot
- 2 x 3.5” SATA hard drive bays
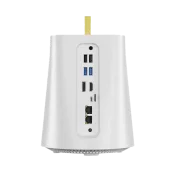
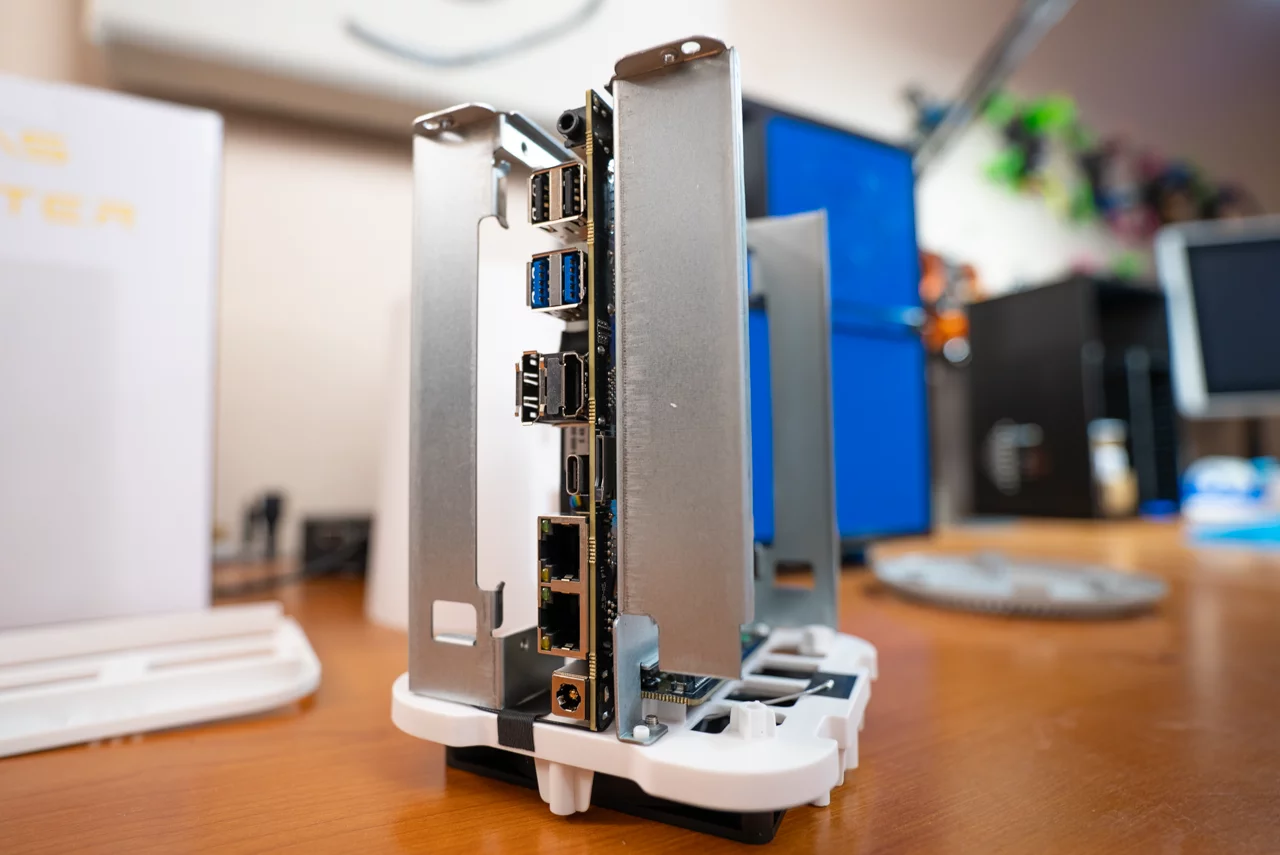
- Network: 2 x Intel i226-V 2.5Gbps NICs
- GPU: Intel UHD Graphics, 750Mhz, 24 execution units, Intel Quick Sync Video
By far, my favorite detail from the R1 Pro NAS is the Intel N100 CPU. For its price and power consumption, the Intel N100 is a fairly powerful CPU. I am also excited that hard drive capacities have reached a point where a single drive is more than large enough to hold all of my data. These large hard drives have brought us to the point where we don’t need to build pools made out of multiple disks just to hold all of our data, and we have the option to focus on using these disks to add redundancy. Lastly, with a pair of 2.5Gbps network interfaces, the R1 Pro NAS helps clear the way for the DIY NAS builder’s most likely bottleneck: the network.
The icing on the cake for my media-hoarding readers is the Intel Quick Sync on the N100’s built-in GPU. There are quite a few people sharing their experiencing transcoding multiple streams on the N100’s GPU without troubles.
If you don’t like plastic …
… then this isn’t the DIY NAS for you! The R1 Pro NAS’s outer shell and drive bays are all plastic. I personally don’t have any issues with its plastic, but I know that this much plastic can be a turn-off for some users. When I took the case apart to install an M.2 NVMe SSD and the RAM, I noticed that I was being very delicate with the case. Something about those plastic parts made me unconsciously worry about being too rough and risk breaking them.
I disassembled and reassembled the case several times. I put drives in and removed them from the drive cages several times. Nothing broke, and nothing even made me worry that it’d break. At its price point, I think this much plastic should be expected by anybody buying the NAS. The plastic wasn’t a deal-breaker for me, and I don’t think it should legitimately discourage anyone from buying a R1 Pro NAS. But if you hate plastic and you want to build a quality economical DIY NAS, you might want to avoid the R1 Pro NAS and check out last year’s economical DIY NAS blog instead.
Does the Topton R1 Pro NAS address my complaint about the Topton N1 NAS?
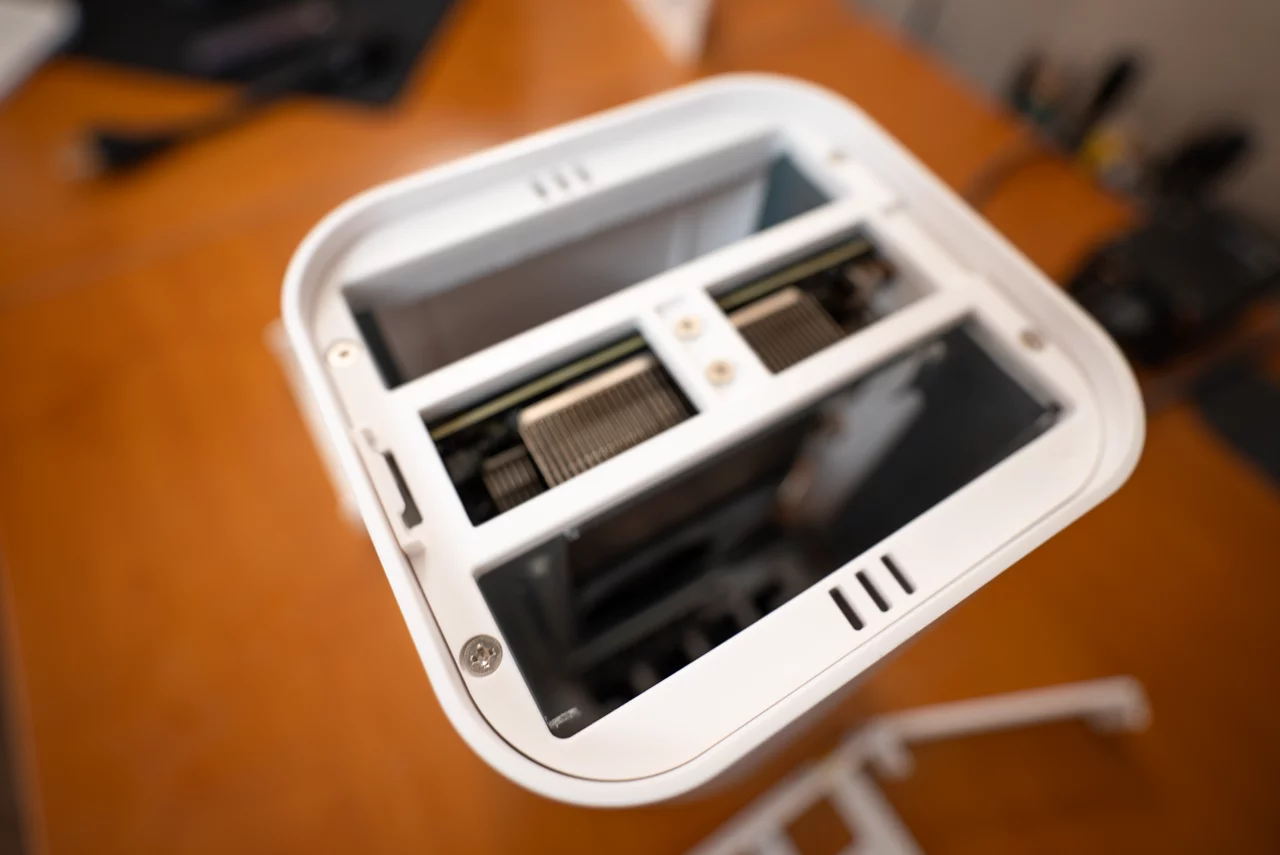
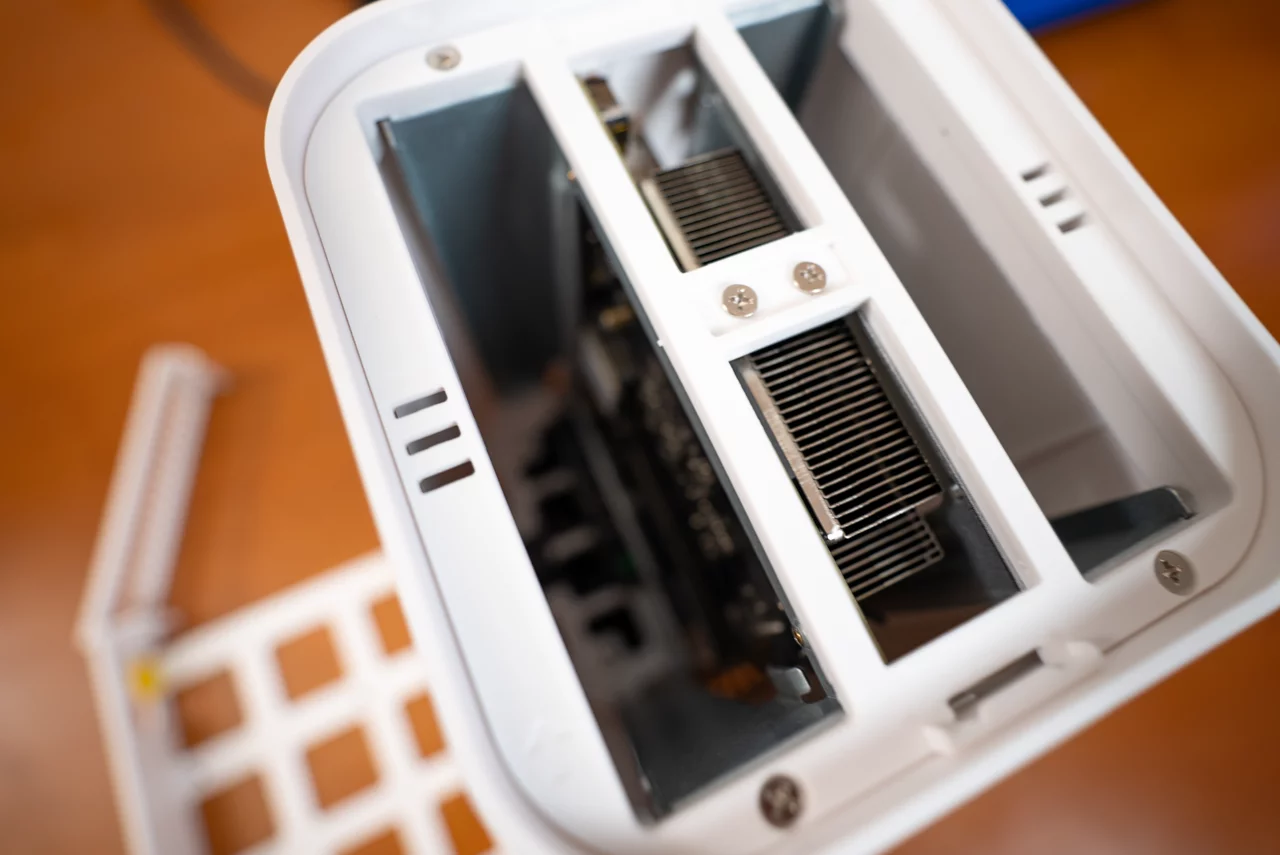
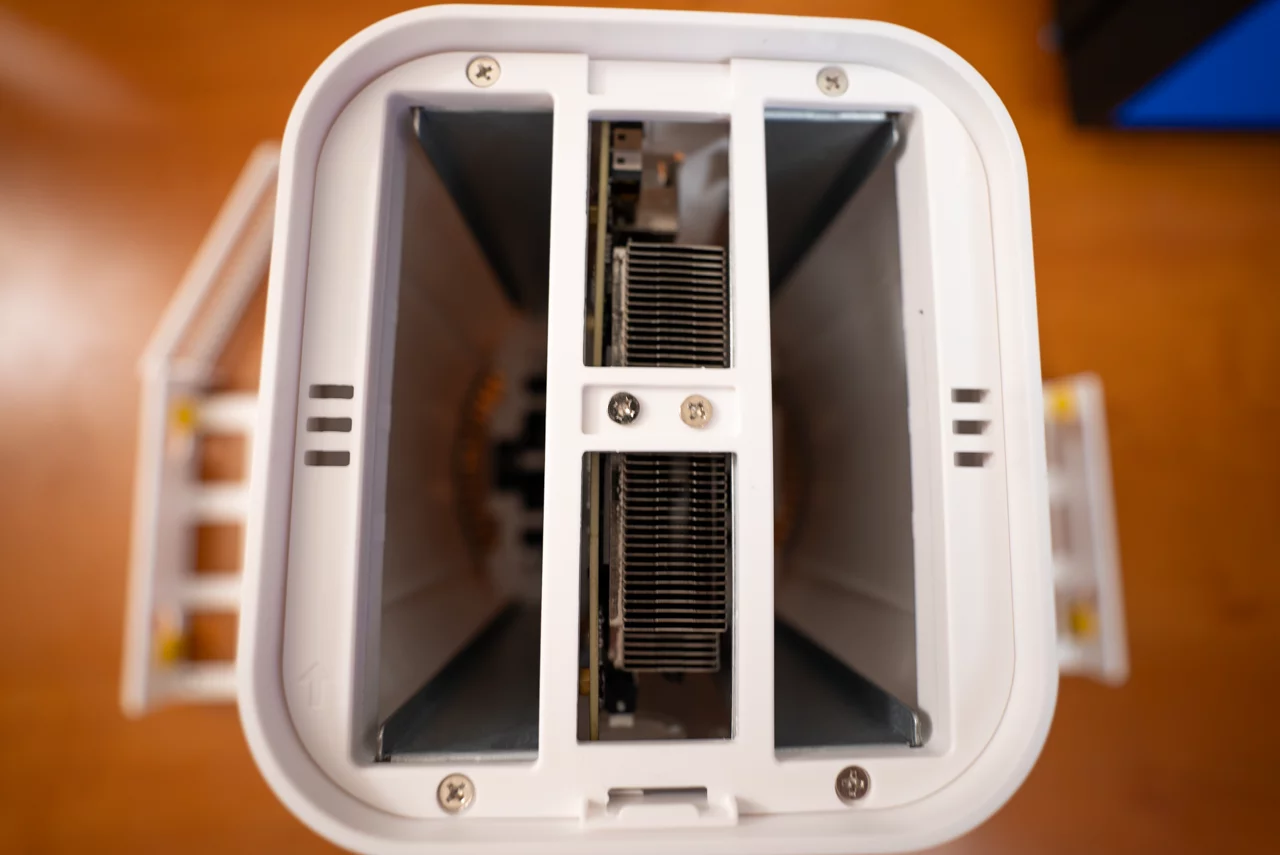
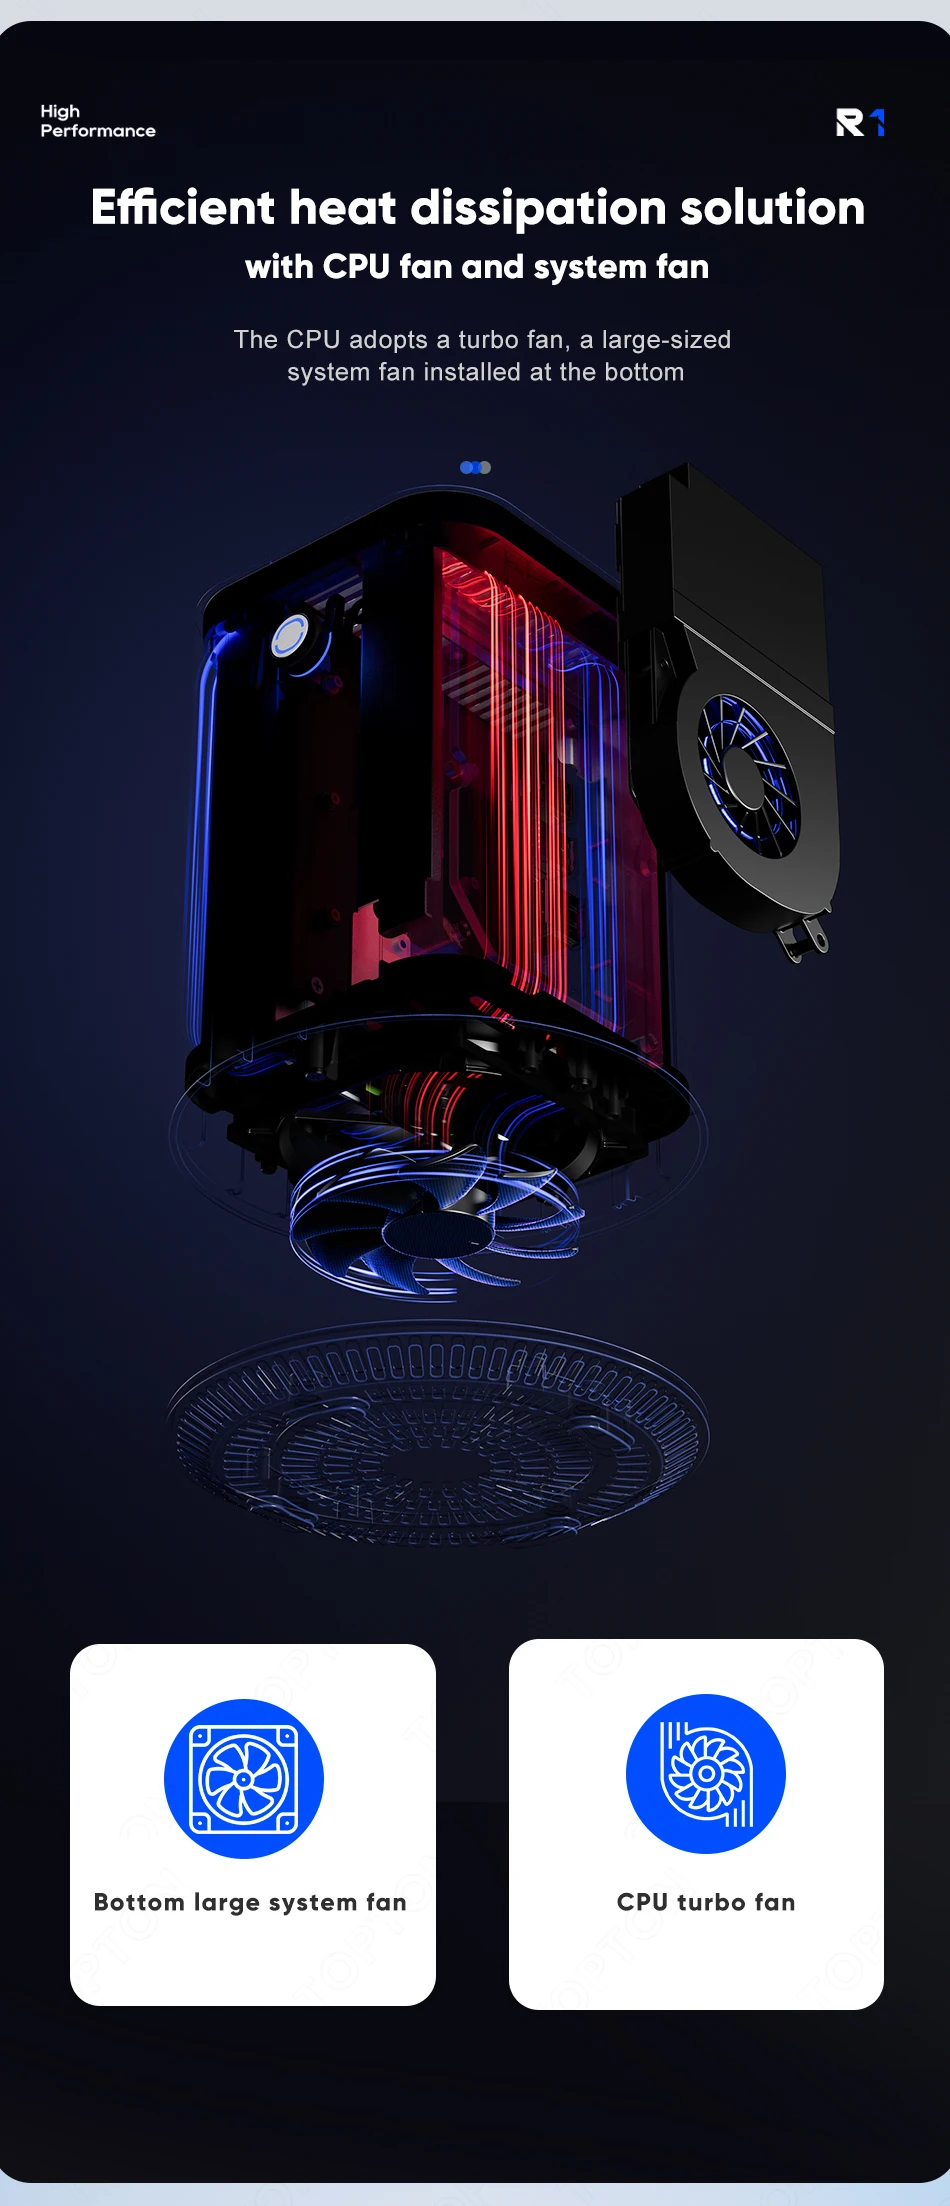 Inside the Topton N1 NAS, there was only the fan on the CPU. I noticed that the drive bay opposite of the CPU was a little bit warmer than the other (~52° Celsius vs. ~43° Celsius). That warm–but not hot–drive was running at a higher temperature than any of the drives in my primary NAS, and I shared this concern when I reviewed the Topton N1 NAS.
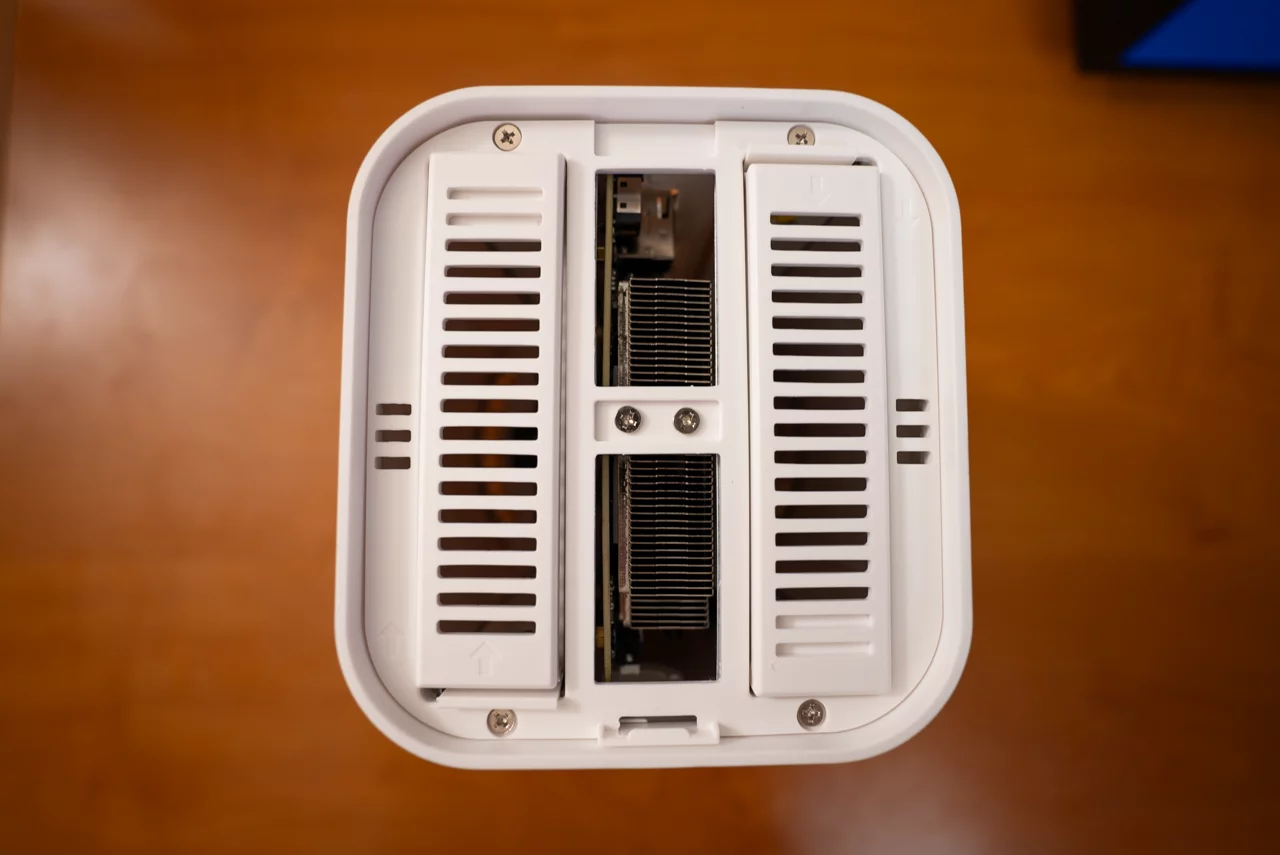
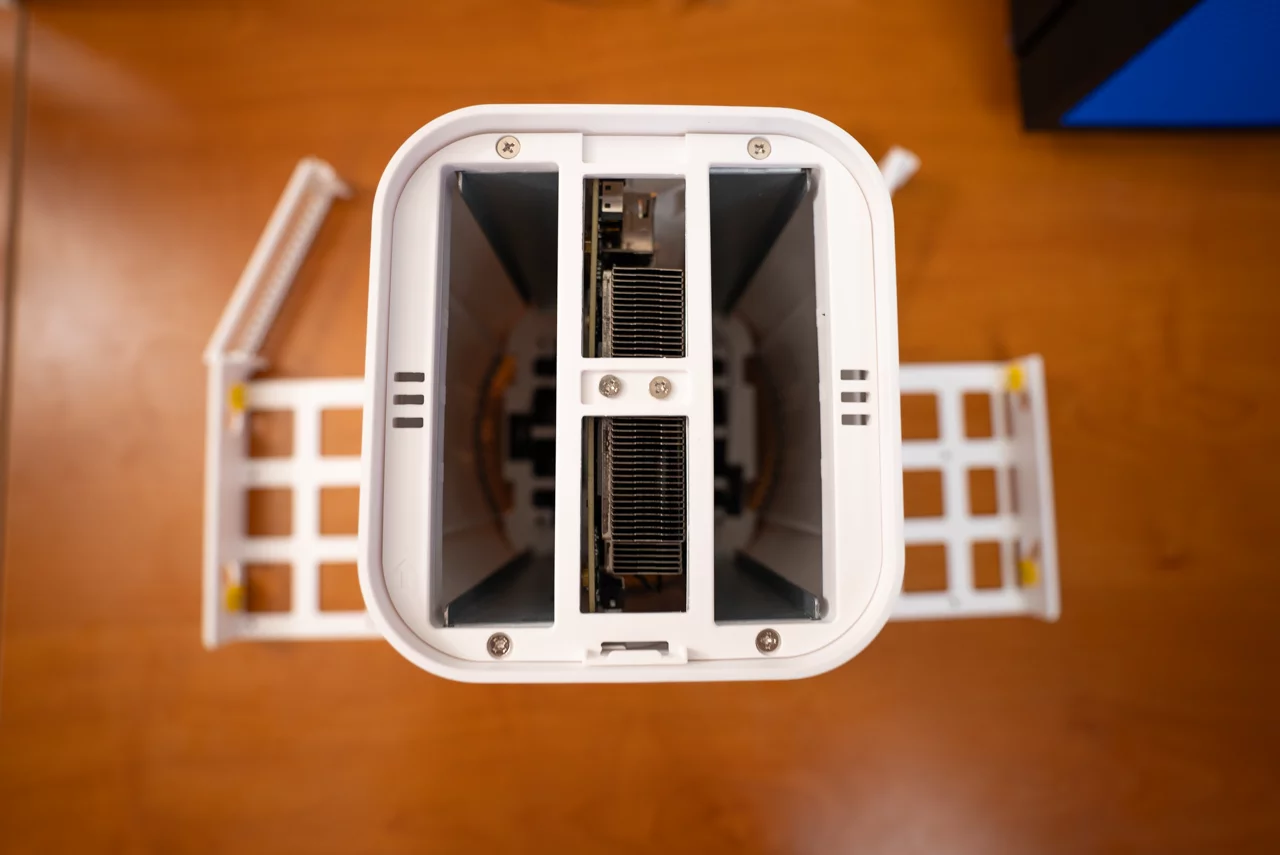
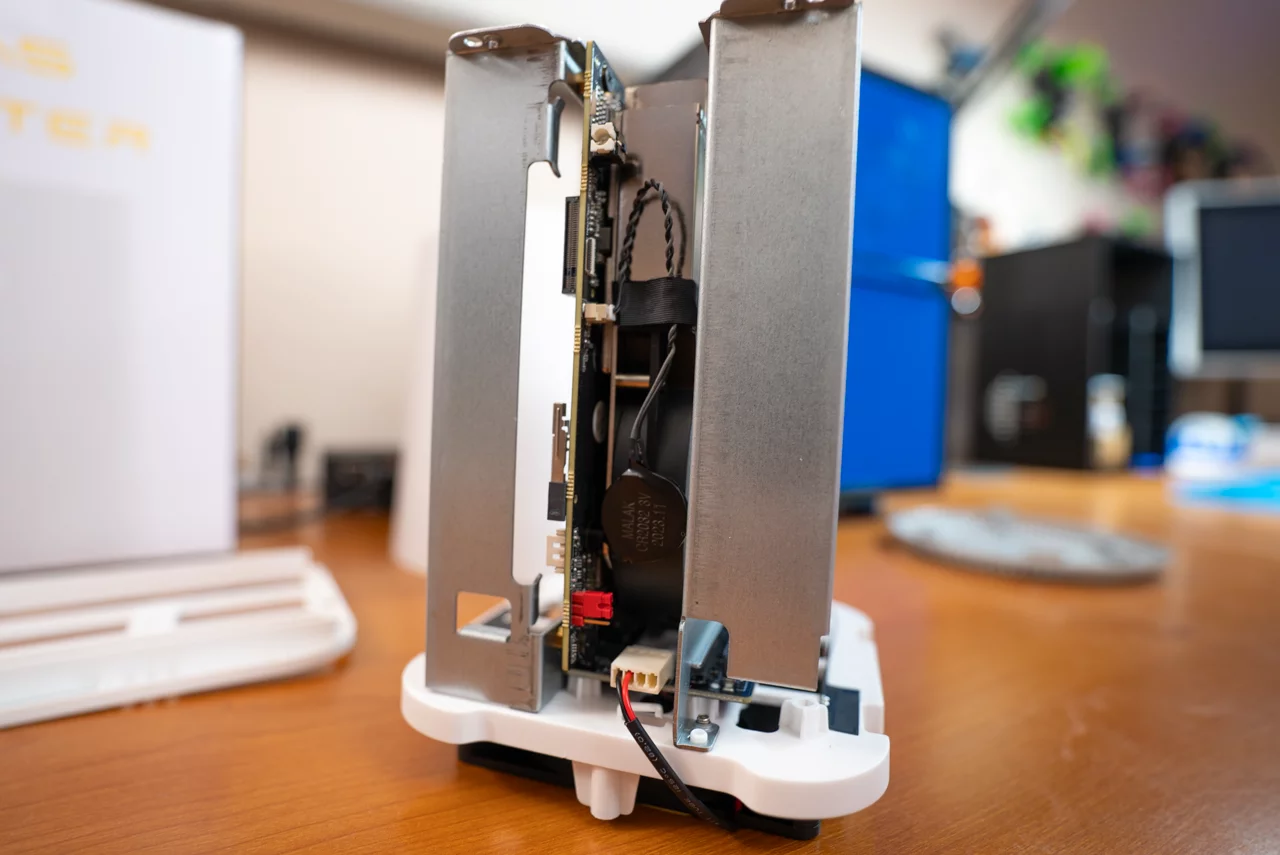
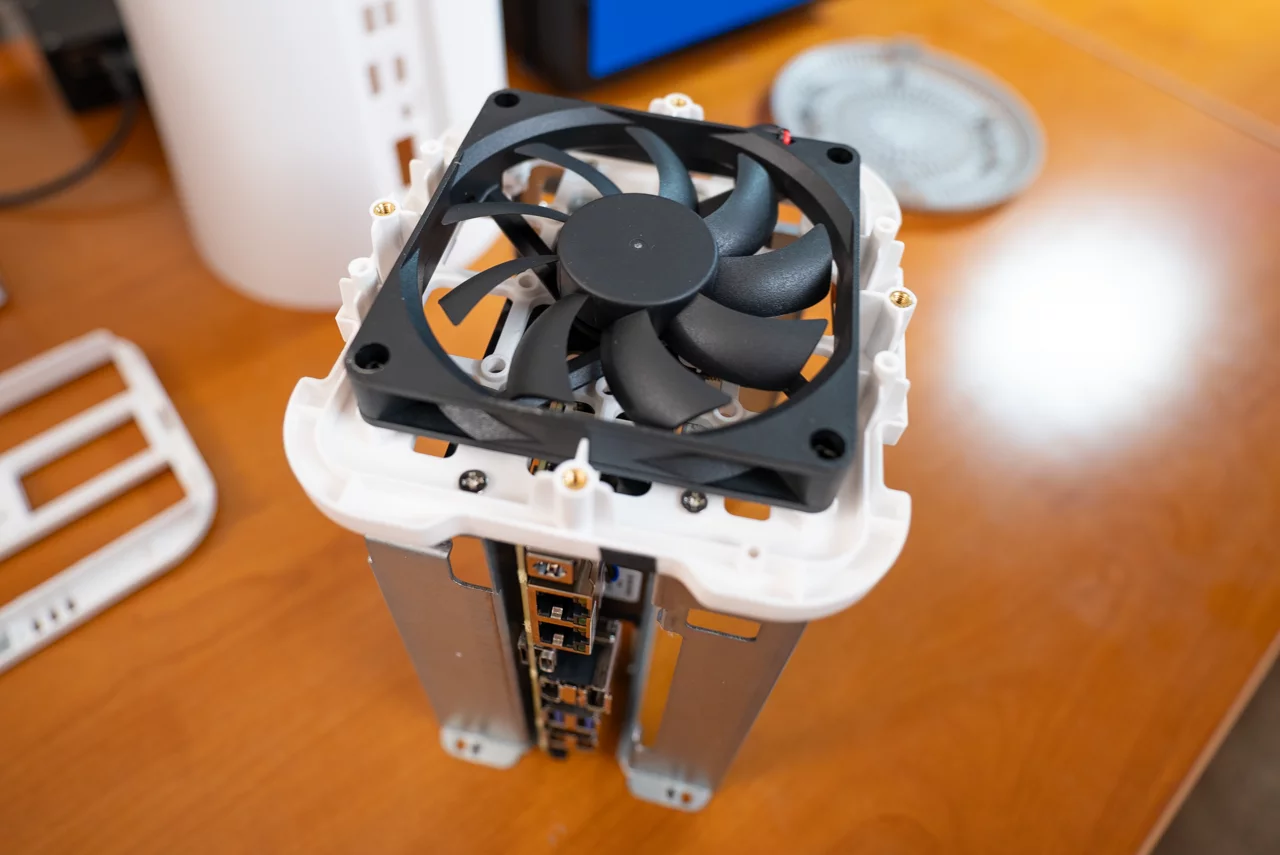
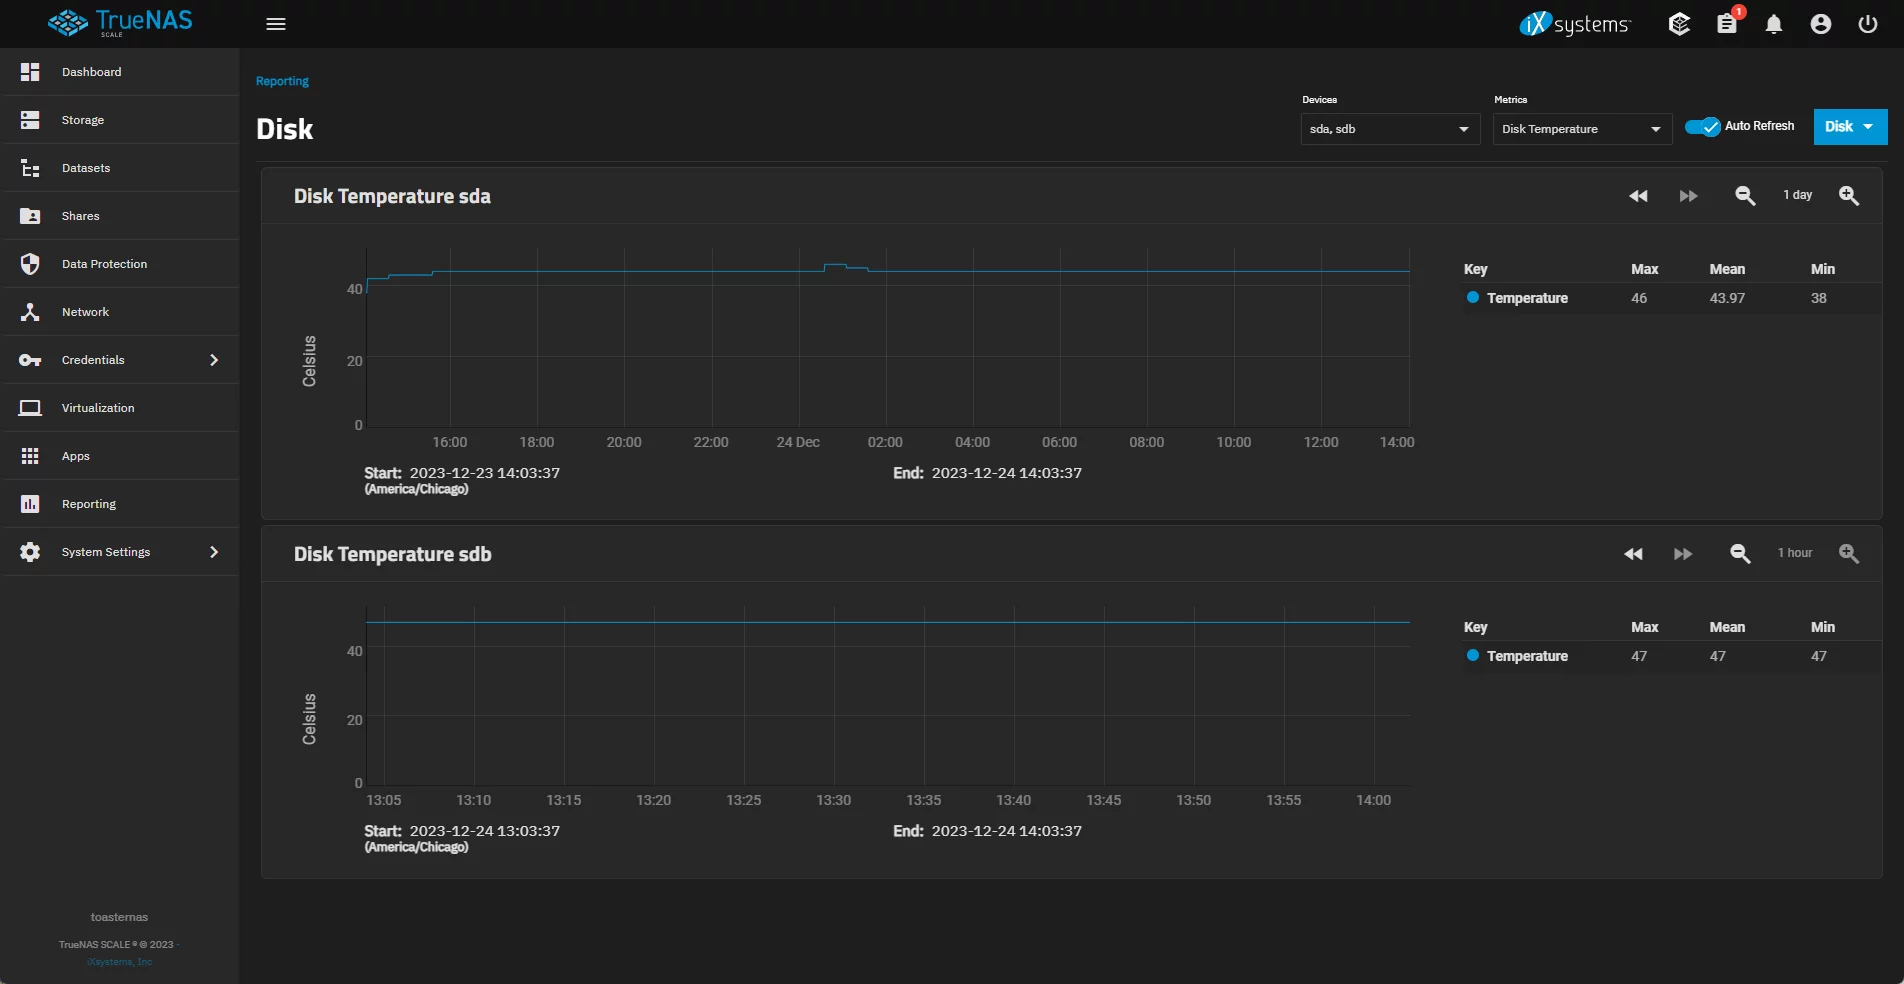
In the Topton R1 Pro NAS, this inadequate cooling isn’t a problem anymore. They solved this by adding a fan in the bottom of the case that sucks cool air in and pushes it equally across both drives. During a strenuous replication task that was constantly writing data to the pool, the hard drives’ temperatures stayed around ~43° to ~46° degrees Celsius, which is just like the temperatures in my primary NAS.
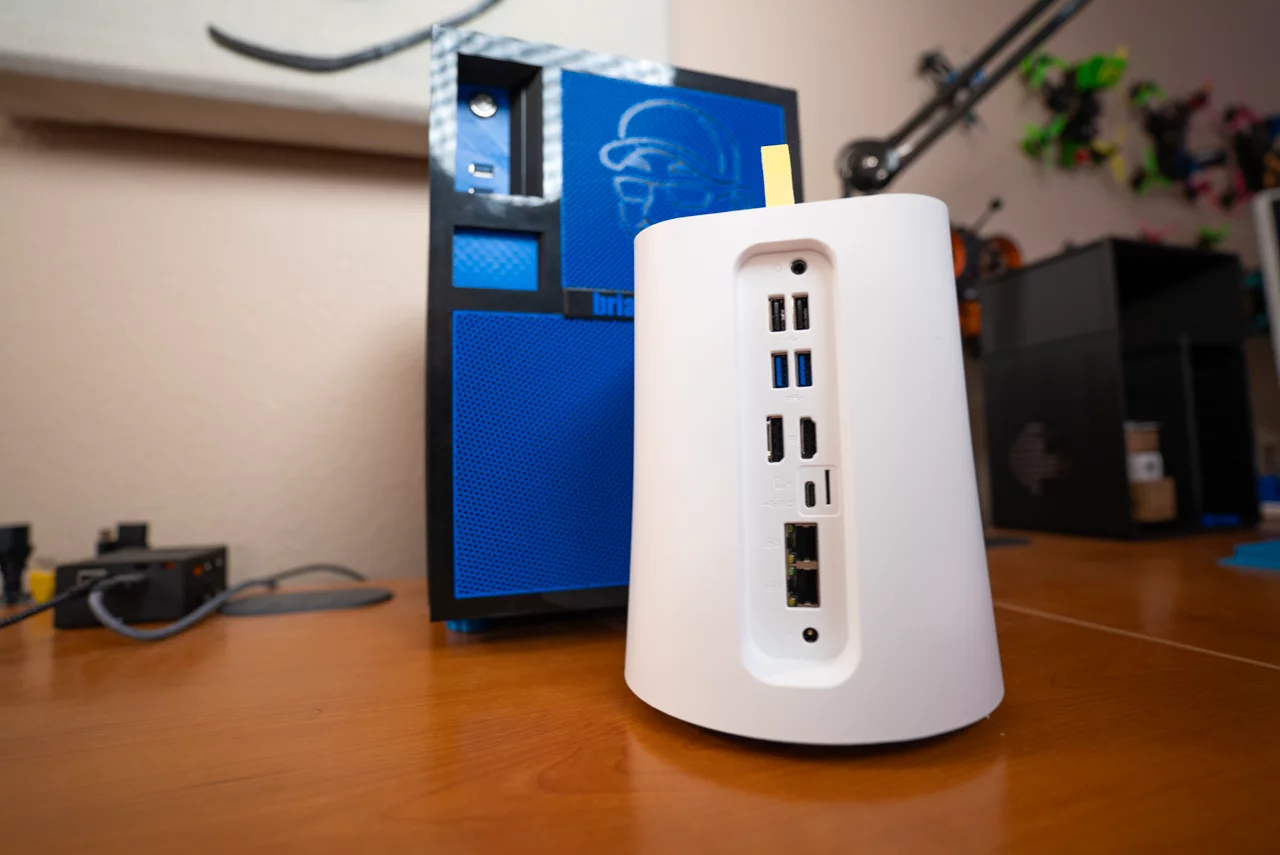
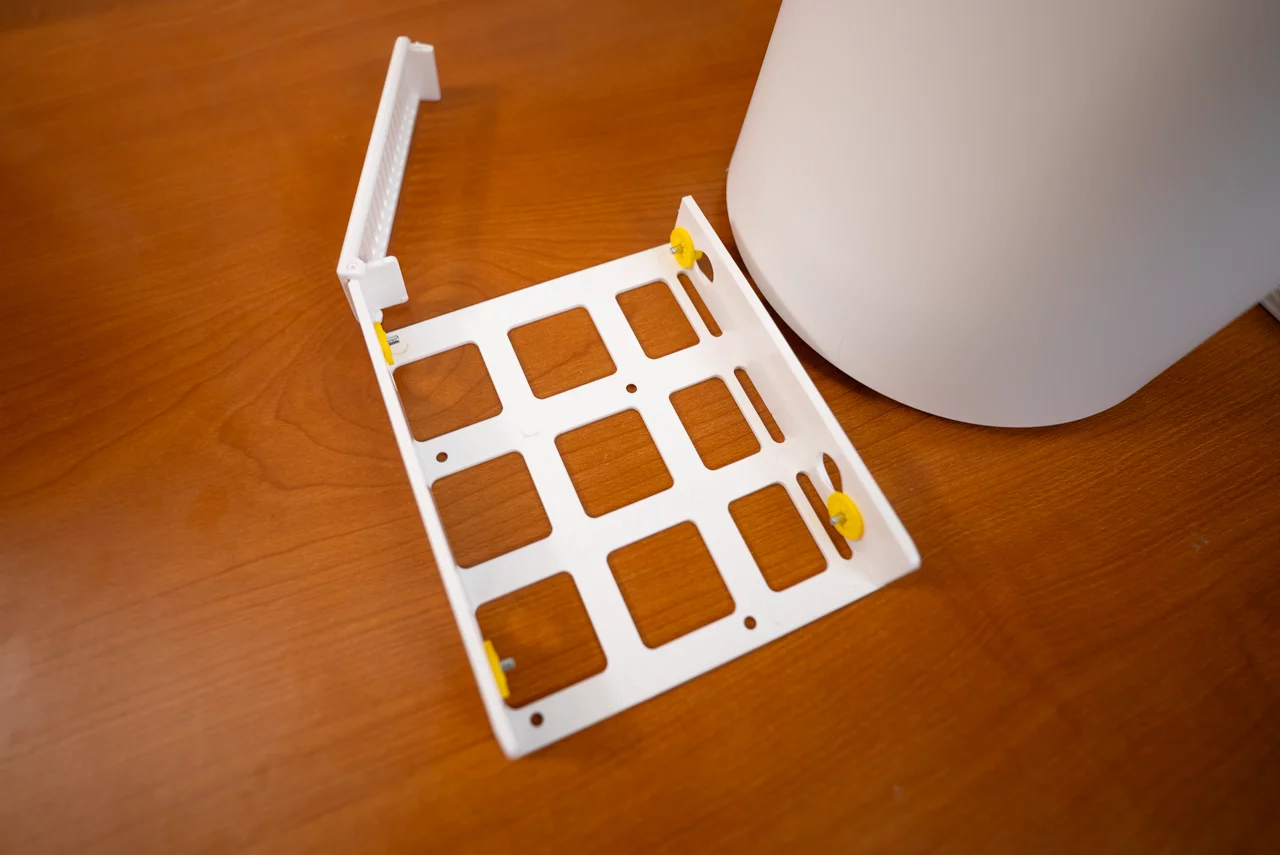
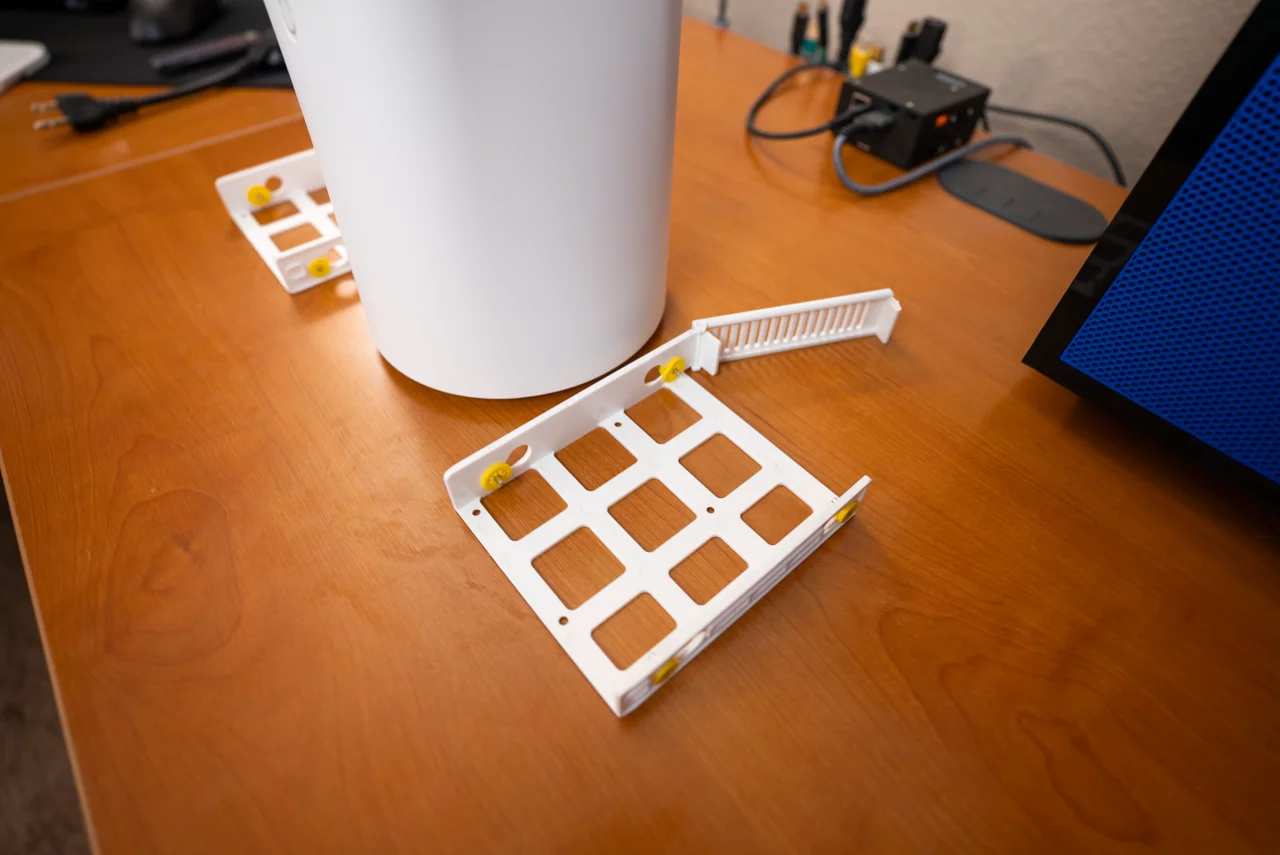
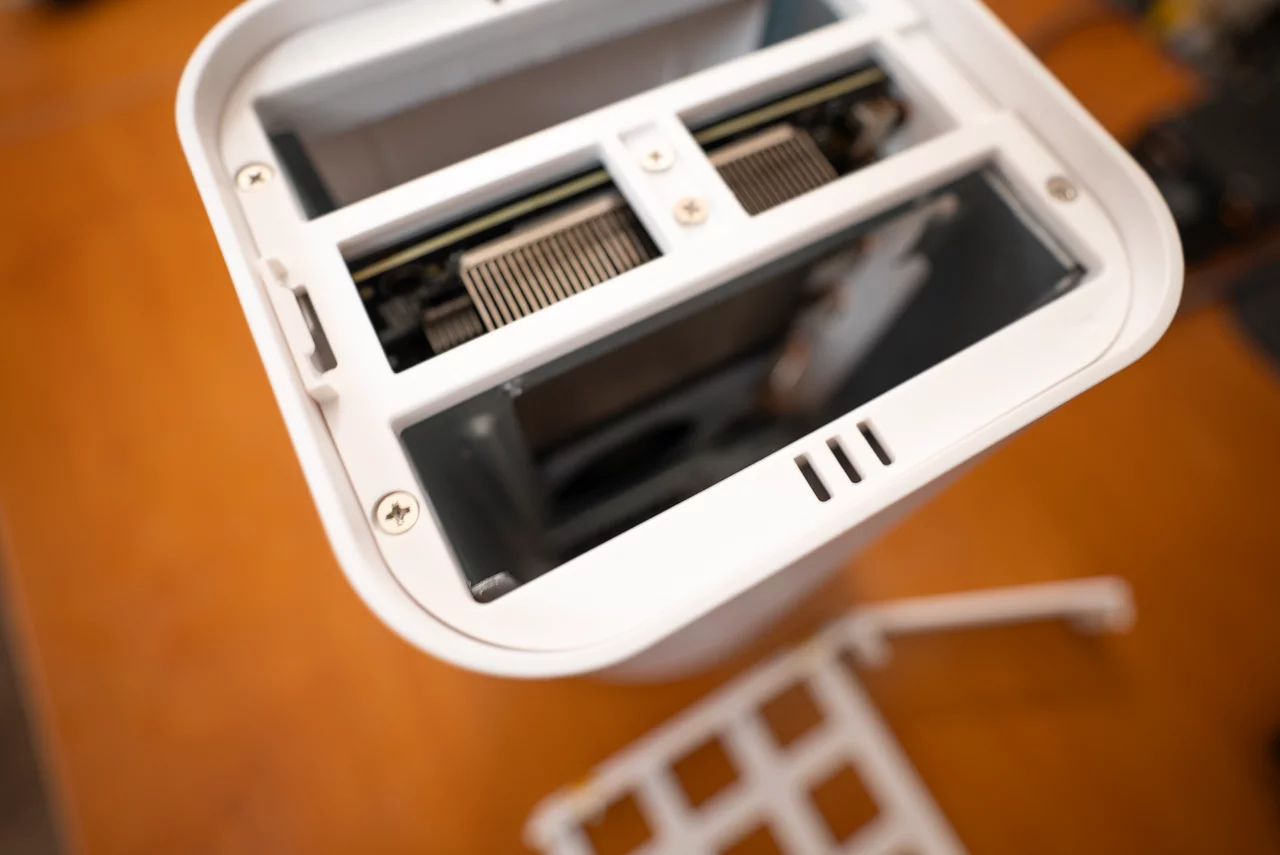
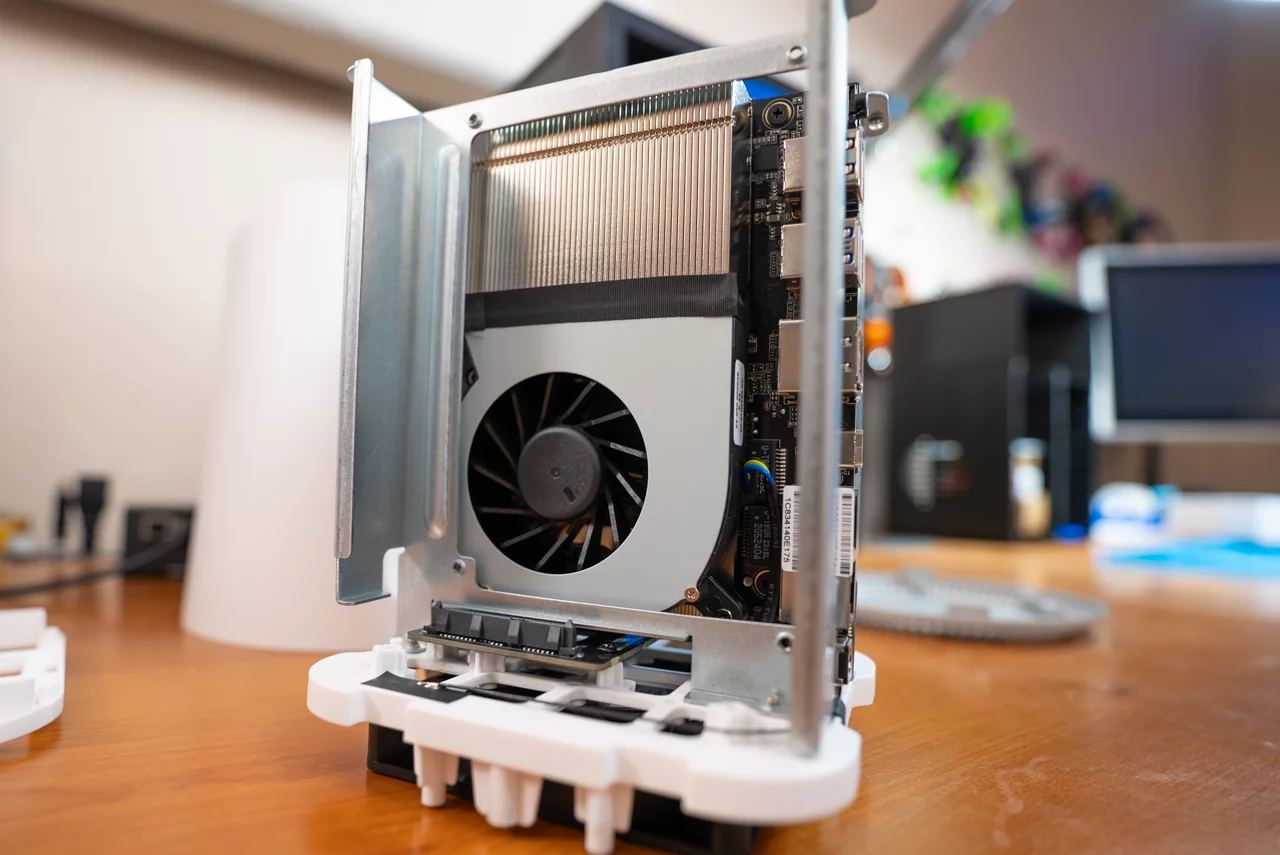
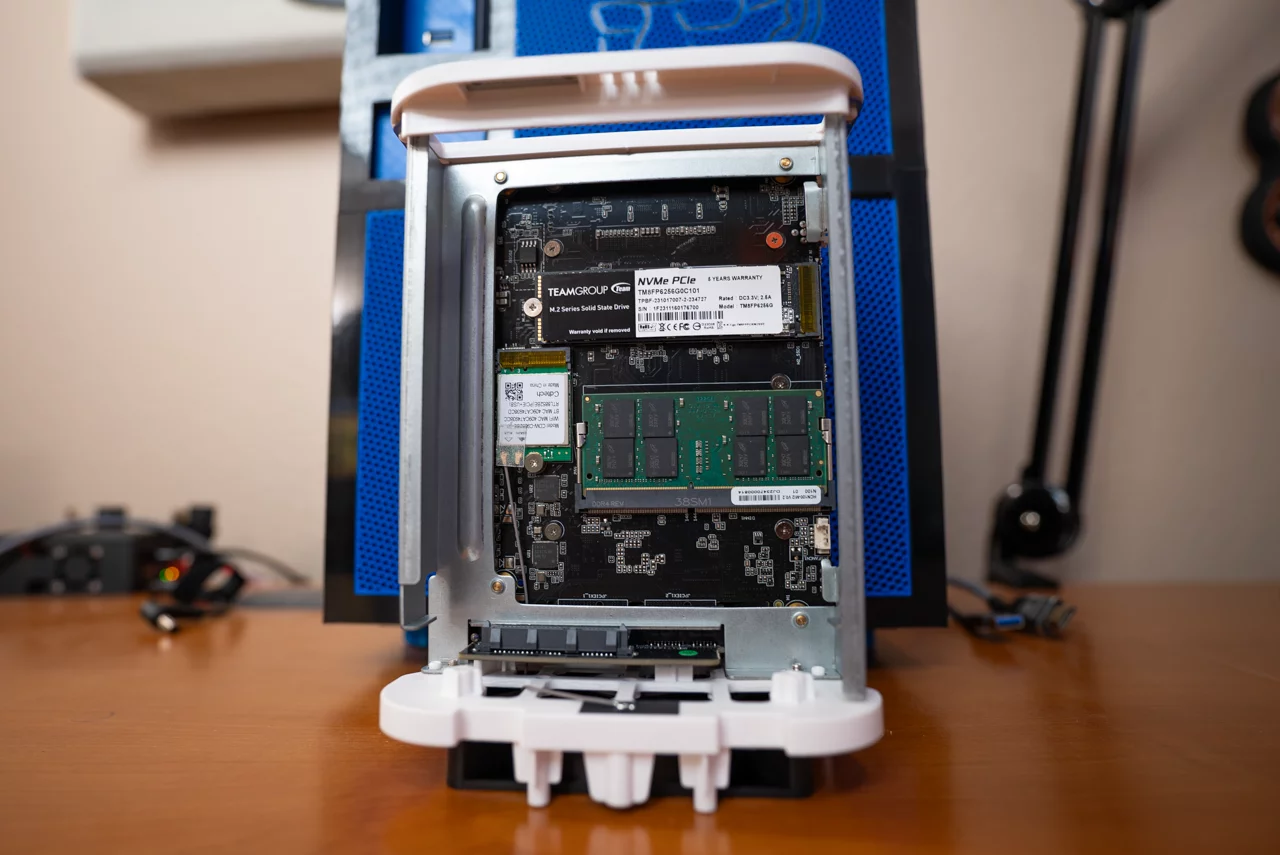
Installing RAM, the NVMe SSD, and two hard drives to the Topton R1 Pro NAS
In the product description, Topton gives a rather bleak warning about how you need to be a “professional technician” to install RAM and an SSD in the R1 Pro NAS. I don’t think this is true at all. It’s a simple matter of removing a few screws and withdrawing the inner frame. It was easy to dissassemble, easy to install the hardware, and easy to put it all back together. Mostly this warning exists to upsell other bundles which include RAM and SSDs.
Adding the hard drives to their sleds was quite easy, and they slid down nicely and gently. I really like the layout of the drives. Not just because it’s funny and the hard drives look a bit like chonky Pop Tarts going into a toaster, but it just makes more sense than trying to build something more cubish where the drives load in from the front.
I’m no “professional technician,” but I sure found putting together the barebones R1 Pro NAS to be rather easy.
Let there be TrueNAS SCALE!
![]() Ever since its beta opened to the public, I’ve been an enthusiastic TrueNAS SCALE user. Debian Linux lies at the foundation of TrueNAS SCALE, and as a result, it opens the doors for a wider range of hardware support–particularly the consumer-level hardware.
Ever since its beta opened to the public, I’ve been an enthusiastic TrueNAS SCALE user. Debian Linux lies at the foundation of TrueNAS SCALE, and as a result, it opens the doors for a wider range of hardware support–particularly the consumer-level hardware.
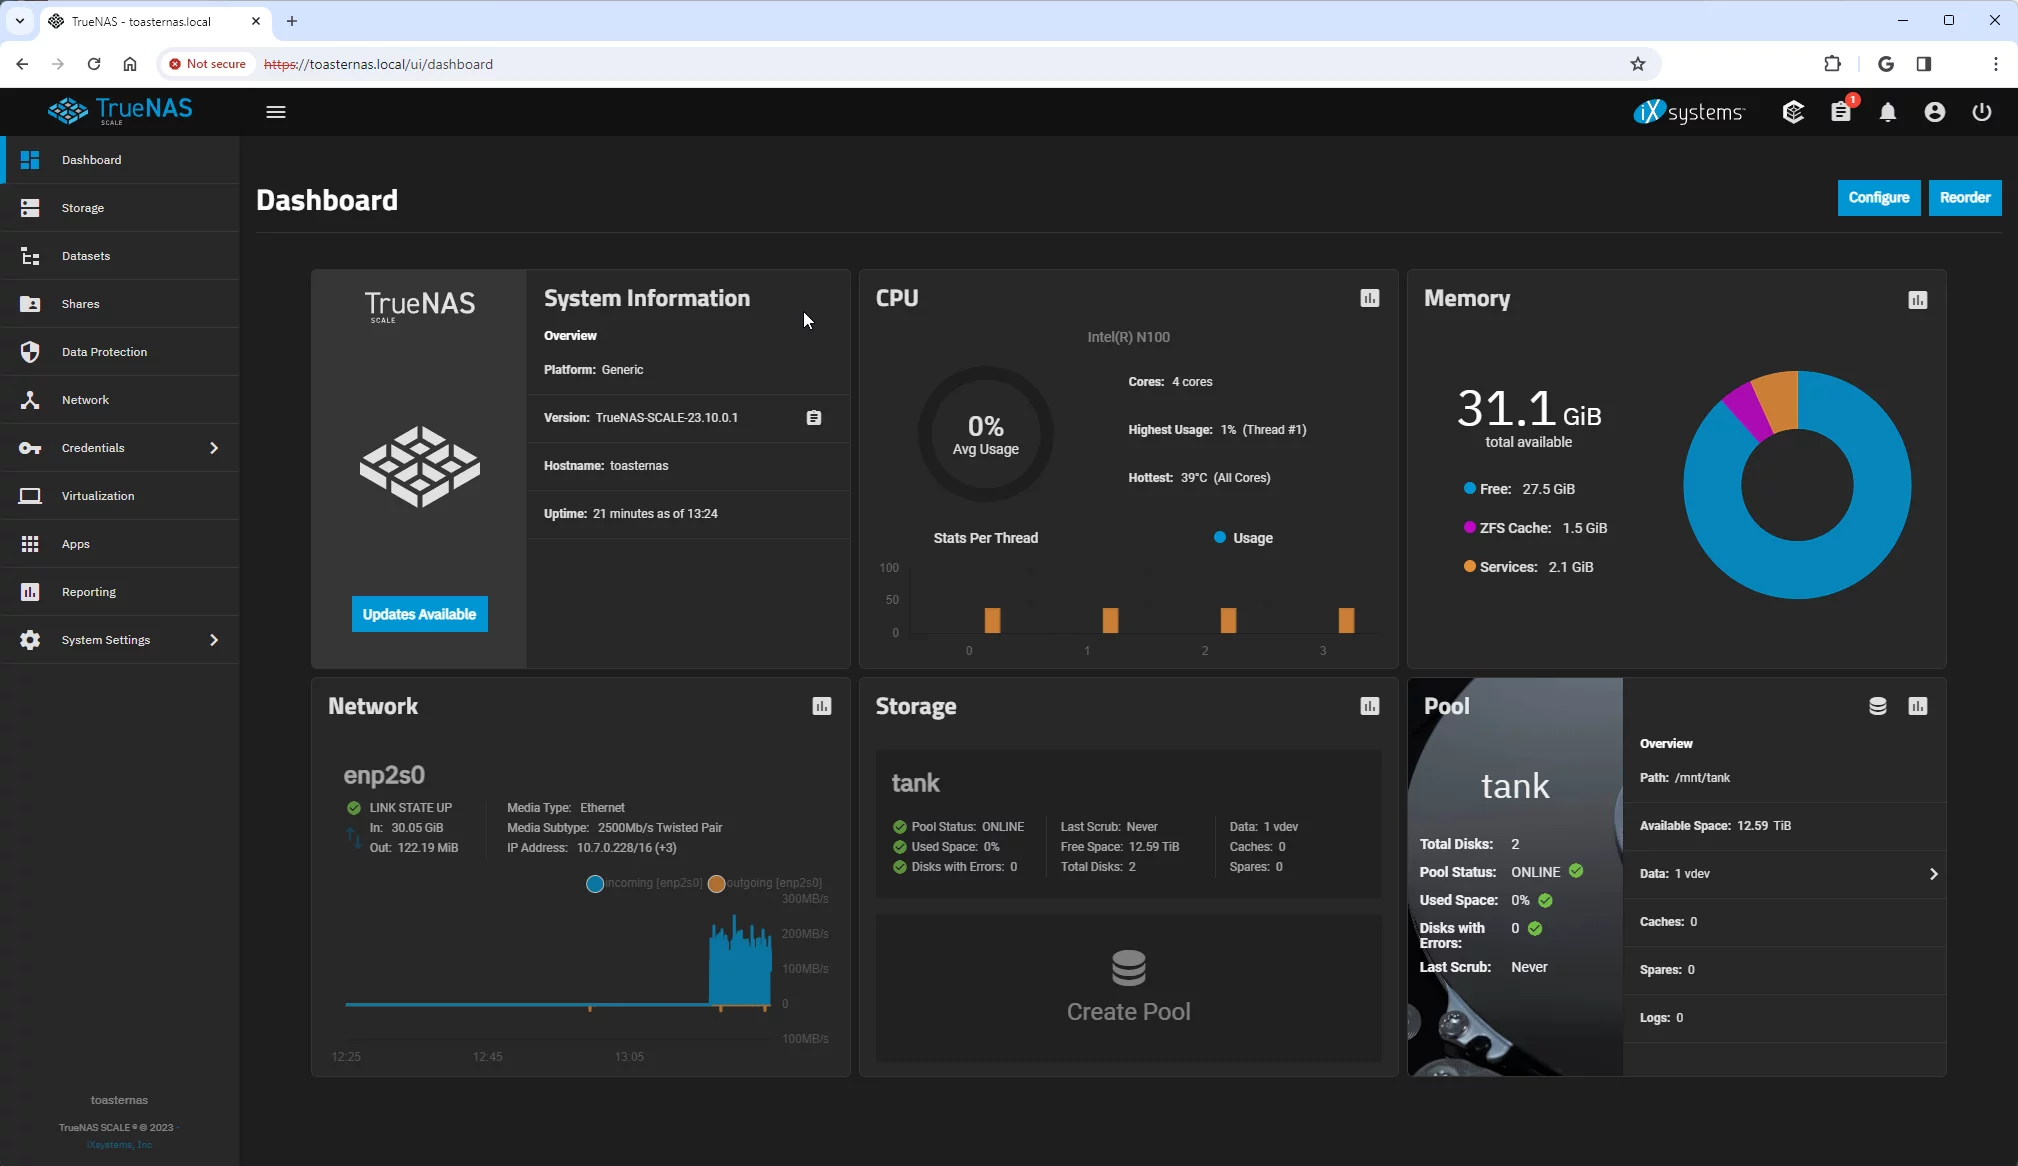
The installation, setup, and configuration of TrueNAS SCALE was fairly unremarkable. Everything was set up and running just fine in a few minutes. I had a pair of Western Digital HC530 14TB hard drives which I created a 2-disk mirror out of.
For fun, I saturated the 2.5Gbps network using iperf3. And then I set up a TrueNAS replication task to replicate my media collection from my primary NAS and watched it whir along as fast as the mirrored disks would permit it to go.
Is this the DIY NAS: 2024 Edition!?
No–but it almost could be! I am confident that if push came to shove, I could manage my data and squeeze it all onto 18TB HDDs (the largest supported according to the manufacturer), and I’m pretty confident that people will have success using hard drives larger than 18TB.
At its price, the R1 Pro NAS certainly seems like it’d be capable of meeting the penultimate goal for my EconoNAS builds, which I rarely accomplish: a fully functional NAS with redundant storage for under $500.
One of my complaints about my off-site backup NAS is that it lacks redundancy, and people caution against building ZFS pools out of multiple USB drives. I like the idea of some day building a new off-site backup NAS using the R1 Pro NAS.
The Topton R1 Pro NAS can’t be that great, can it?
I have two observations to share about the R1 Pro NAS, in no order of importance.
Firstly, there’s only a single SODIMM slot on this motherboard–as opposed to the two on the N1 I reviewed for Butter, What?!. I dug through pages of search results on Amazon for “64gb sodimm ddr4 1x64” and didn’t find a single listing. The 32GB of RAM I put in this R1 Pro NAS is likely the most it’ll ever support. 32GB of RAM is more than fine to be your NAS, but I anticipate that RAM would be limiting as you explored the world of Virtual Machines and Apps under TrueNAS SCALE.
Secondly, other than swapping out smaller hard drives for larger ones, you’re never upgrading this DIY NAS. One of my favorite things about my regular DIY NAS builds is that their standardized form factors mean that there’s a possibility of upgrades down the road without starting over from scratch.
Should I buy the Topton R1 NAS Pro, Brian?
Well, I’m selling them–so my answer is going to be a resounding “Yes!” But I’m also acting as a salesman here, so take that with a hearty grain of salt!
- Topton R1 Pro NAS barebones kit for $275
- Topton R1 Pro NAS with 16GB DDR4 RAM, Intel Optane 16GB NVMe, and TrueNAS SCALE for $375
Whether you should buy it depends on whether it will meet your needs. Primarily, I think you should wonder about its storage capacity, your need for redundancy in your hardware, and how quickly you are hoarding data.
I really like that the R1 Pro NAS is small, it can accomodate high-capacity hard drives, its CPU sips power–but you get a big bang for the buck, it comes mostly assembled, it runs TrueNAS SCALE, and it’s quite affordable.
If you’ve been thinking about building a NAS and you’re worried about breaking the bank, worried about having to dedicate a bunch of room in your home to another computer, or worried about the potential cost of building a “serious” DIY NAS, then I think you should be seriously considering the Topton R1 Pro NAS.
I liked the Topton R1 NAS Pro enough that I emptied my blog’s bank account to buy as many as I could afford–and I’ll definitely be holding on to one for myself!