
Update (09/17/2016): This is the final update to the DIY NAS: 2015 EconoNAS. I went through and updated all prices to current pricing in order for comparison to the new DIY NAS: 2016 EconoNAS, which turned out to be a much more powerful machine. If you’re looking to build an inexpensive DIY NAS, go check out the DIY NAS: 2016 EconoNAS blog.
Giveaway Update (07/01/15): Congratulations to Charles Moye for being the lucky contestant (out of 350-something) for winning the 2015 EconoNAS. I’m very pleased, this is a 50% increase over the number of entries in the 2014 EconoNAS! I’ll set it back to default settings, get it boxed up and ship it either this weekend or early next week. If you have any questions, please feel free to reach out to me directly and we’ll get this moving along. The rest of you, it’s time to start building your own EconoNAS and share it here! Alternatively, you can wait for the next giveaway, probably early next year. Thanks to everybody who participated, you may not have won this NAS but you’ve all but guaranteed that I’ll do another giveaway next time around!
Ever since building and blogging about my own NAS back in early 2012, I’ve been carrying on the tradition every six months or so by building out a new NAS. This year has been no different–at the beginning of the year, I built the DIY NAS: 2015 Edition which featured a maximum capacity of 24TB at around $1,600. But in my opinion, that’s not a very budget-friendly price tag.
As an answer to that blog, each year I also put together an additional NAS build but with a different focus: minimizing costs and get every last drop out of each dollar spent as I possibly can. I named these builds the EconoNAS. This year I took some calculated risks and did things a little bit differently. I bought parts much earlier in the year so that I could start a series of blogs evaluating different NAS packages. I essentially wound up gambling that the prices of parts I bought would fall down to an acceptable level for the newest EconoNAS build.
Here’s my set of goals for the EconoNAS build this year:
- Total price below $750 (extra bonus for keeping it around $500).
- At least two drives of parity data.
- More total storage than the 8TB in the 2014 EconoNAS.
- Some room for future upgrades.
The last two goals are probably the hardest to achieve. Firstly, hard drive prices seem to be pretty stagnant. I like to keep each NAS build blog up-to-date for at least 6-12 months; in those months the hard drive prices barely move at all. Considering that hard drives typically account for the majority of expense in NAS builds, this makes adding more storage for the same price (or less!) pretty difficult. Additionally, wanting to leave room in the case and on the motherboard for future upgrades typically ends up in having to scratch most of the extremely economical motherboards off the list.
If I have my own NAS that I’m perfectly happy with and I’m still building and blogging about new ones at the rate of two a year, that begs the question: What am I doing with all these extra NAS machines? I raffle them off for one of my readers to win! The details of the giveaway can be found at the bottom of this blog.

CPU & Motherboard
 For every NAS that I’ve built, this is the component that I put the most effort into selecting. I’ve got a set of criteria that I like to use when shopping for a motherboard for a NAS, and there just aren’t that many motherboards that meet that criteria. When they do meet that criteria they tend to be a bit expensive, which is a concern for the economical NAS build. Here’s the criteria that I considered when searching for this year’s EconoNAS motherboard:
- Relatively inexpensive (<$100)
- At least 6 SATA ports.
- Onboard Gigabit
- Basic integrated Video
- Room for Upgrades:
- Free DIMM slots for memory upgrades in the future.
- Additional SATA Ports or PCI-E expansion slots to handle additional hard drives.
- Room in the case for additional HDDs down the road.
- Support for faster CPUs.
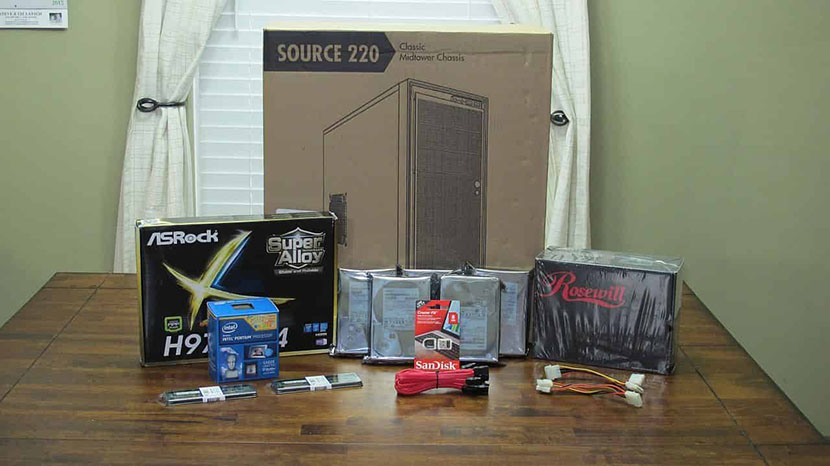
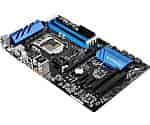
The motherboard that I wound up selecting is the ASRock H97 Pro4 (specs) which, to my surprise, met or exceeded each of my criteria. The LGA 1150 motherboard supports a wide range of CPUs, which allowed me to select the inexpensive Intel Pentium Processor G3220 (specs). Other important features of the motherboard included: 4xDDR-3 DIMM slots for up to 32GB of RAM, 6xSATA3 6.0GB/s, onboard Intel gigabit network controller, and a smorgasbord of different PCI slots. In my opinion the ASRock H97 Pro4 is an ideal motherboard to use as the foundation of an inexpensive NAS.
Running Total: $174.99
RAM
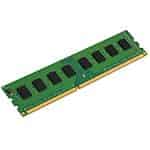 Depending on which NAS distribution you pick, you can go just about any direction with memory. You can spend a little (and get a little) or you can spend a bunch (and get a bit more). Many NAS zealots will point out that ECC RAM is the best option for the sanctity of your data, a point I have no squabble with. However, I think the risks of using non-ECC RAM are acceptable and manageable. Since budget is a driving force behind this NAS, I’d rather save the money on the RAM and motherboard and go with non-ECC memory. This led to me buying two sticks of Kingston Value RAM 4GB 1600MHz PC3-12800 DDR3 (specs), which also happened to be a slight upgrade from last year’s 1333MHz RAM. As far as I’m aware, 8GB of RAM meets or exceeds the minimum requirements of the most popular NAS distributions.
Running Total: $195.98
Case
 The case and power supply I picked out signify what I think is both the best and worst of my decision making for this build. I picked out the NZXT Source 220 Mid-Tower Case (specs), which is a feature-laden and budget-friendly mid-tower case. It is the big brother of the case I purchased when I last upgraded my PC, as well as the same case I picked out for the 2013 and 2014 editions of the EconoNAS. I really like this line of cases, and this newest version is no different. It’s easy to work inside, it has room for many hard drives (up to 11), and has an interesting tool-less drive-mounting system. About the only thing I didn’t like was the amount of vibration I could hear using the tool-less drive-mounting system, especially when you have a bunch of drives in there all spinning at the same time. This noise caused me to dig up some screws and mount the hard drives in a more typical fashion. Despite that one complaint, I love the NZXT Source 220 Mid-Tower Case, which has lots of features at a very reasonable price.
Now the bad: I wound up looking for the best deal I could possibly find on a power supply and I wound up carelessly selecting the Rosewill ATX 350W PS (specs). It was very inexpensive and well-reviewed, so I thought it’d work great with what I’d picked out. Unfortunately I found out two things: it didn’t have enough SATA power connectors and its 4-pin 12v ATX cable was too short to reach from the bottom of the case to the top of the motherboard. To take care of these, I had to buy 3 Molex-to-SATA Power adapters and an extension for 4-pin ATX 12V CPU power cable. Rather than repeat my mistake, I’d suggest spend a few dollars more ($7-12) on a power supply with those features already built in.
Running Total: $279.69
Storage
NAS OS USB Drive
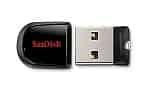 In the past, I’ve focused on NAS distributions which are lightweight enough to run on a USB flash drive. The beauty of running the OS from a flash drive is that your physical HDDs can be used solely for storage of your data. Additionally, USB drives are inexpensive enough that it’s easy to keep 2-3 around for backups and use when upgrading your NAS to the latest distribution. As with recent blogs, I picked the SanDisk Cruzer Fit 8GB (specs). I’ve used these for almost every NAS that I’ve built and I’ve had nothing but good experiences. Furthermore, its slim profile allows it to be installed in the USB ports on the back of the machine without obtrusively sticking out.
Alternatively, check out the Brian’s Face 16GB USB Drive on Tindie for $12.00 or pre-loaded with the current FreeNAS ISO for $15.00.
NAS Hard Disk Drives
This is where I encourage everybody to seriously consider veering from my build. Hard drives typically account for at least 50% of the cost of a NAS, and when building an economical NAS you should expect that percentage to creep up higher. You may need more storage or you may need less, so when building your NAS build it to suit your needs.
I’m taking a little bit more risk in my hard drive selection. Readers of my past NAS builds should note that I usually encourage users to buy similarly sized drives but from different makers to reduce the likelihood of buying drives that could all originate from the same batch. That way if a batch of drives is plagued with a manufacturing defect, you don’t wind up having to worry that every drive in your array may have come from that batch.
I found a good deal on the HGST Deskstar 2TB (specs) which I felt was too good to pass up, especially after reading Backblaze’s recent updates to their drive reliability report. In the report the HGST drives, especially the 2TB model, seem to be particularly reliable. After reading this report, I felt comfortable with buying 5 of the HGST 2TB drives for a maximum total of 10TB of potential storage.
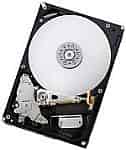 Unfortunately, if you’re following the comments on the blog, you’ll see that at least one person has had a hard time finding this great hard drive at a comparable price (see my update at the bottom for full details). I expect to run into problems like this with each EconoNAS blog but to experience it within the first day of the blog being published is a first! So, in the event that you’re trying to build exactly this configuration and can’t find the same drive, I think that the HGST Deskstar 2TB (0F10311) is also an excellent drive spoken very highly of in Backblaze’s drive quality report. The good news about this drive is that it appears to be a better deal ($5-10) cheaper, so I’ve gone ahead and updated this blog to reflect its new price.
Final Price: $529.96


Hardware Final Thoughts
Overall, I’m pretty pleased with the hardware I picked out. I’m especially pleased at how much it has dropped in price since I originally shopped for of the parts. For a while there I was pretty worried that my “econo”-NAS wasn’t going to wind up being much cheaper than the DIY NAS: 2015 Edition. In a perfect world, the EconoNAS would be closer to $500 than it wound up being this year. But all things considered, it has wound up being a nice upgrade when compared to the prior year’s EconoNAS. Especially the fact that when similarly configured, this year’s NAS has 50% more usable storage (roughly 6TB vs 4TB) than last year’s EconoNAS.
Hardware Assembly, Burn-In, and Configuration
Assembly
It’s been a couple months between when I built the machine and wrote this blog, so my memory’s a bit fuzzy. But from what I recall, the actual assembly went pretty smoothly. I didn’t run into any issues putting things together. Aside from what I previously mentioned: I discovered that the power supply I picked had an inadequate number of SATA power connectors that had to be remedied by a few molex-to-SATA power adapters and it also needed an extension cable for the 4-pin 12V to reach from the bottom of the case to the top of the motherboard.
There’s a likely chance that there’s not enough SATA cables to hook up all 5 of the HGST Deskstar 2TB hard drives included with the motherboard. After only having 2 SATA cables packaged with the motherboard on my first and second NAS builds, I bought a bulk bag of SATA cables so that I’d always have extra in case I needed them. The cables that came with the ASRock H97 Pro4 were black and there were only four of them, so I replaced all four with red ones from my collection. I really liked that the NZXT Source 220 had the motherboard punched out so that I could run some of the extra SATA cable length behind the motherboard.


 <a href = "/images/2015/econonas/15_4pinext.jpg" title="EconoNAS 2015 Assembly" alt="4-pin 12V ATX 8" Extension cable"><img src = "/images/2015/econonas/thumbs/thumb_15_4pinext.jpg" title="EconoNAS 2015 Assembly" alt="4-pin 12V ATX 8" Extension cable"></a>


Burn-In
The 2015 EconoNAS got the same burn-in as the prior NAS builds. Firstly, a couple days’ worth of Memtest86+ to validate and put the memory through its paces. Anything more than 3-4 passes in Memtest86+ is excessive; my test only went on that long because I got busy and neglected it. On top of that, I ran roughly 24 hours of stresslinux to put some strain on the system. Both of these tests came back positive without any errors or instability occurring during the tests. Furthermore, I used this system extensively when working on the initial NAS Roundup blog. I tinkered with several NAS distributions on this hardware and didn’t experience any issues during that testing. Finally, the machine has been running with FreeNAS on it nonstop for a couple of months.
Configuration
The biggest challenge in getting this configured was picking which of the NAS distributions I’d evaluated so far that I wanted to go on the NAS. In the past, I’d exclusively configured my NAS builds to use FreeNAS. However, having recently evaluated both NAS4Free and OpenMediaVault, I was tempted to run OpenMediaVault on this year’s EconoNAS build. But ultimately the ZFS file system and my experience with my three prior NAS builds left FreeNAS as the most appropriate choice in my eyes.
FreeNAS Installation and General Configuration
Installing FreeNAS is simple. You boot a machine using their installer ISO and tell it which device you want FreeNAS installed to, in this case the SanDisk Cruzer Fit 8GB. The next significant step in the installation process is to provide the root user’s password. The installation concludes when you’re prompted to remove the installer ISO and boot from your FreeNAS drive. Once it’s booted from the FreeNAS USB drive, the remainder of the work can be done from within the FreeNAS web user interface.
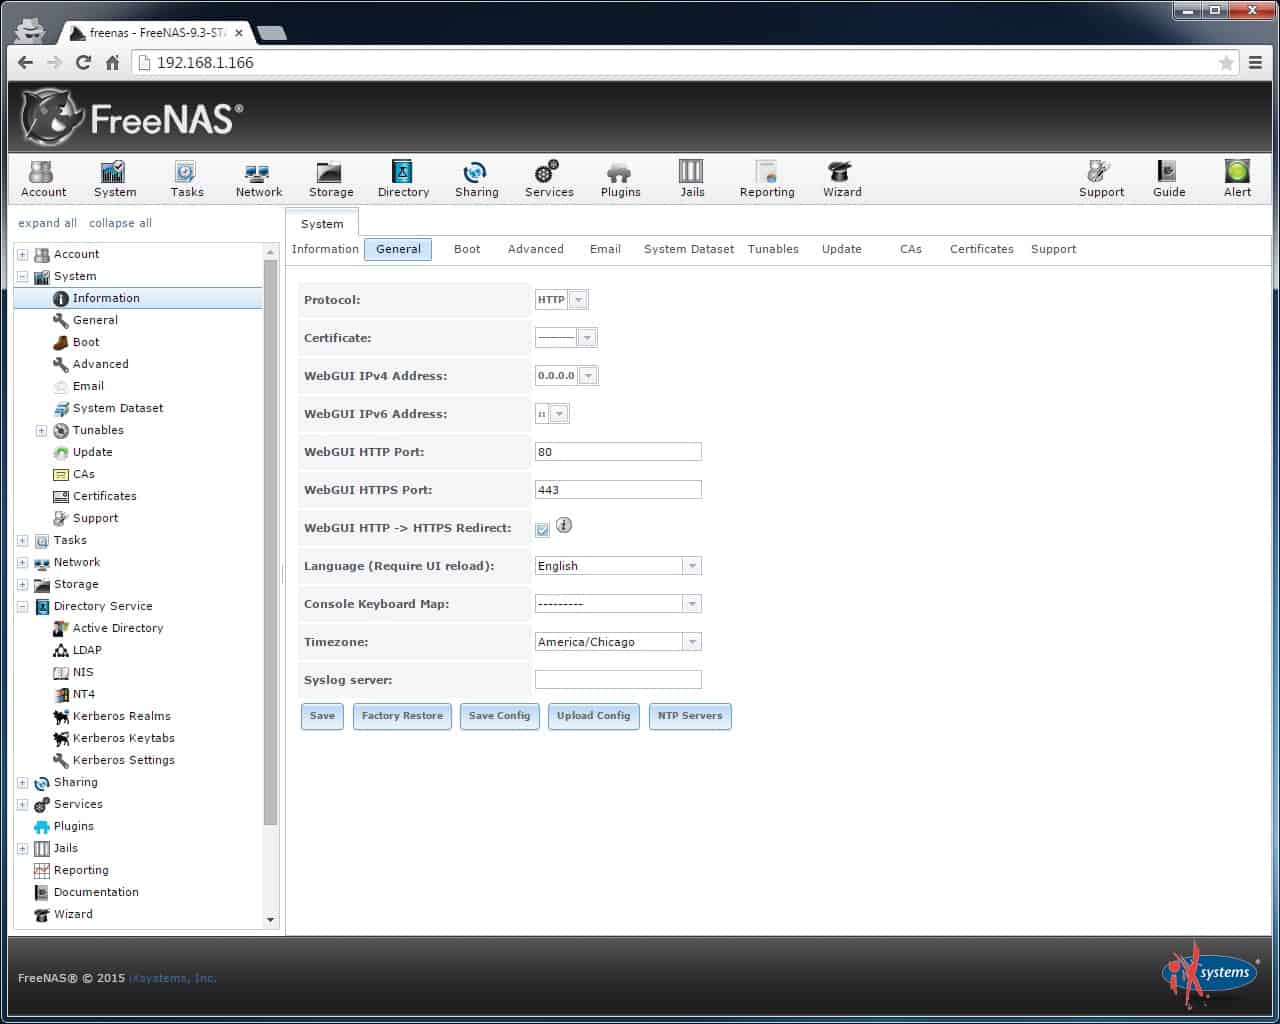 When you initially log in to the FreeNAS web interface, you’re prompted to use an installation wizard which walks you through enough setup to get your NAS functional. I think that initial wizard is pretty handy; however, there’s a configuration step or two that I also like to do not covered by the wizard, so I skipped the wizard. The first thing that I did was to change the hostname to “EconoNAS.” Mostly, I did this because my own FreeNAS box is still running the default hostname, and having two machines with the same hostname tends to be problematic. After that was changed, I updated the timezone information in the General settings. Followed by that, I configured the Email punching in my SMTP server details, updated the Root user’s email address to my own and sent a test email. In the network setup, I specified the default gateway and DNS addresses to what’s appropriate for my home network here.
FreeNAS Services Configuration
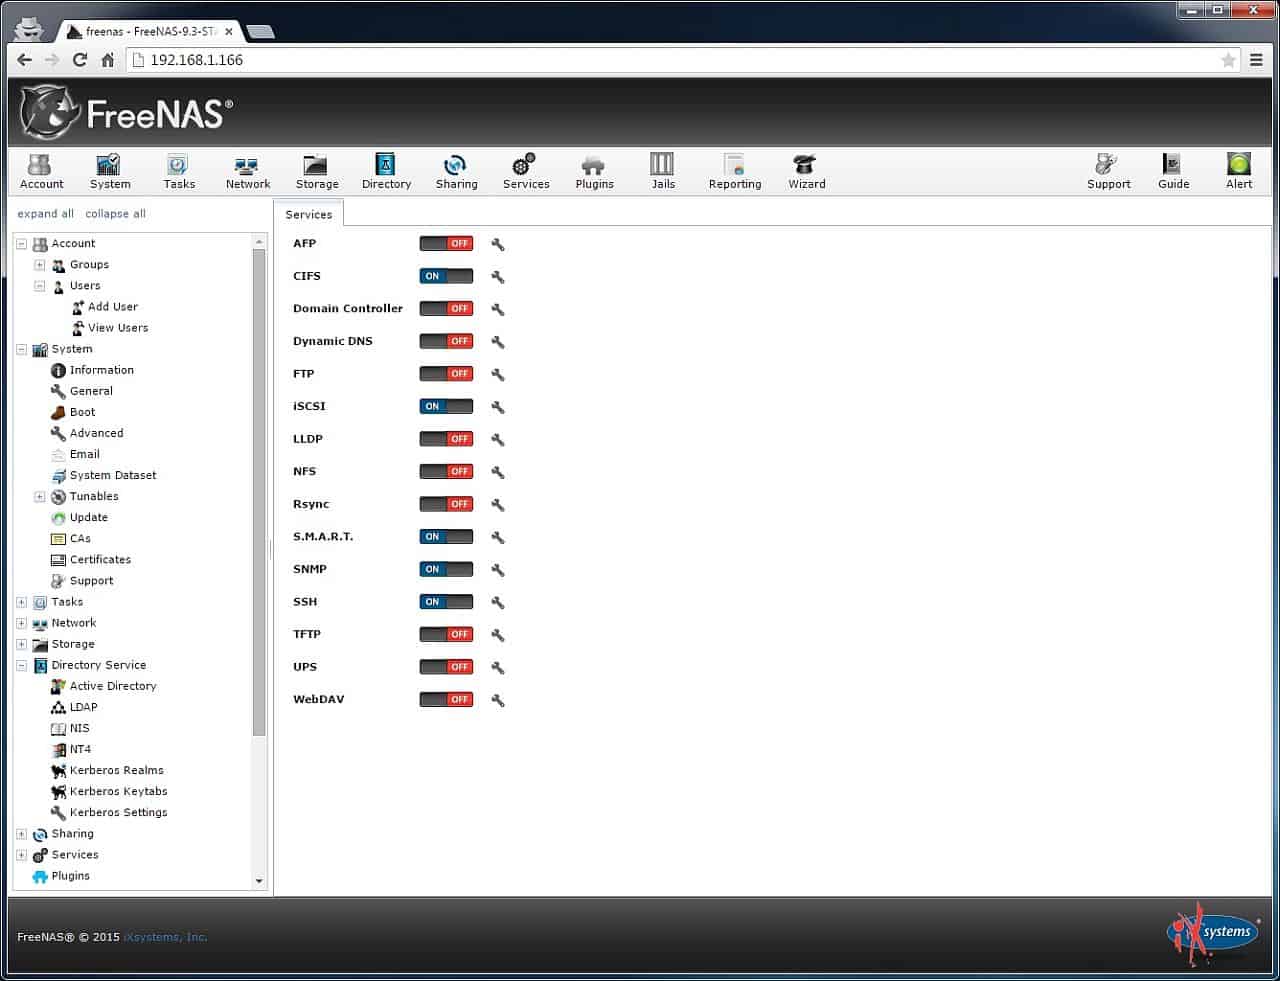 From the Services screen, I turned on the following services: CIFS, iSCSI, S.M.A.R.T., SNMP, and SSH. Depending on your environment and what you want to play with, you may want to enable more of the services. For the most part, I left each service using its default values except for CIFS and S.M.A.R.T. Within the CIFS configuration, I updated the NetBIOS name to read “EconoNAS” and within the S.M.A.R.T. configuration, I entered my email address so that the S.M.A.R.T. errors would wind up in my inbox.
FreeNAS Volume and Share Configuration
Setting up the volume, dataset, and share is the heart of your NAS configuration. As part of this I created a new Group called “ShareUsers” and a new user whose username and password matched the credentials that I use on my primary PC. That user was added into the ShareUser group. The user and the group would be assigned the appropriate file and share permissions once they were created.
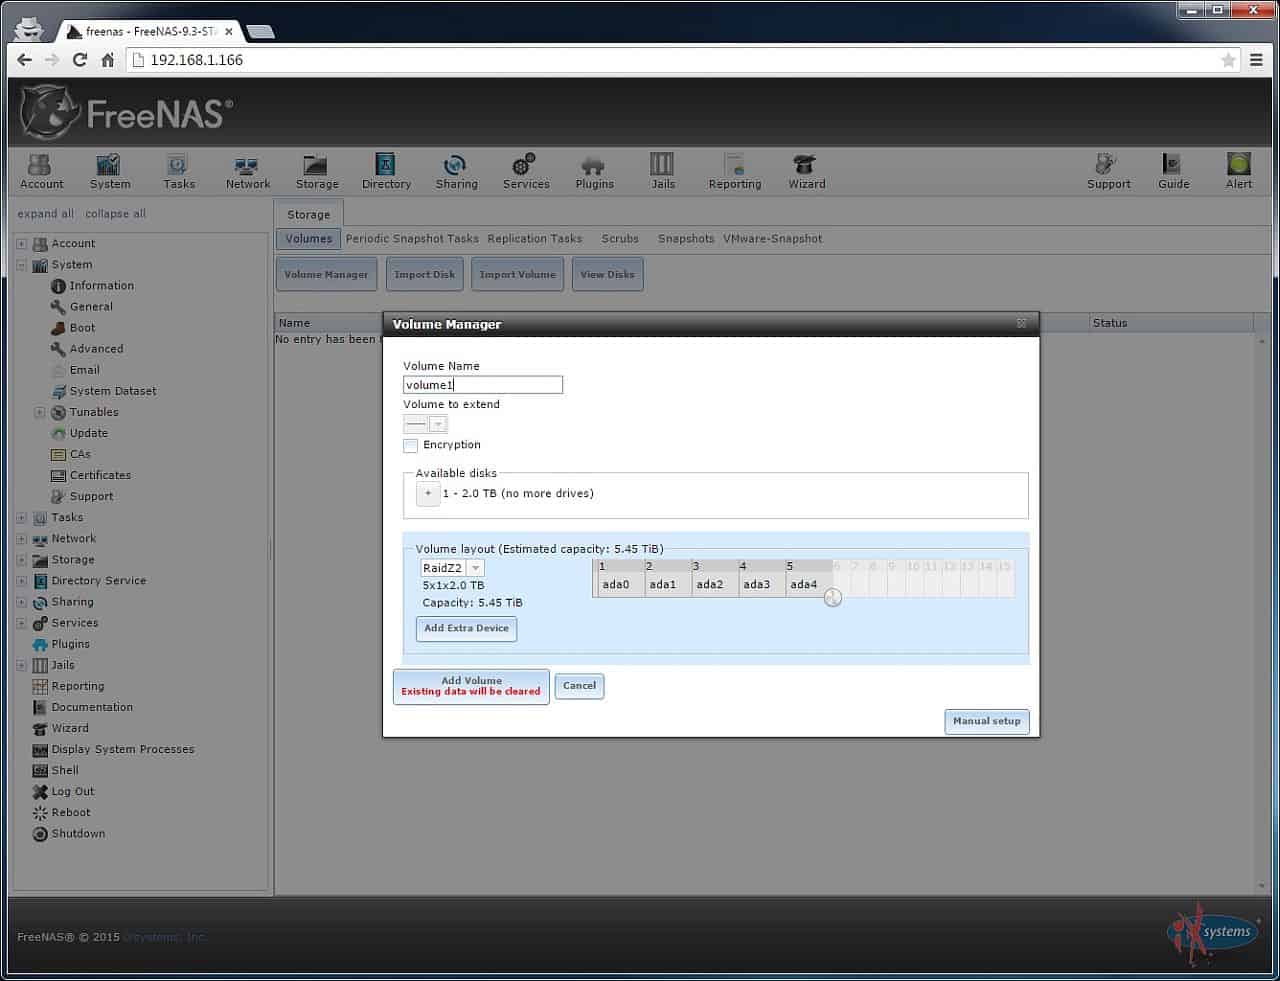 Then I launched into getting a new FreeNAS volume created. For its configuration, I added all five of the 2TB drives to the volume and chose Raid-Z2, which provides the two drives’ worth of parity data. Once the ZFS Volume was created, I went ahead and modified the scrub schedule to run every 14 days instead of the default value. The scrub is responsible for detecting and fixing some problems and corruption. Scrubbing more frequently was a best-practices suggestion that was made to me on the FreeNAS forums because I decided to use consumer-level hard drives and Non-ECC RAM in my own NAS, much like in this EconoNAS.
Once the ZFS volume was created, I added a new ZFS dataset to that volume. I named that ZFS dataset “share” and set the share type to Windows. After the Share dataset was created, I tinkered with the permissions; setting user FreeNAS account as the owner, changing the owning group to the “ShareUsers” group and making sure that both owners (group & user) had Read, Write, and Execute permissions on the dataset.
I then created a CIFS share named “share” (I’m so creative!) and pointed it at the /mnt/volume1/share path. Finally, I opened a Windows File Explorer and browsed to the appropriate share path. My local credentials were used to authenticate to FreeNAS and the share path opened right up. For grins, I created a new text file to make sure that all of the permissions that I was expecting were in place and as expected I didn’t have any issues creating or updating a simple text file.


Giveaway
In a tradition that I started with the 2014 EconoNAS and continued this year with the DIY NAS: 2015 Edition, I am going to raffle this NAS off to one of the blog’s supporters. Here’s essentially how the giveaway works:
- You follow my blog and myself on Twitter, the blog’s Facebook page and the blog’s Google+ page.
- You retweet or share the promotional posts from these social networks (links below) with your own friends and followers. (Note: Make sure that your share is public, otherwise I won’t be able to see it and give you credit!)
- Your name gets entered up to three times (once per social network) in a drawing.
- After a month or so, I’ll pick a winner at random and announce it here.
Here’s a link to the best posts to promote for each social network:
If there are any questions, please go read the #FreeNASGiveaway rules page, I explain it in a bit more detail there. Please keep in mind, it’s more about the “spirit” of these rules, rather than the letter of the law. If you go to the trouble of helping promote my blog, I’ll do whatever I can to make sure you get an entry into the giveaway. The best way to make sure you get your entry is to follow the steps above.
Updates
05/29/15: Well it certainly didn’t take long for the first update. The HGST Deskstar 2TB (0F12117) is apparently out of stock on Amazon as brand-new drives at reasonable prices. I poked around a few of my favorite computer-parts websites and the only ones I found had been marked up to well over $100 (way to gouge people looking for an exact replacement, shameless retailers!). I’ve crudely updated this blog with an equivalent drive which seems to be in stock on Amazon. This is one of the dangers I’ve found in the EconoNAS builds, great prices don’t last long so we’ll see how long it lasts!
07/01/15: Announced Charles Moye as the winner of the 2015 EconoNAS. Congratulations, Charles!
09/17/16: Updated all the prices for the parts in the _DIY NAS: 2015 EconoNAS for comparison to the DIY NAS: 2016 EconoNAS